If you’re a first timer to mechanical keyboards, read on! This will help you choose the best keyboard for your needs, and help you understand some names of things.
Psst! If you’re familiar with mech keebs, but are a first timer to Keebio, and you want to know how to DIY your first keyboard, skip here.
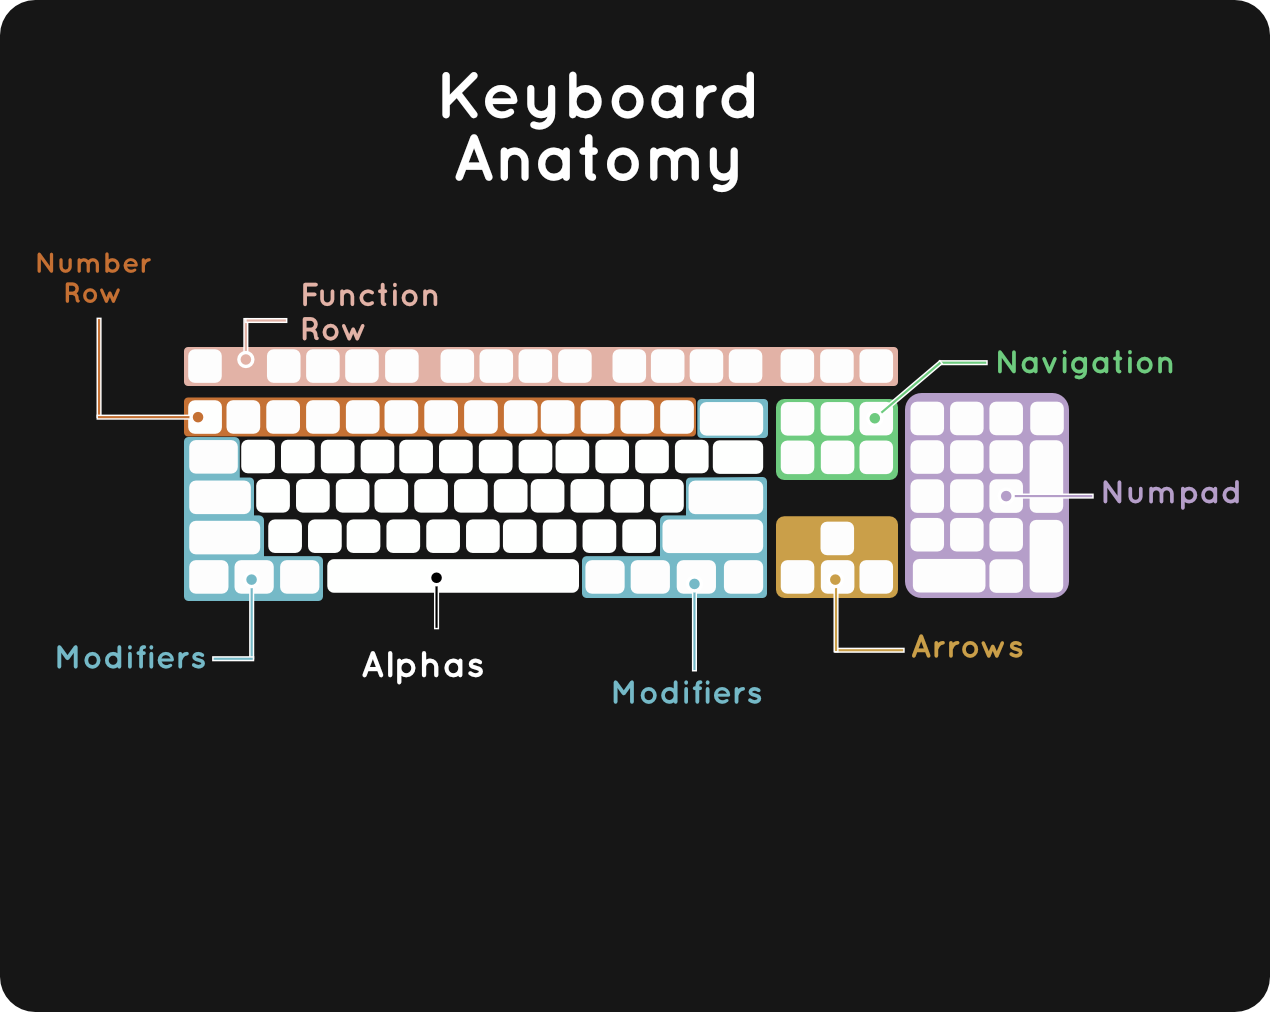
Keyboard Anatomy
Before we talk shop about what parts of keyboards are left out of smaller kinds, take a look at the anatomy visual below.
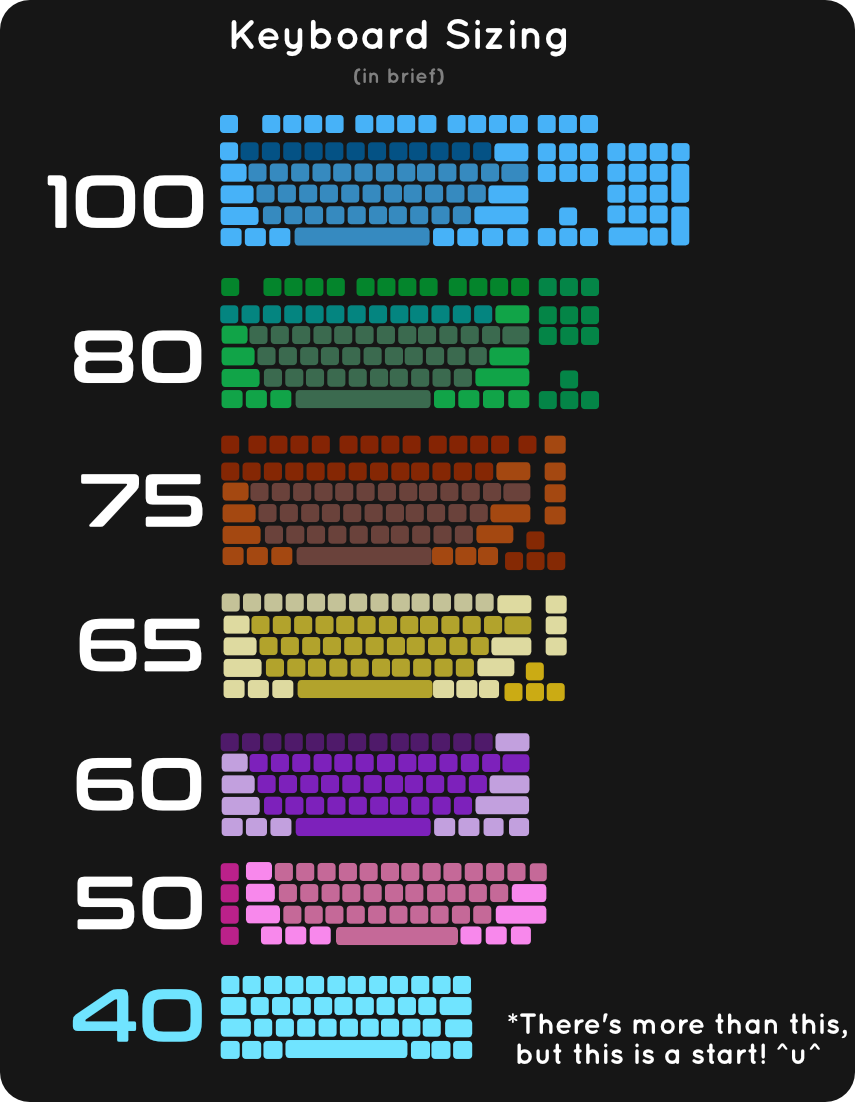
Keyboard Sizing
You’ll see a lot of percentages used to describe the size of a keyboard. A small list for you:
- 100% = full keyboard This has your numpad (short for number pad), function row, arrow/navigation keys and alphas, naturally.
- 75% = without numpad, but all the rest of the keys are scrunched together
- 65% = no function row, numpad is absent, but the navigation cluster is smushed up to the right side.
- 60% = Chop off the navigation cluster and arrows from the 65%, and this is what you have.
- 40% = Very smol. This keyboard heavily relies on layers for its usability.
There's more granular detail to sizing, but this is for starting and getting some basics under your belt.
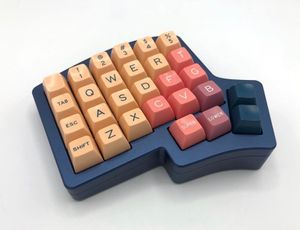
Once you hit 40%, it's a good time to talk about your staggered versus ortholinear. Ah! What're those?! It's okay, we'll take it one step at a time.
In a staggered layout, your keyboard keys are in a zigzag arrangement from row to row. The letter "V" is placed between and below the letters F and G, for example.
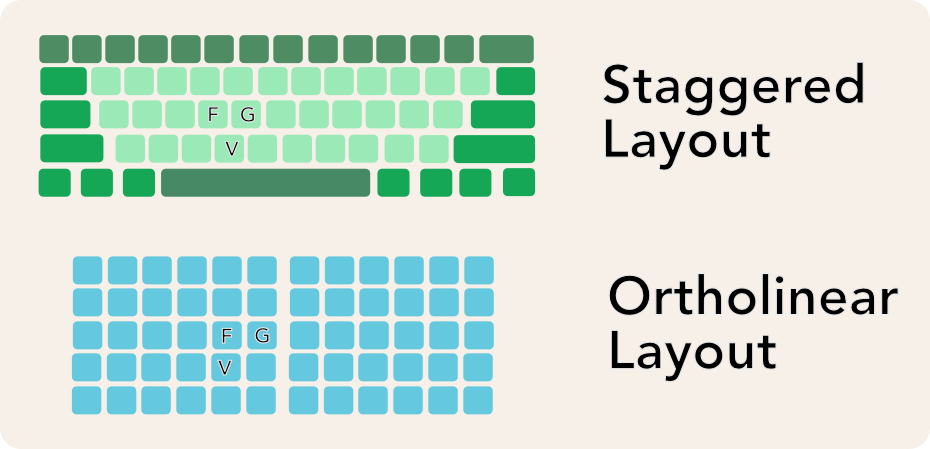
Whereas on an ortholinear layout, the V is situated directly under letter F, and B is under letter G. Ortholinear designs rose up to say that human fingers are not entirely meant to move side to side, but rather up and down.
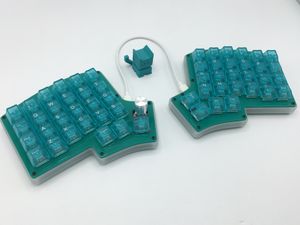
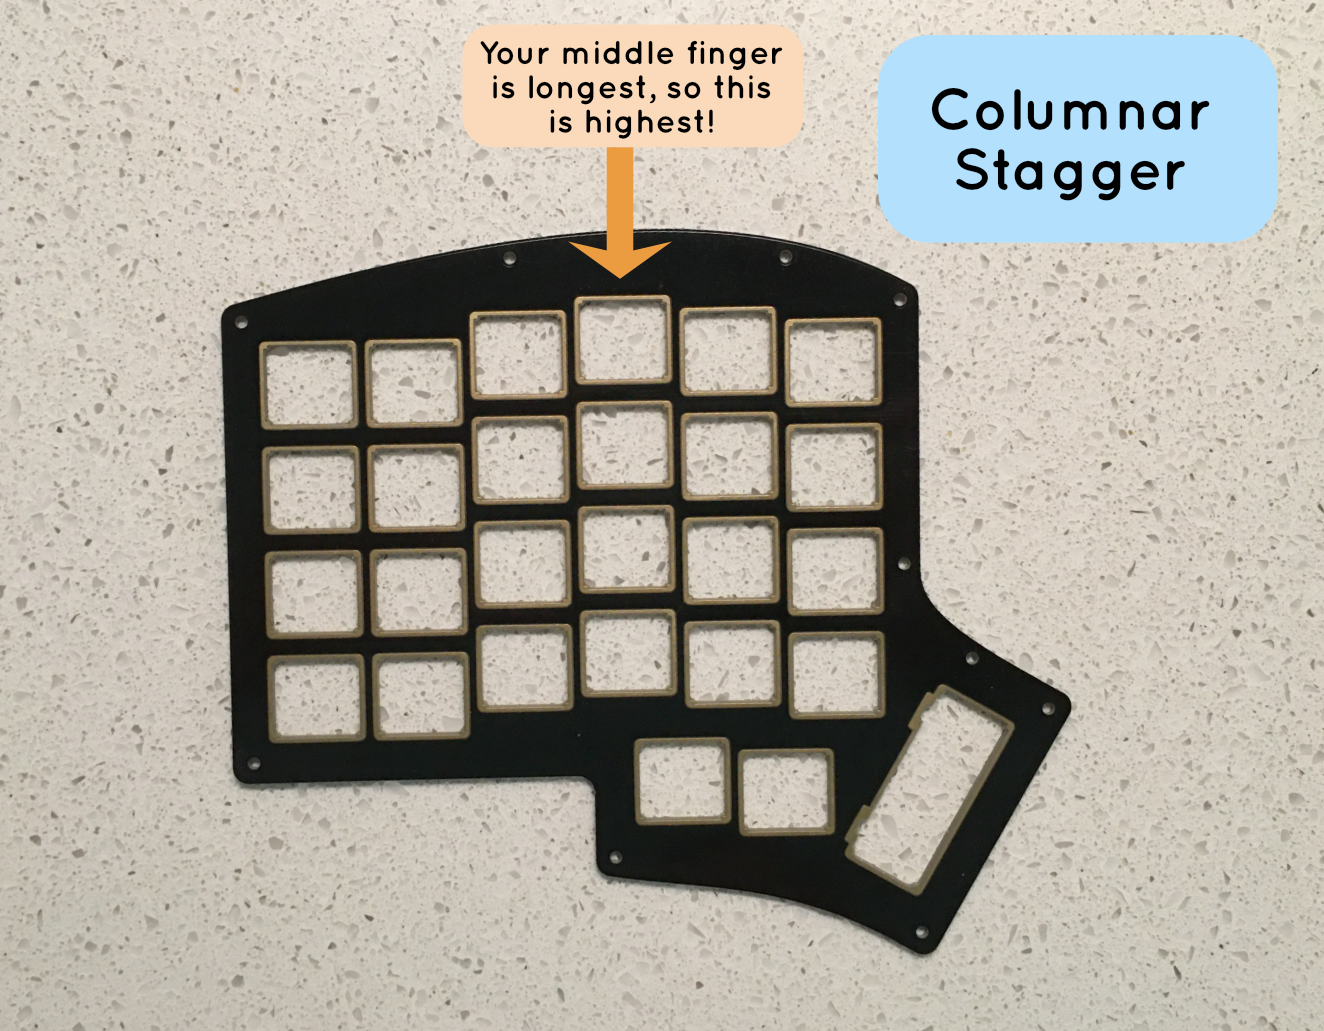
While on the other hand, if a keyboard has each of the columns catering to the different lengths of your fingers that is column stagger. The Keebio Iris is a great example of this.
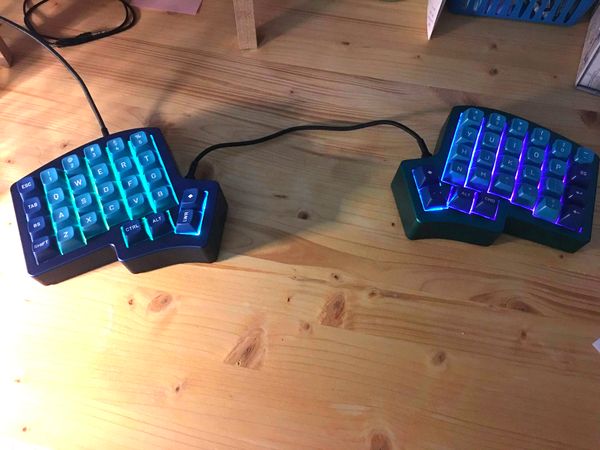
Another development in keyboards came from the awkward wrist bend that can occur from a 40% keyboard. Let's talk split keyboards.
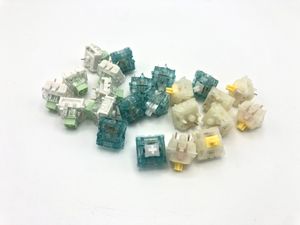
Switches
With so many switches under the lovely mechanical keyboard umbrella, I'll stick to covering a few here.

Switches can dictate how your keyboard feels to your hands and your wrists. Switches are linear, clicky, tactile, or a combination of clicky and tactile. For all kinds of switches, the grams of force needed to actuate (get the switch to send data to the computer) the switch can vary.
Keebio carries one of each kind most of the time. Always be checking our Status Trello page for what is current! Our in-house switch that we sell loose (that is, not attached to a pre-built keyboard) is the tactile Durock Shrimp switch.
Split Keyboards
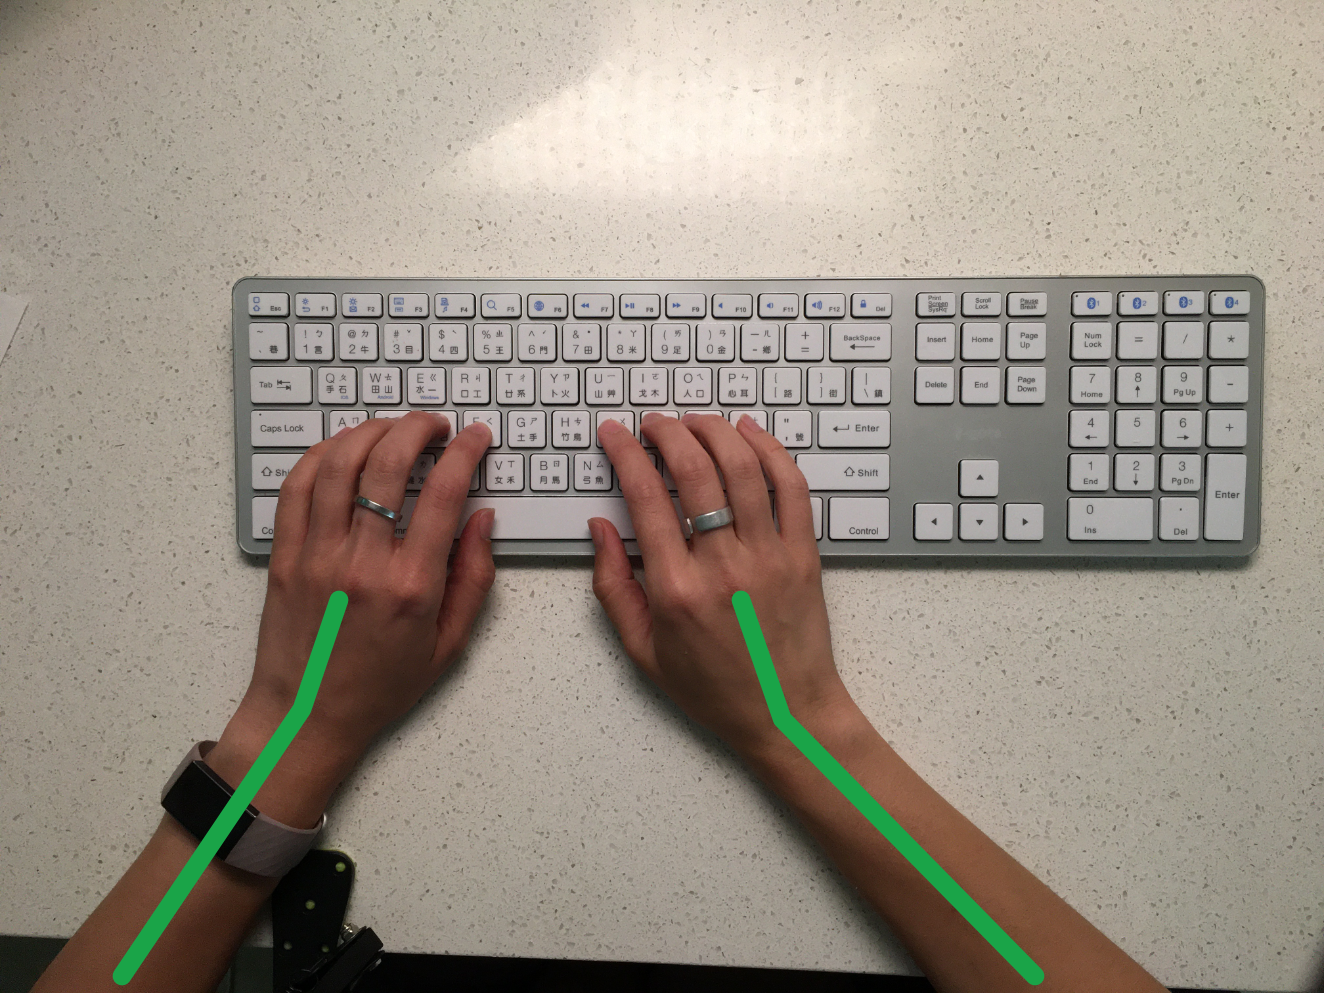
The biggest reasons behind split keyboards are typing comfort and aesthetics. A spot for your cat to sit between your typing halves is a bonus. Typing comfort comes from allowing a natural distance between your hands. If your hands are scrunched together, you may be bending them awkwardly to make use of it.
Many people take it as a granted that’s how keyboards just are, but consider: if you’re here, you are looking to expand your viewpoint on the world of typing. Spending so many hours daily typing, it is worth considering different ways to make it more comfortable and sustainable with less pain to be dogged by. (Because we all know doggies are great at making sad faces while you eat.)
Let your arms rest naturally at your sides. Ah. Feels nice, right? Your arms relaxed at your sides (but on your desk) is achievable with your keyboard setup. The common keyboard that comes with a computer doesn’t give you that relaxed distance. And that distance is one of the goals with a split keyboard: for your body to be in its natural position Tenting takes this concept even further, but we’ll get back to that.
By typing in a more natural position, you’re reducing strain on your shoulders and neck. The idea of not hunching over a keyboard can seem nice, yes? Read on for a few more pointers and one more way to make your split keyboard ergonomic and helpful to your daily workflow.
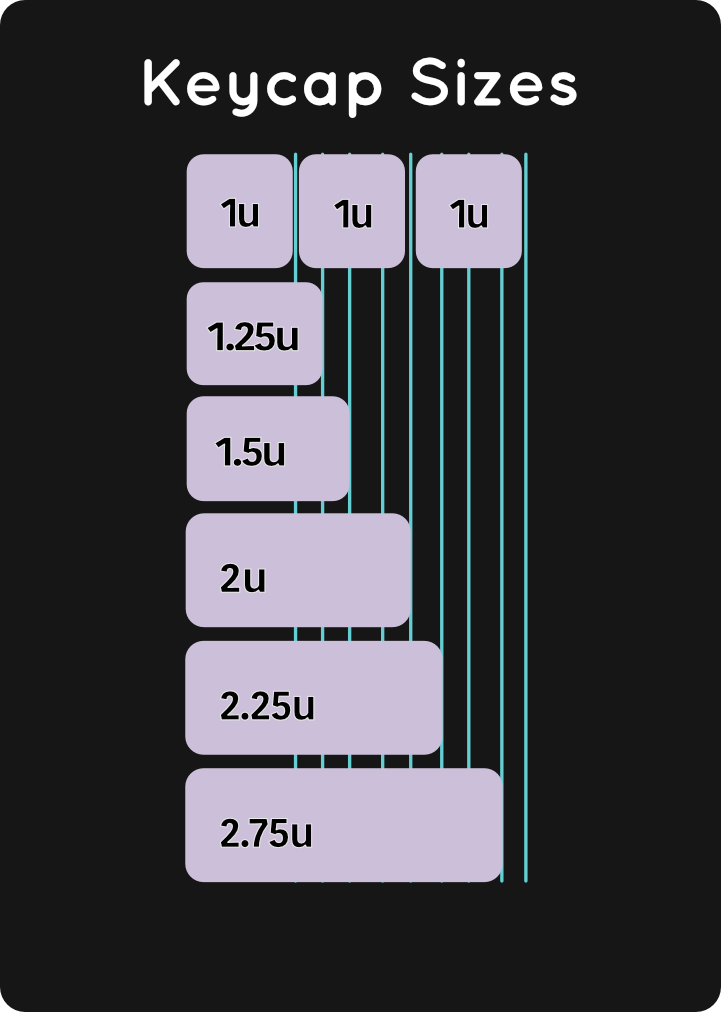
2.25u, 1u, so many u’s!
The small u that follows some numbers that you see is telling you the size of the keycap that will go over the switch. 1u is the smallest, and 7u or 8u are the biggest, depending on the keyboard you’re looking at. (Those big ones are usually saved for the spacebar, if you’re curious!)
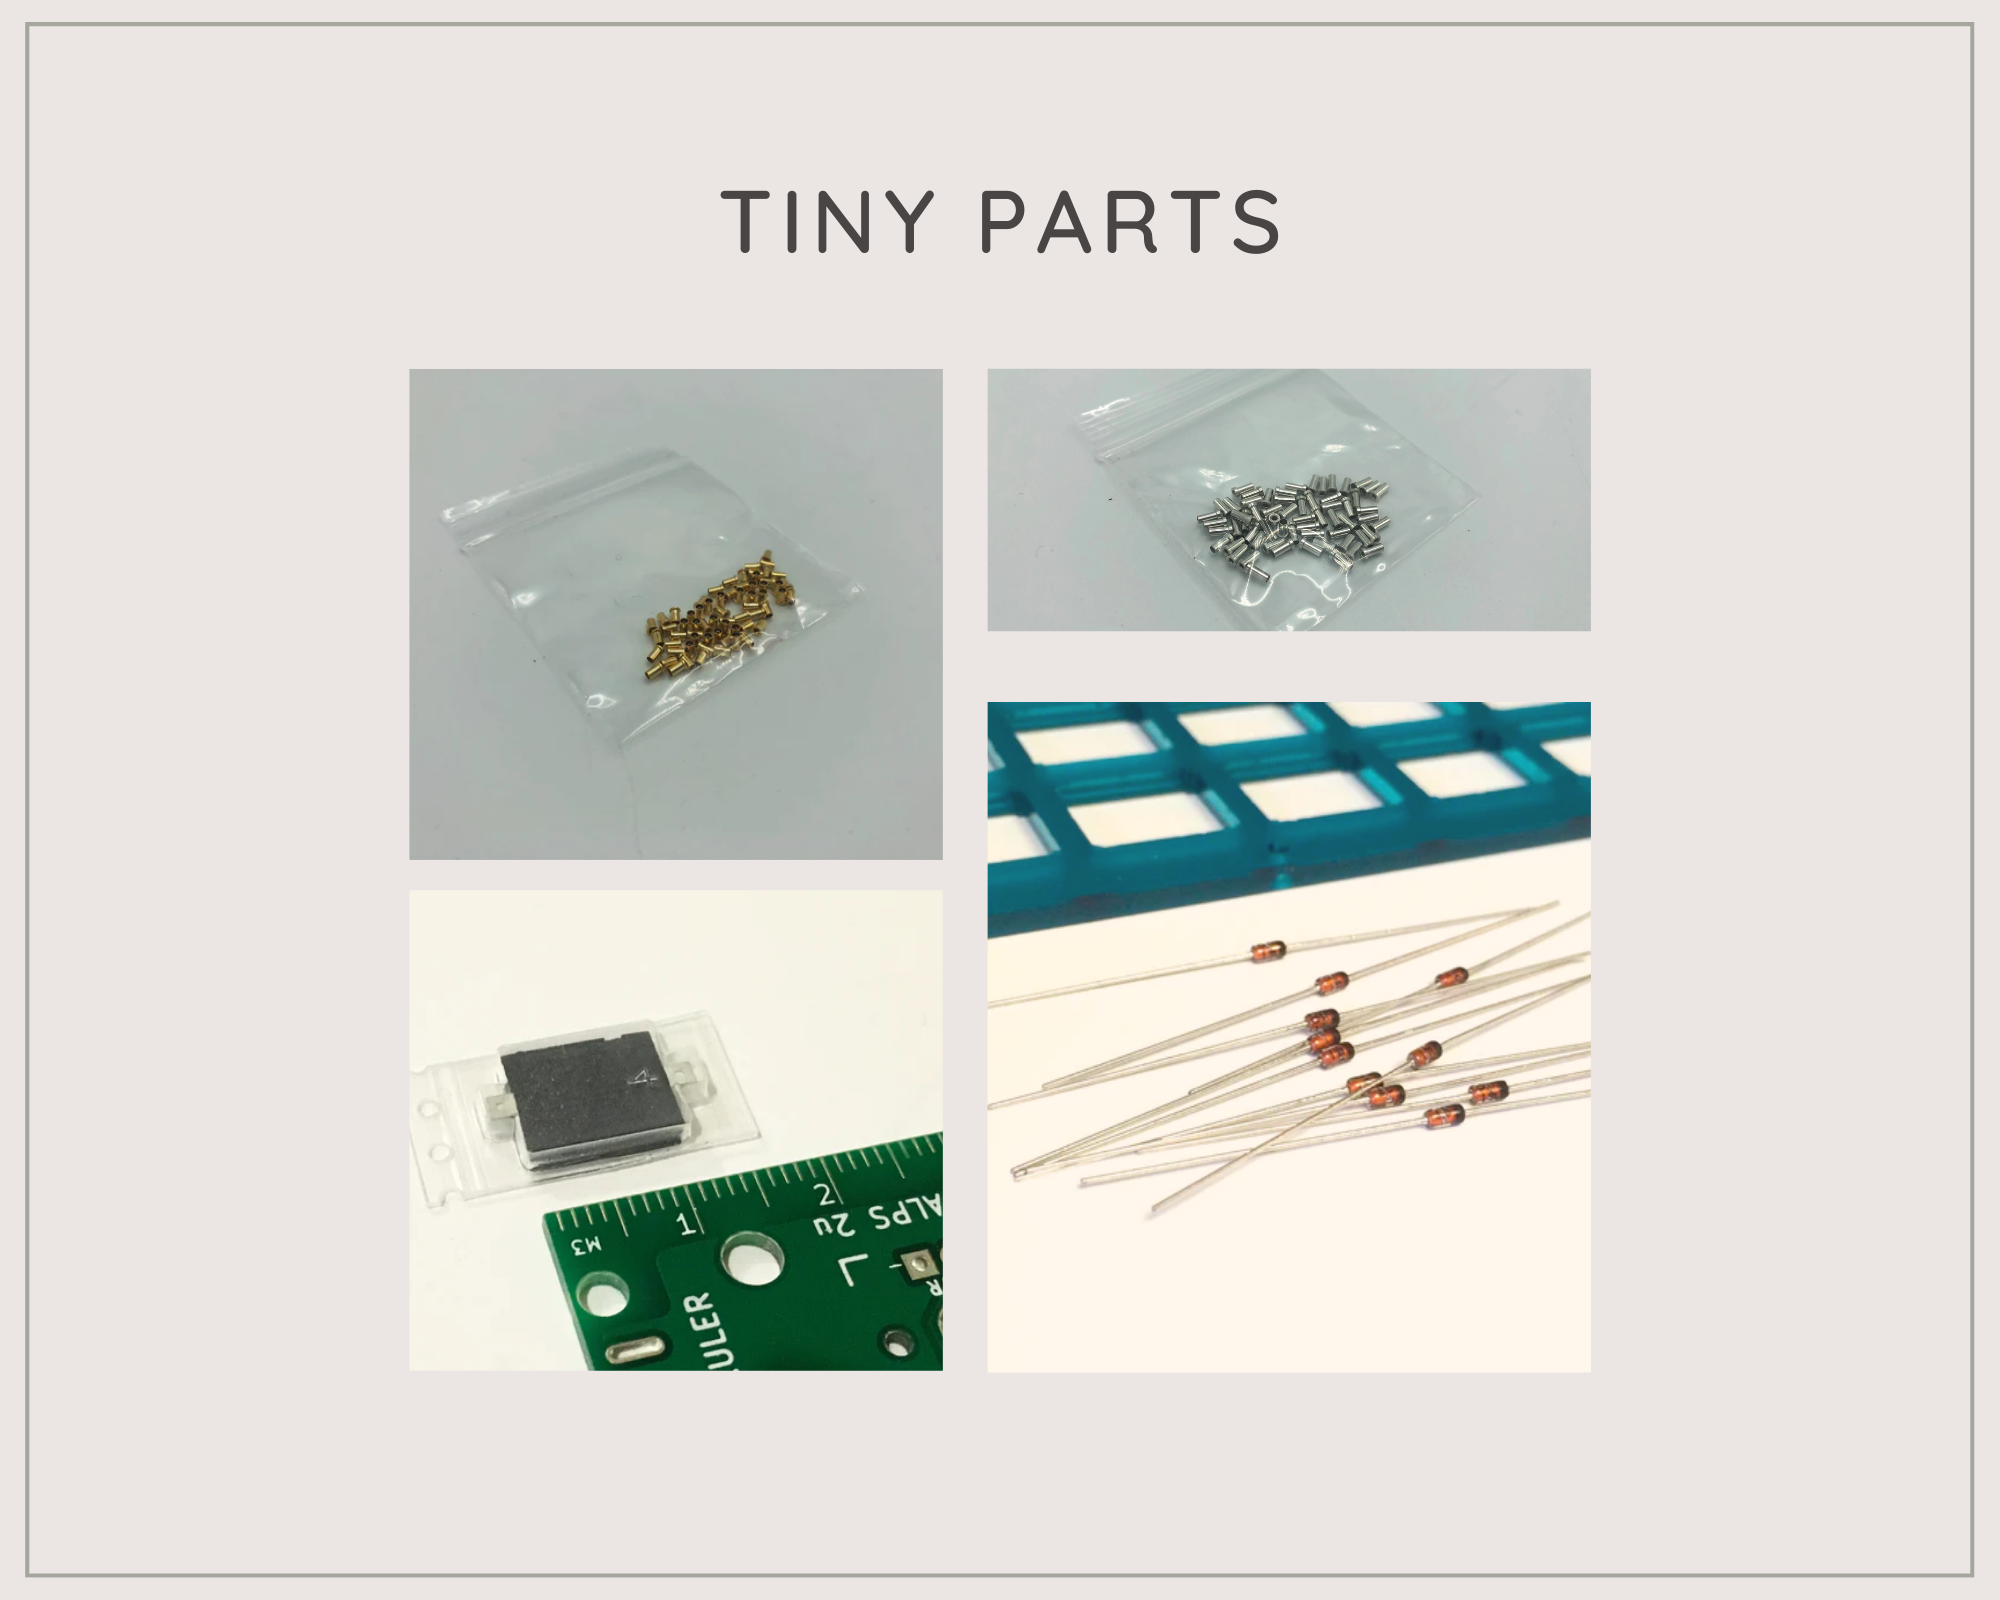
Tiny parts?!
I won’t get into ALL of them here, but they do all have their unique purposes. Rotary encoders, through hole diodes, resistors, reset buttons… to name a few. You’ll see these more often with the DIY kits, but the great news is this: we have a robust documentation site built for you!
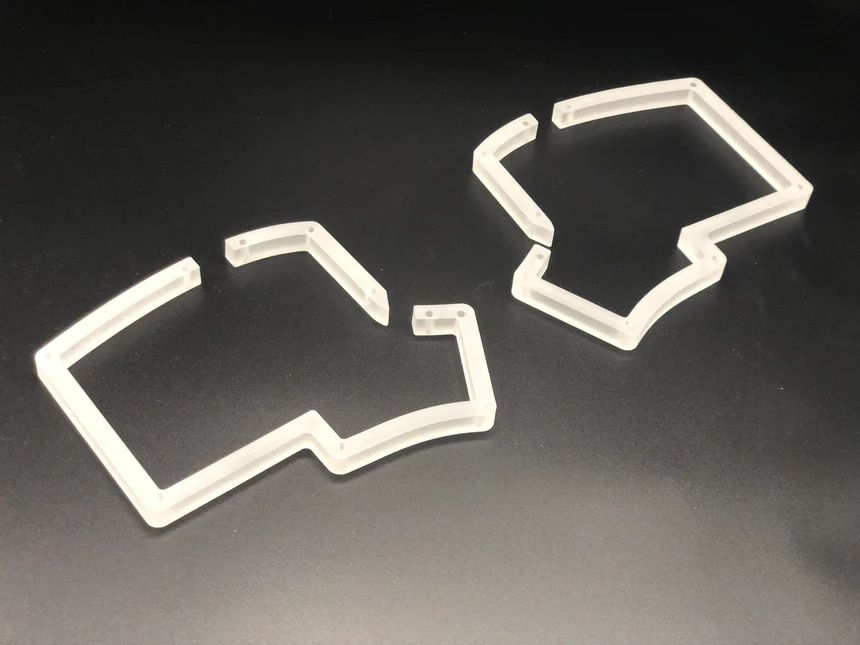
Middle Layers… do what?
This is another strategy you can implement a more ergonomic setup for your keyboard. The pieces that get sandwiched in between the top plate and the bottom plate are the middle layer. Depending on the keyboard model, it can come with tenting holes, or just be the attractive piece that the RGB shines through.
What’s up with tenting? Are we going camping?
Camping is cool. It’s also cool to reduce wrist strain, babyyyy! If you’ve ever been unable to move your wrist/hand you know what I mean.
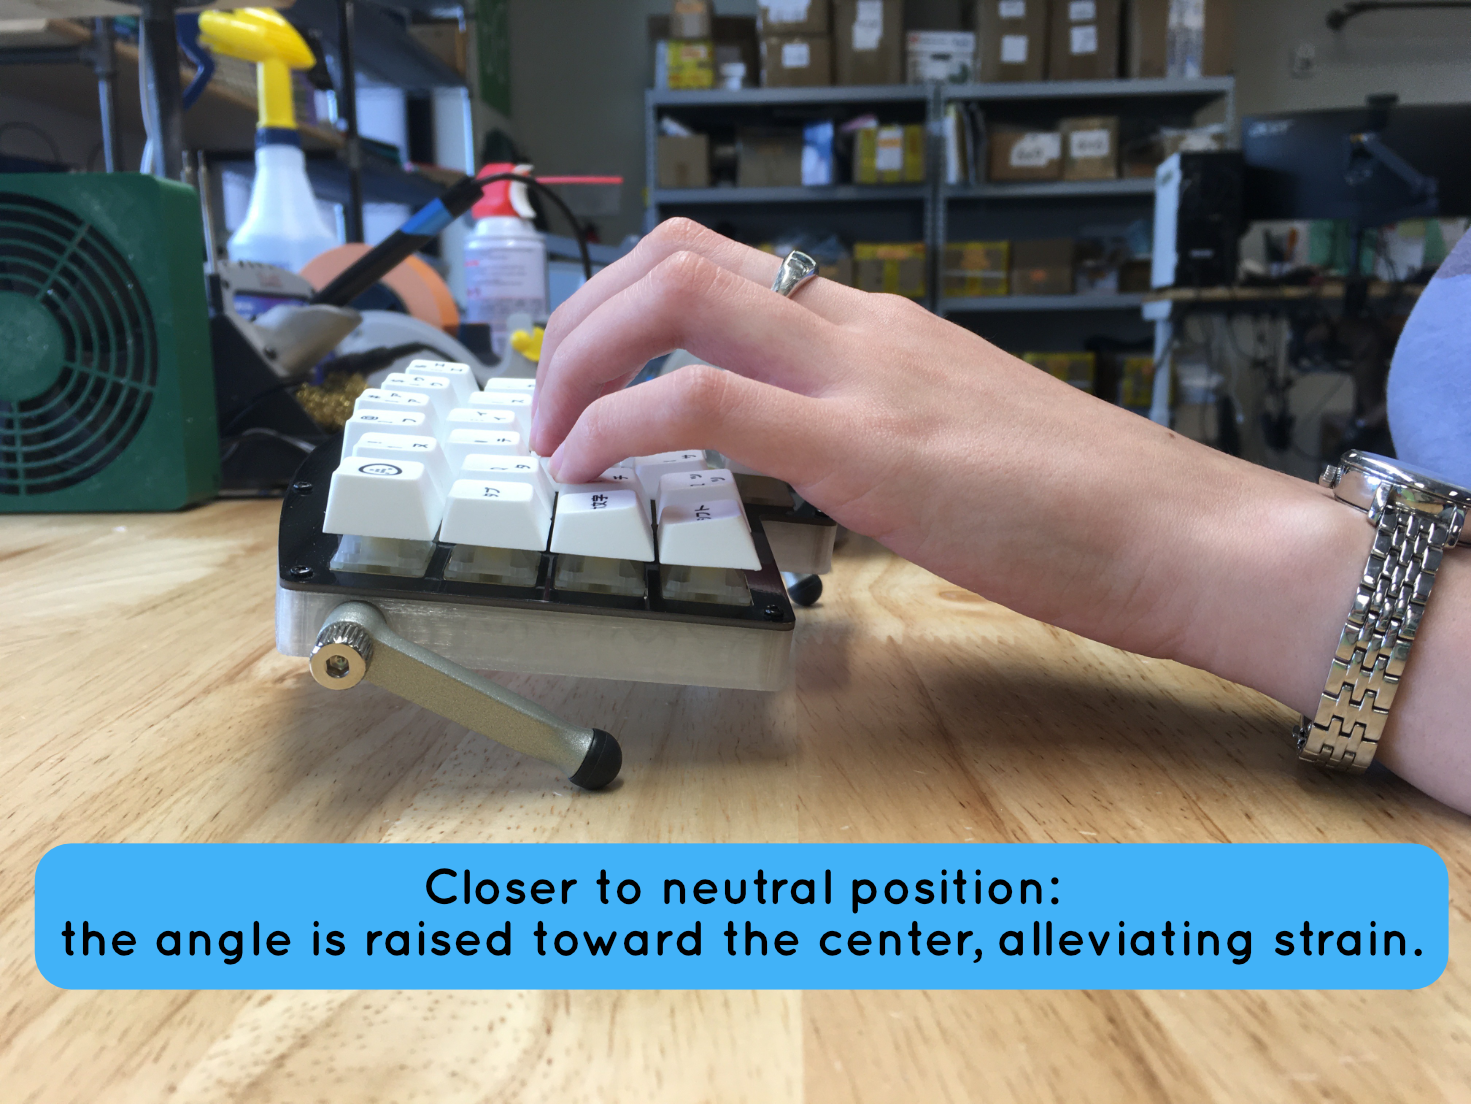
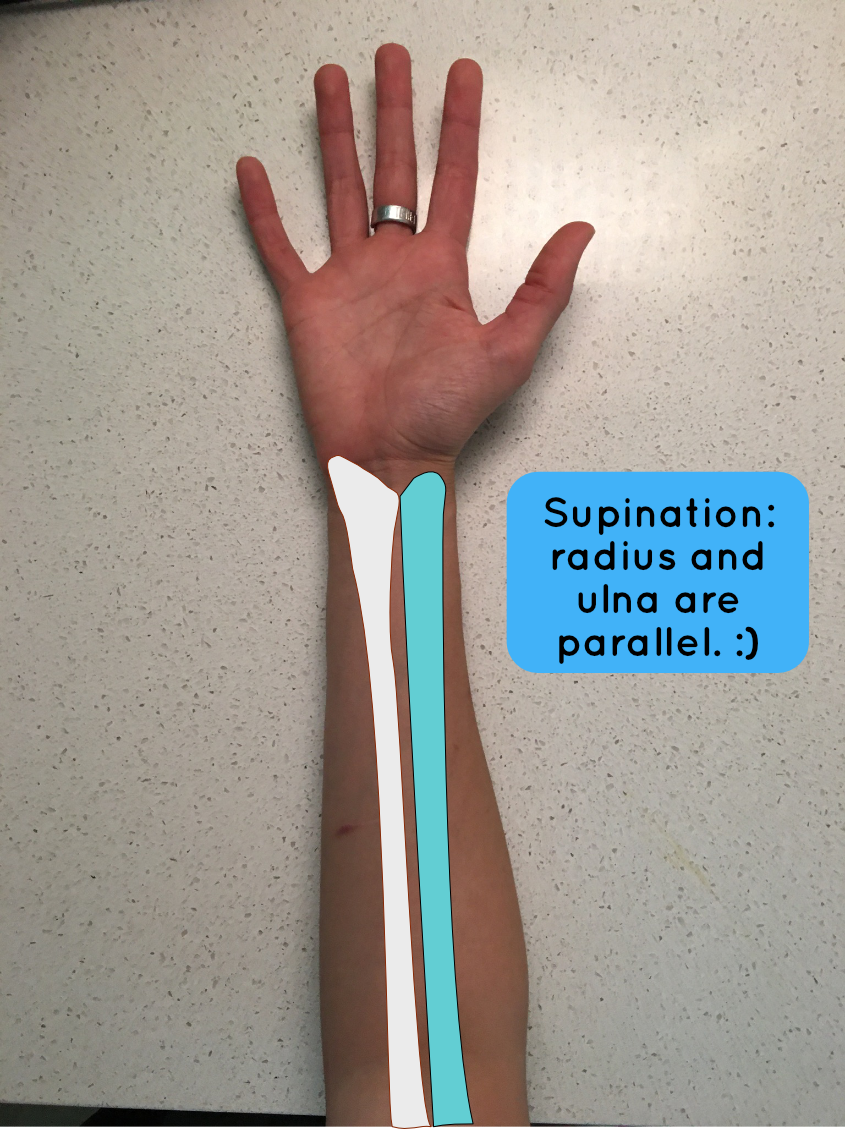
There are easy steps you can take to reduce wrist strain. We talked of natural positioning for the body, right? By angling a keyboard so it is highest toward the center you’re bringing your wrists into a position that is more natural for them.
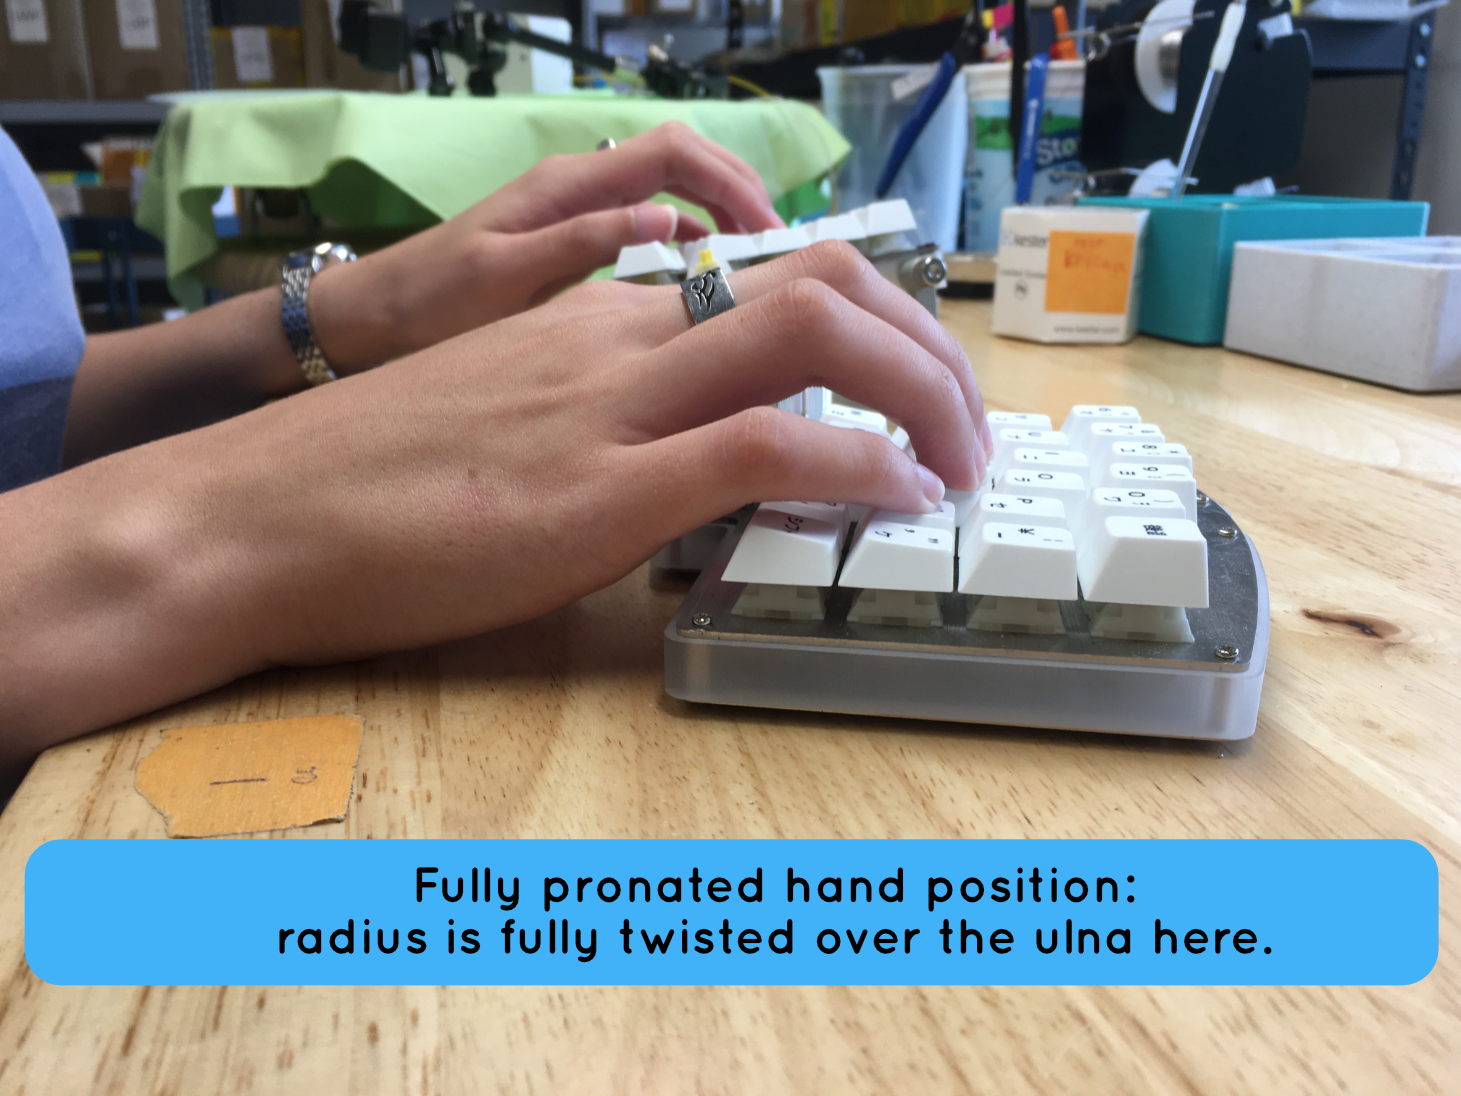
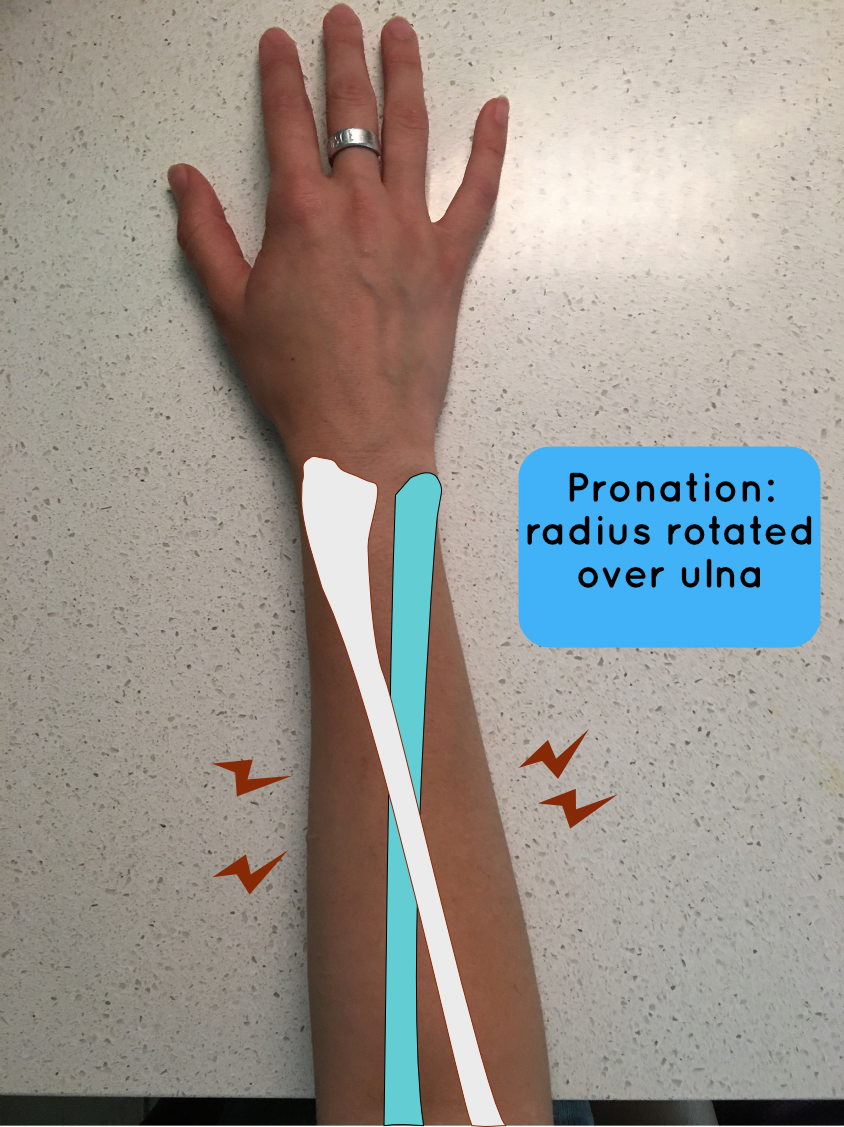
The bones in the forearm are built to overlap. They are not built to overlap for the hours of typing that people currently do today. It is entirely possible to reduce that strain, and make your keyboard look mega cool.
Some vocabulary that might help you!
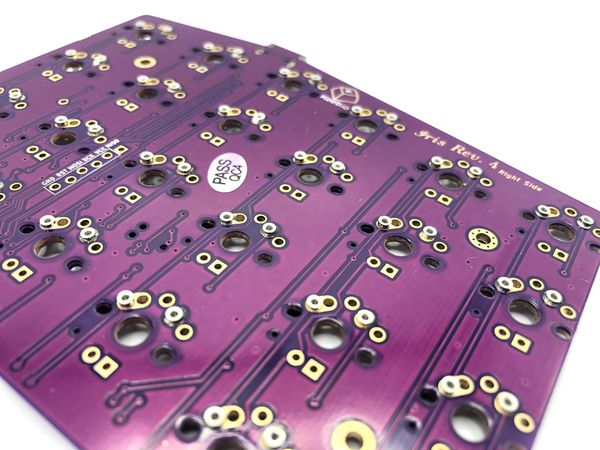
What is FR4?
It’s the material PCBs are made out of. And, incidentally, also makes cool plates to hold your PCB and switches.
What’s this 2u, 2.75u and 1u stuff all mean?
These are the sizes of the keycaps that will go on top of your switches. The size of the keycaps placed on top of the switches influences where they all sit, and how closely or far apart they sit.
What is tenting? How is tenting ergonomic?
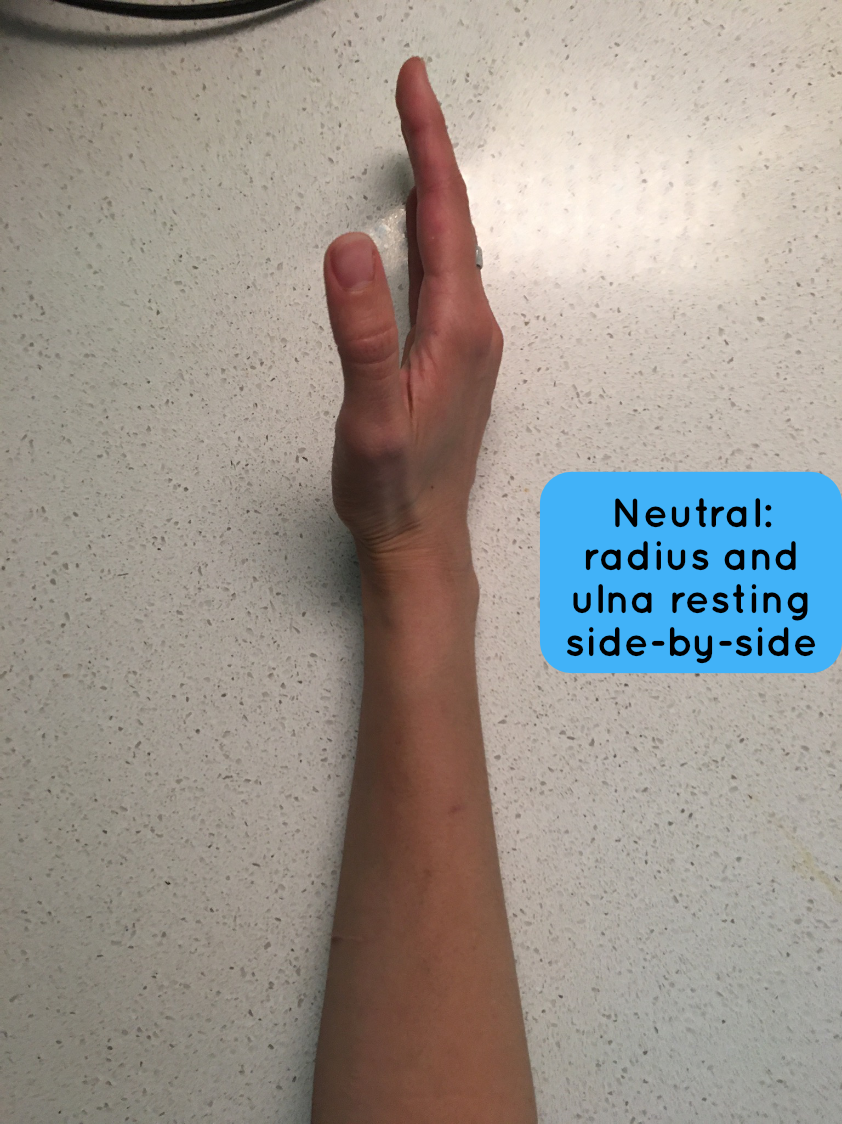
Tenting angles your keyboard so that your hands position themselves more closely to their natural resting position. On a flat keyboard, your hands are facing downward. That means one bone in your forearm is twisted over the other. That can cause some pain for some folks. The tenting alleviates the twist by producing an angle for the natural resting position of the bones. Here is a video on Danny assembling the Iris with a middle layer that allows it to be tented.
Why do so many things have middle layers? Do I need one?
A middle layer can be functional, purely for aesthetics, or both. Many people like the middle layers for the look: the non-tented middle layers make the lights under the PCB opaque and softer. Others like the middle layer for the aforementioned reason as well as for tenting, as described above.
What is a macro section? Do I need one?
If you're looking for more details on macro stuff, here's a link for you: https://www.gomechanicalkeyboard.com/guides/what-are-keyboard-macros/
What on earth is NKRO?
N-key rollover. Not an instruction to give your pup, but this indicates how many inputs a keyboard can take until it no longer takes inputs.
Too many choices on keycaps! Am overwhelm.
The top things you need to know are that keycaps are made of primarily two different materials. ABS and PBT.
Keycaps from the top row of keys to the bottom row of keys may be shaped differently. Some are contoured to your fingers, and others are not. There's a fantastic page that goes in-depth on the profile chart you see below by u/gtderEvan to help you think about what you'd like in keycap profiles.
First Keebio Keyboard, eh?
Rock on! I'll talk about how Keebio boards are different from other shops and direct you to some resources. Ready? Steady... go!
Ergo Options
Danny, Keebio's founder, breaks a lot of barriers to bring people new models of keyboards. We primarily offer split keyboards but we still have some classy keyboards without splits. Emily has joined us and is doing some stunning work with Danny for our aluminum cases as well as PCB design! #goteam!
The primary ways to order keyboards from us is to 1) build your own DIY kit or 2) order a pre-built.
Depending on how ergonomic you want to get, we've got various options for you. We tend to divide our categories into split staggered, which you're likely familiar with, and column stagger/ergo/ortholinear. This second category is usually where folks go a little deeper to understand their personal wrist needs. Take a look at some of our selection!
Split Staggered
If you are just treading into the waters of split keyboards and want something that's similar to your current keyboard, a split version of a traditional staggered board is probably for you. For that, we've got the Quefrency, Sinc, and KBO-5000.
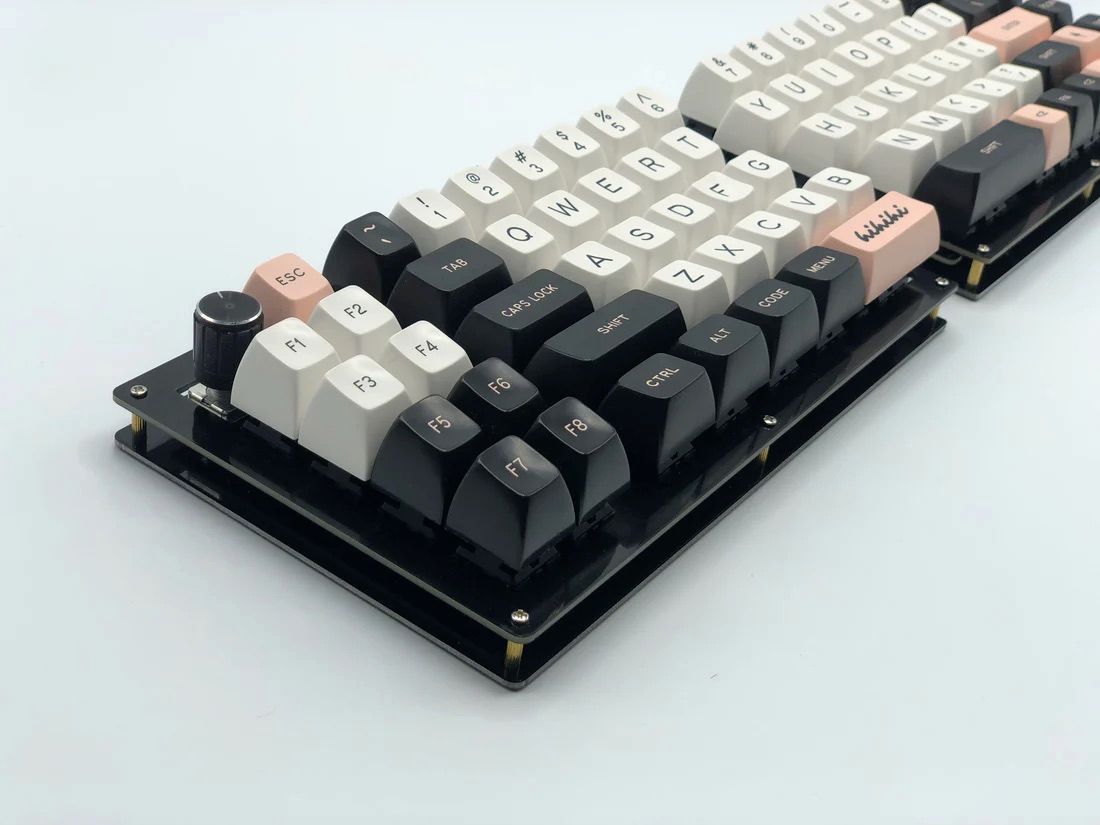
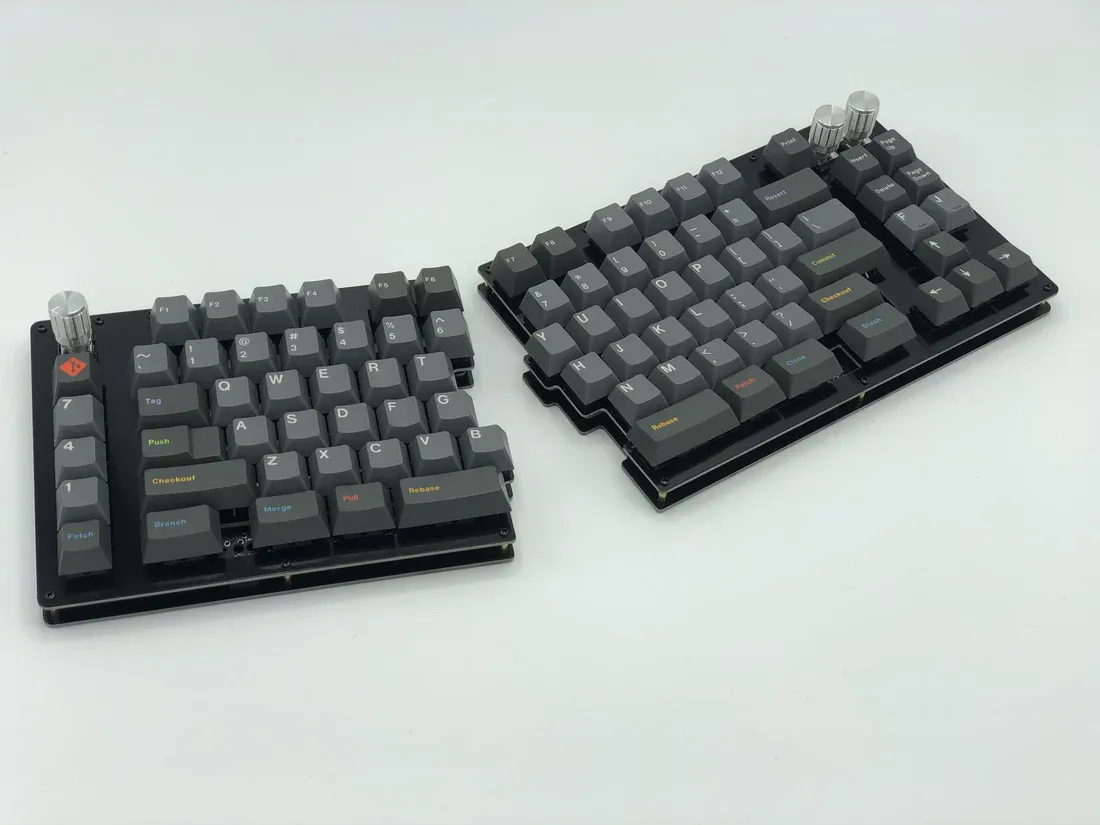
Quefrency
One of our most popular boards is the Quefrency, which is a 65% keyboard, with an additional 2x5 macro section on the left half of the board. Some people call that layout 65XT.
You can also get this without that macro section if you want things to be more compact. Another option available is having rotary encoders on the board, to allow you to control things like volume, page up/down, zooming, etc. Just keep in mind if you want the rotary encoder on the left side, the macro section needs to be there! The way switches versus encoders attach to a PCB are different.
Sinc
For a 75% keyboard that retains the Function keys at the top of the keyboard, you'll want a Sinc. Just like the Quefrency, it has the option for the macro section to the left and rotary encoders. Same idea with the encoder situation as the Quefrency.
KBO-5000
The KBO-5000 is similar to the Sinc with it being a 75% keyboard, but has a separated out arrow/navigation cluster if you want a bit more separation of those keys from the rest of your keyboard.
Column Staggered/Ergo/Ortholinear
If you want to step up your ergo game a bit more than the staggered boards, we've got these boards:
- Iris (Ergo/Column Staggered)
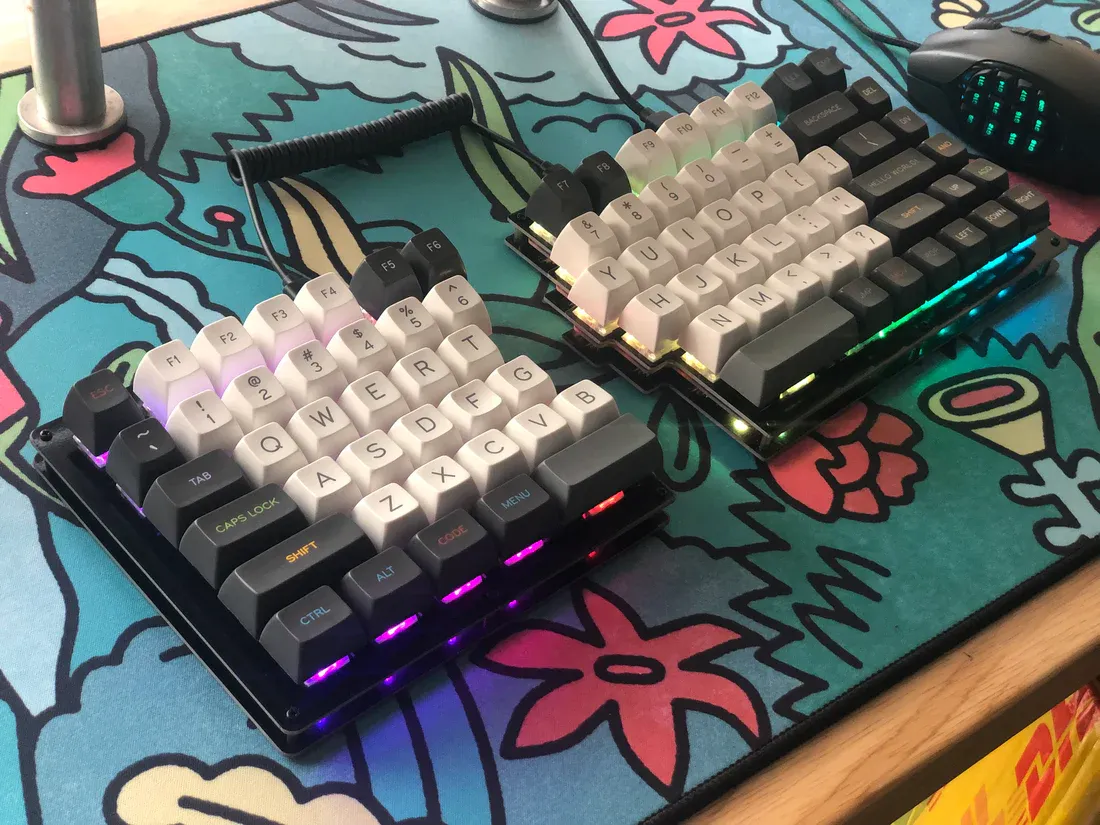
- Nyquist (5x6 Ortholinear)
- Levinson (4x6 Ortholinear)
- Viterbi (5x7 Ortholinear)
- FoldKB (Ortholinear)
Due to the different arrangement of keys, it'll take about 2-3 weeks for you to get used to the layout, but in the end, our users of the board have said that using them has improved their issues such as RSI or carpel tunnel syndrome. Also, you'll still be able to type normally on a regular keyboard whenever you need to, so no fear!
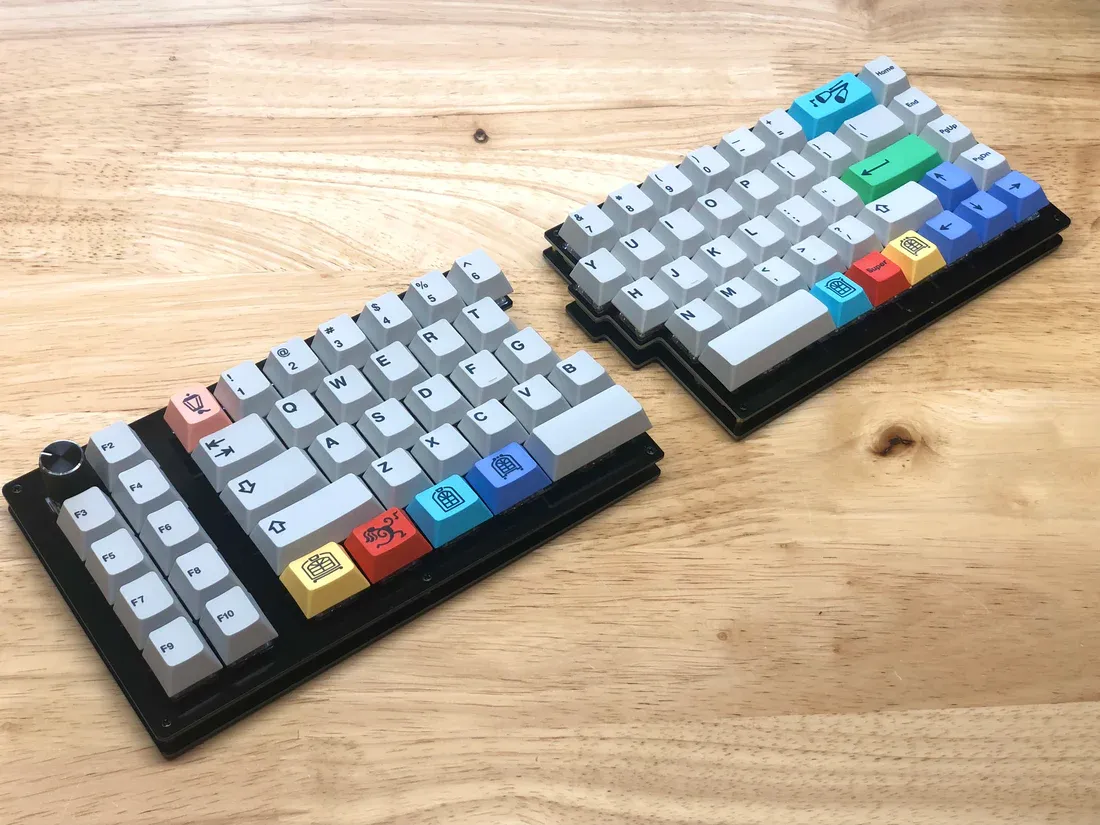
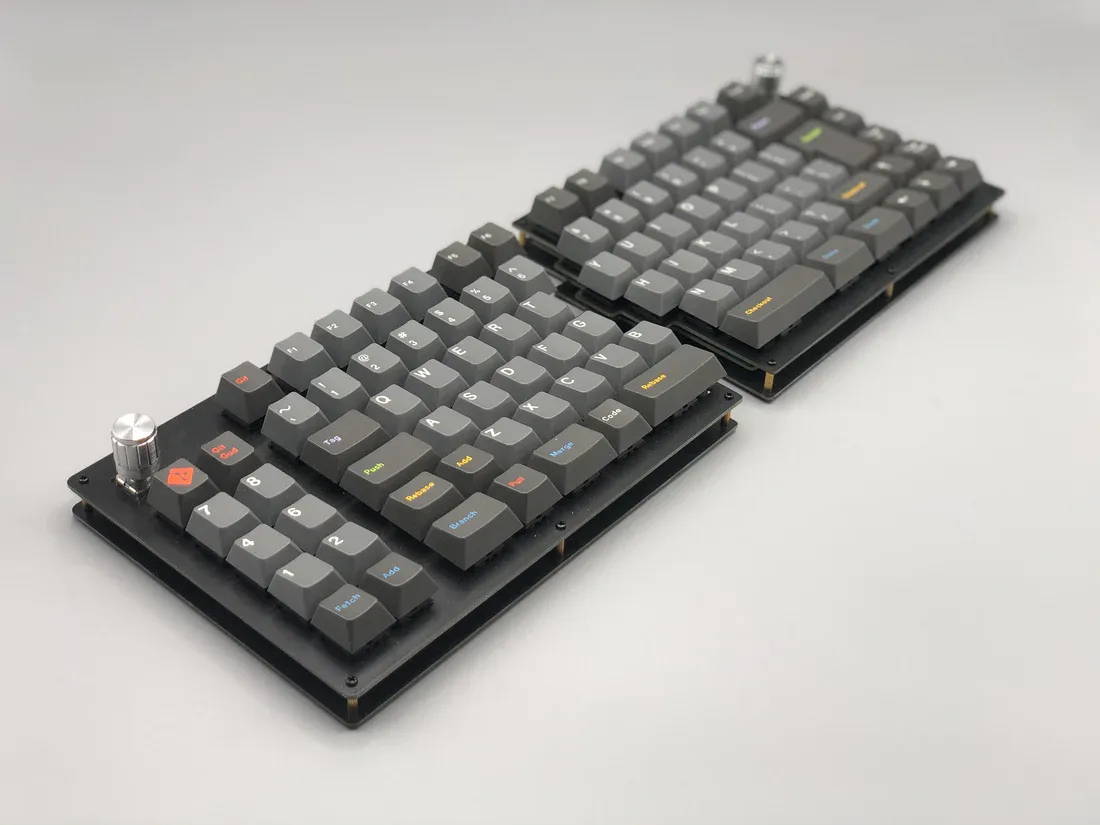
Iris
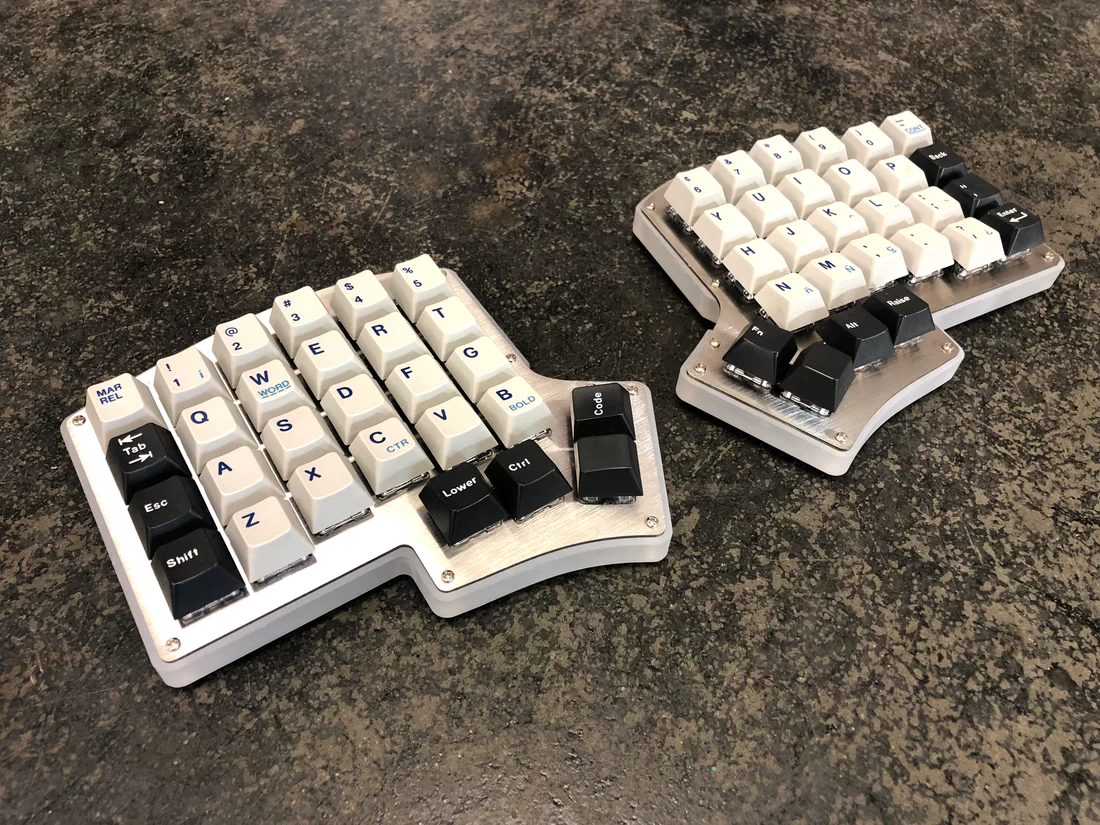
The Iris is our most popular keyboard, as it's got vertically staggered keys as well as thumb keys. You can tent the Iris in a few different ways: screws and wingnuts, Ergodox legs, or the Aluminum case that has a built-in tenting tilt. The Iris not only allows you to have your hands rest in alignment with your shoulders, but also offers a more neutral position if you tent it in one way or another.