


Over the past year and a half, we've offered a keyboard repair service and have fixed over 100 keyboards, as seen in our repair log spreadsheet. In this post, I'll go through the repair of a keyboard to see what goes on.
Intake Information
- Case #56892 (This is just the order number for easier tracking on my end)
- Keyboard: Neson Studio 810E
- Symptoms: Switch pad for Left Ctrl key burned off
- Service Level: 0
Unboxing and disassembly
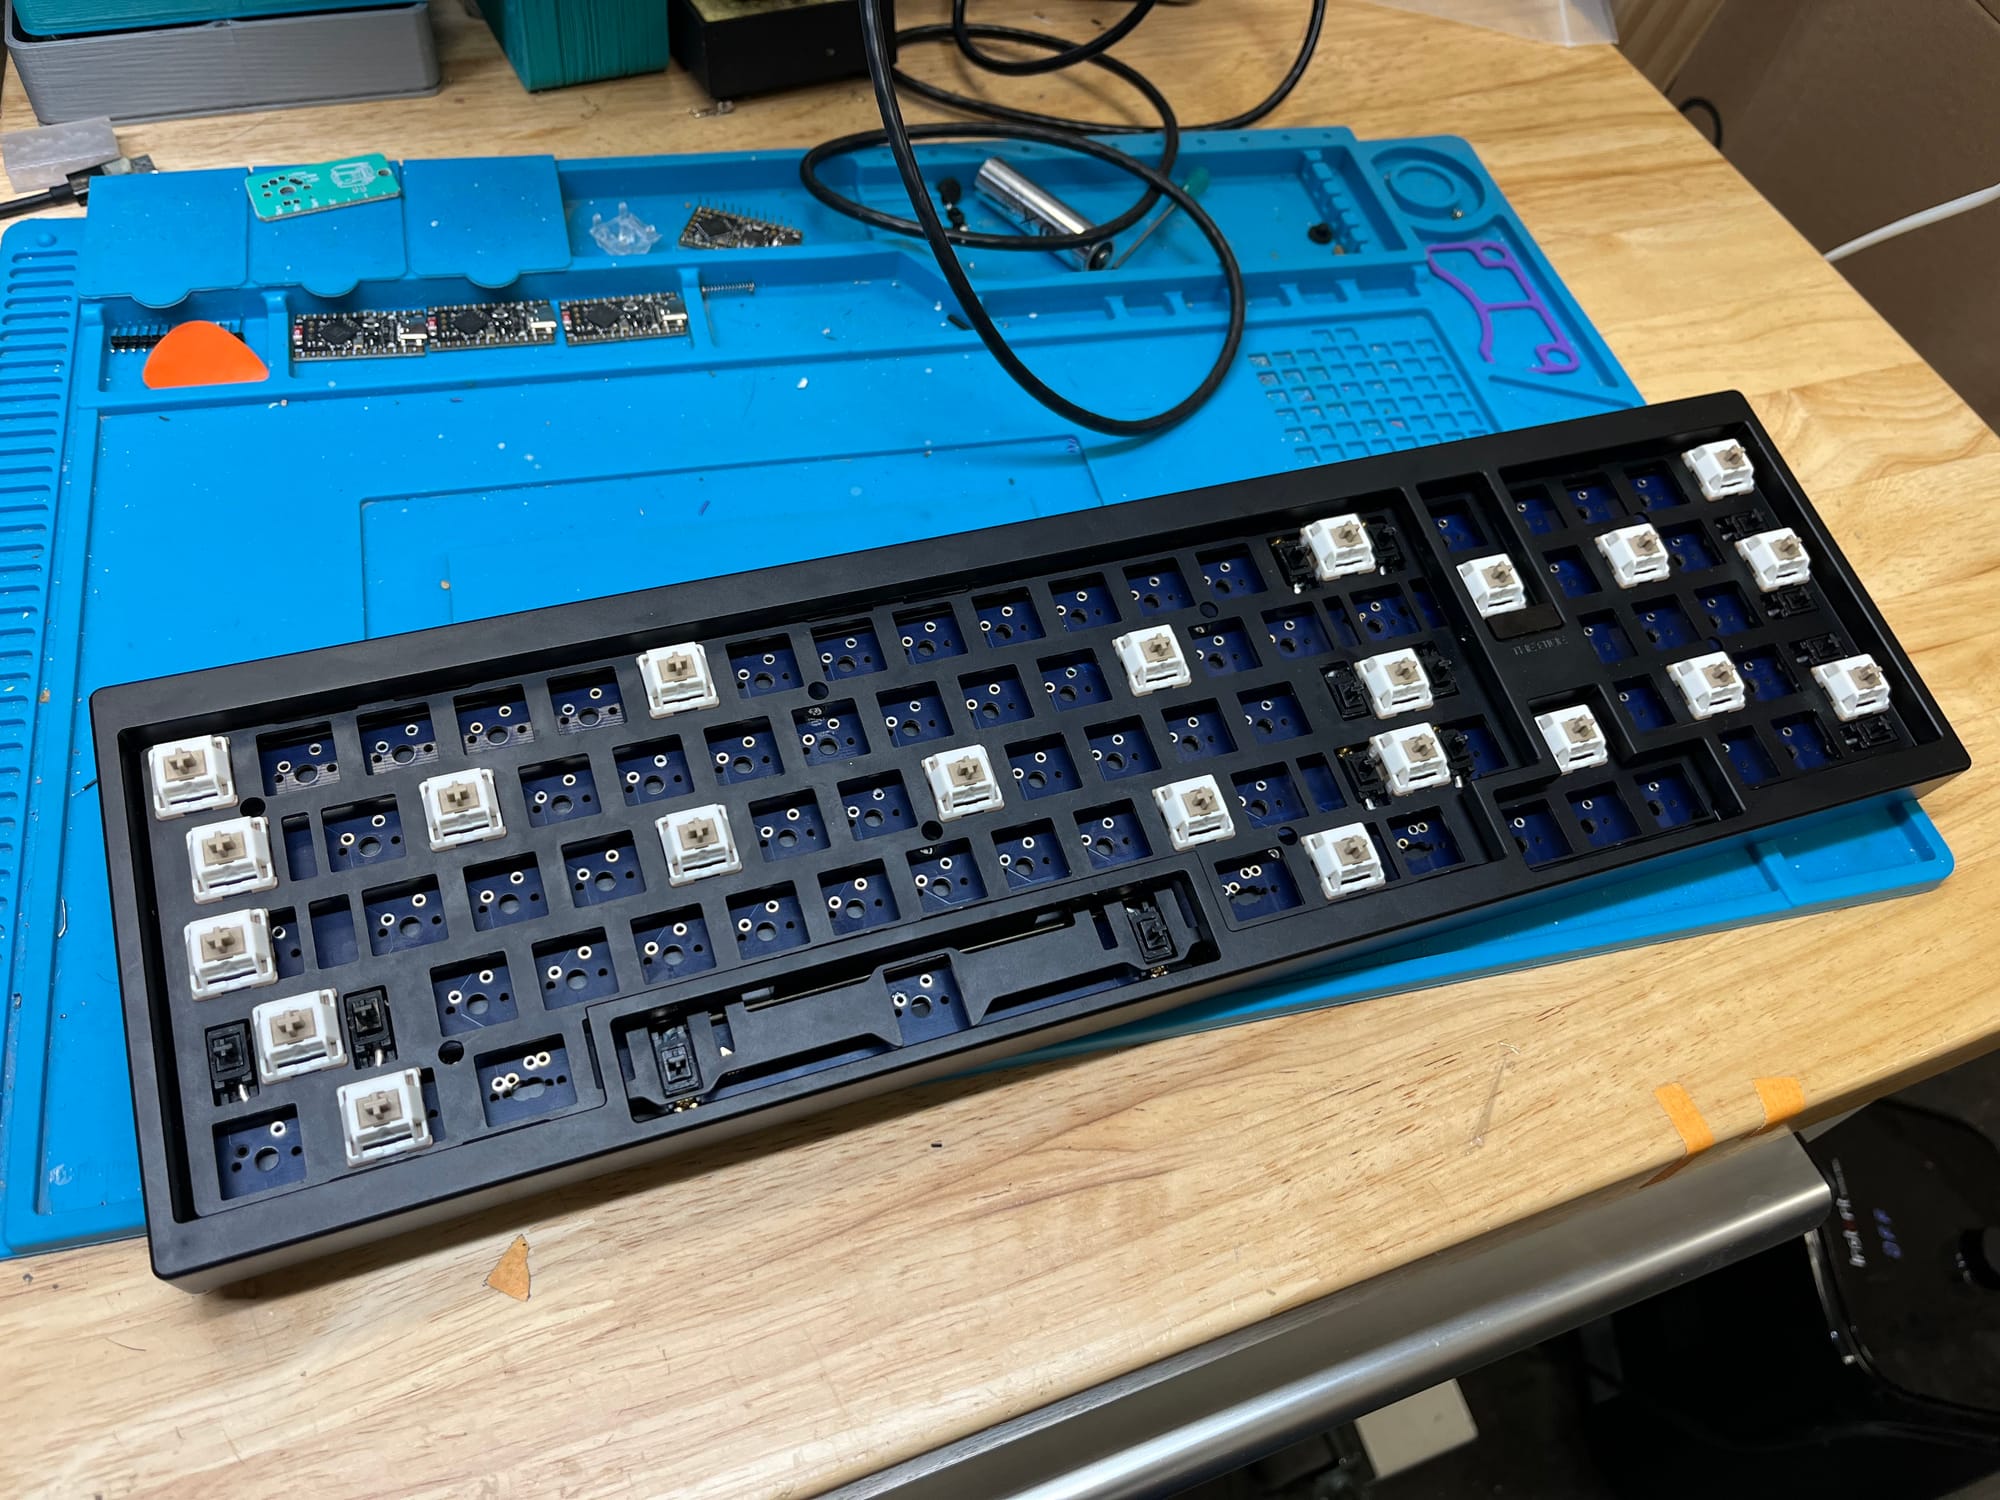
The first thing to do was unbox the keyboard and start disassembling it. The top side of the case had 8 M1.5 screws to remove that held the top and bottom parts of the case together. After that, there were a few screws to remove the light diffuser at the rear of the keyboard and then 8 more M1.5 screws to be able to access the plate/PCB.
Fixing the board
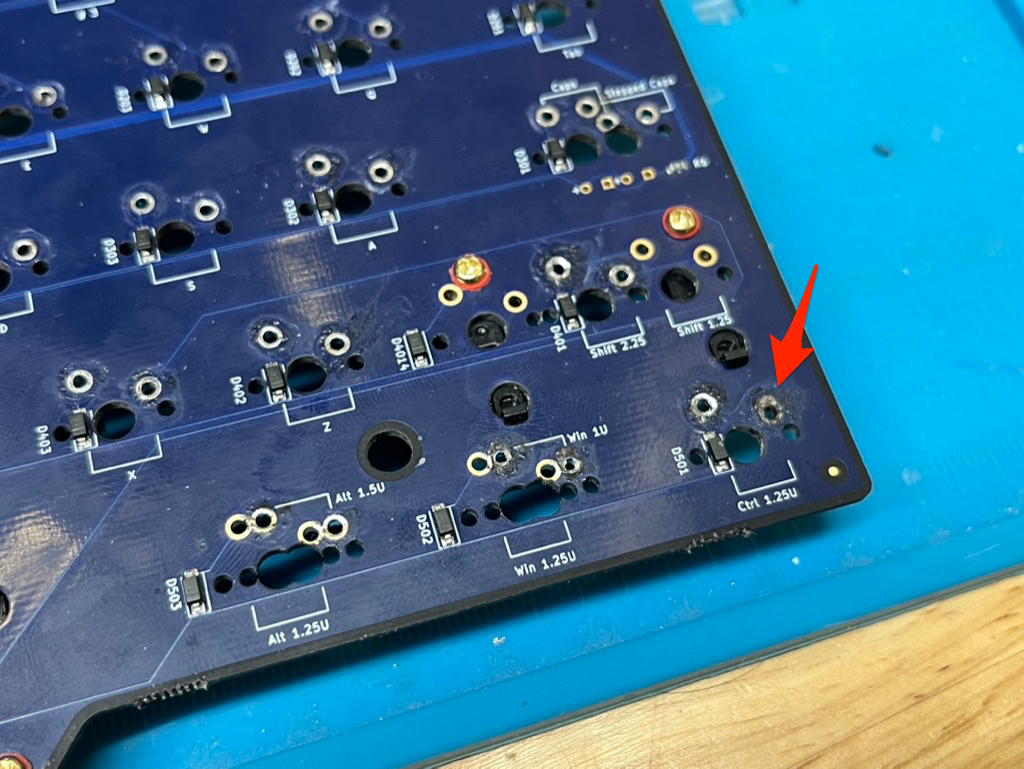
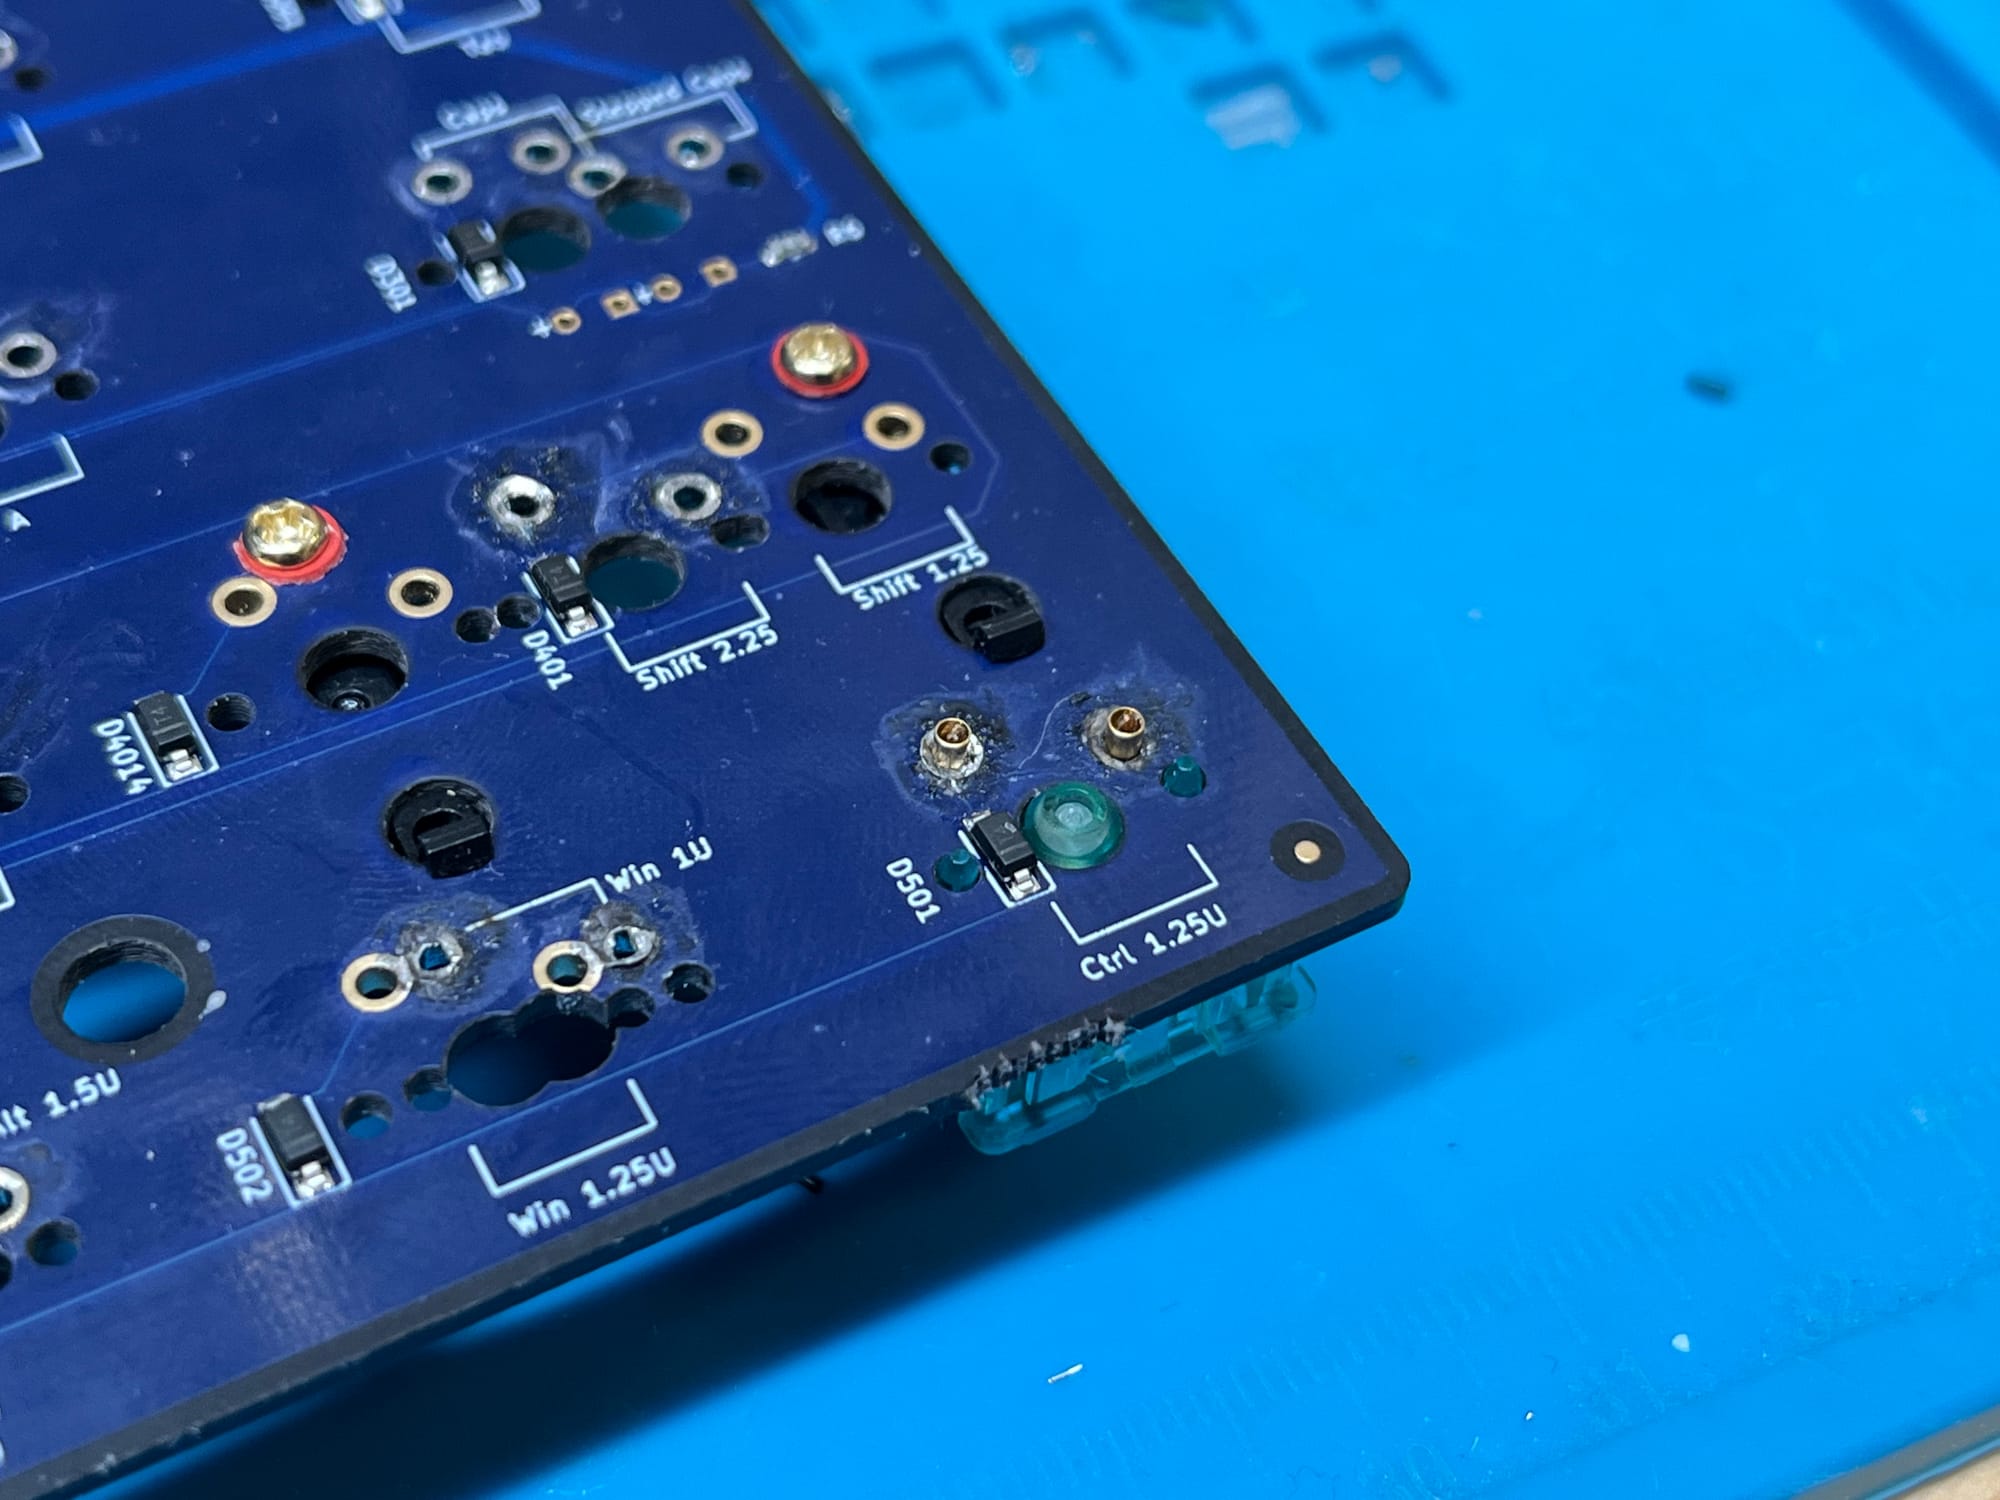
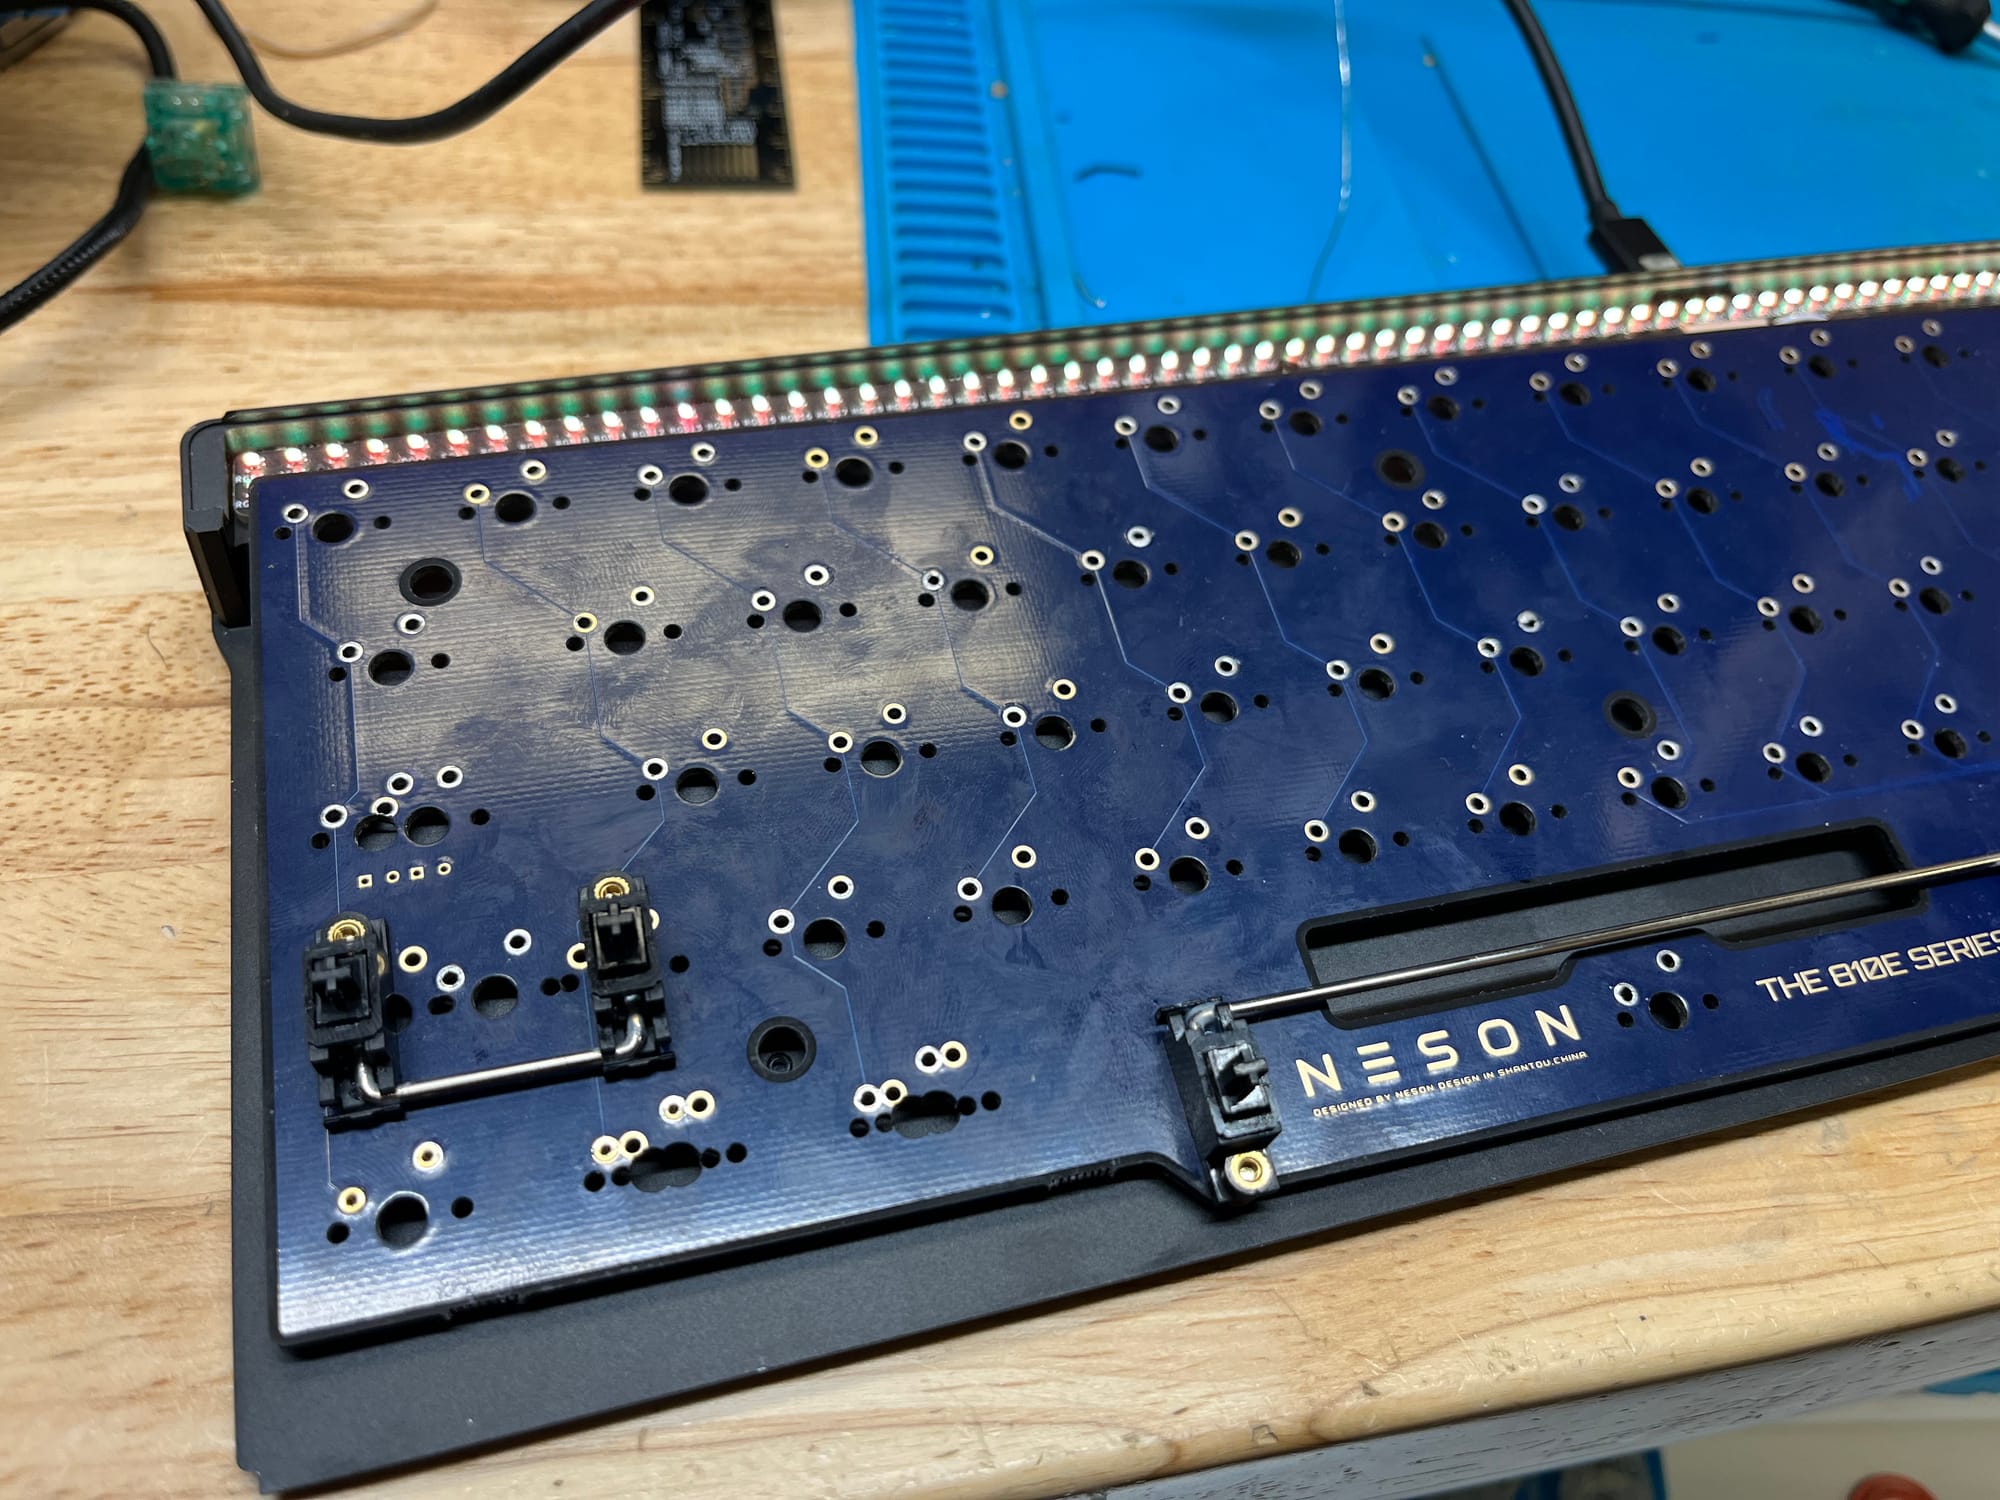
Damaged location (bottom side and top side)
A quick inspection of the PCB confirmed the burned-off pads. The normal fix I do for this is to add Mill-Max sockets to the affected switch and then add any jumper wires needed to restore a row/column connection or connection to its associated diode.
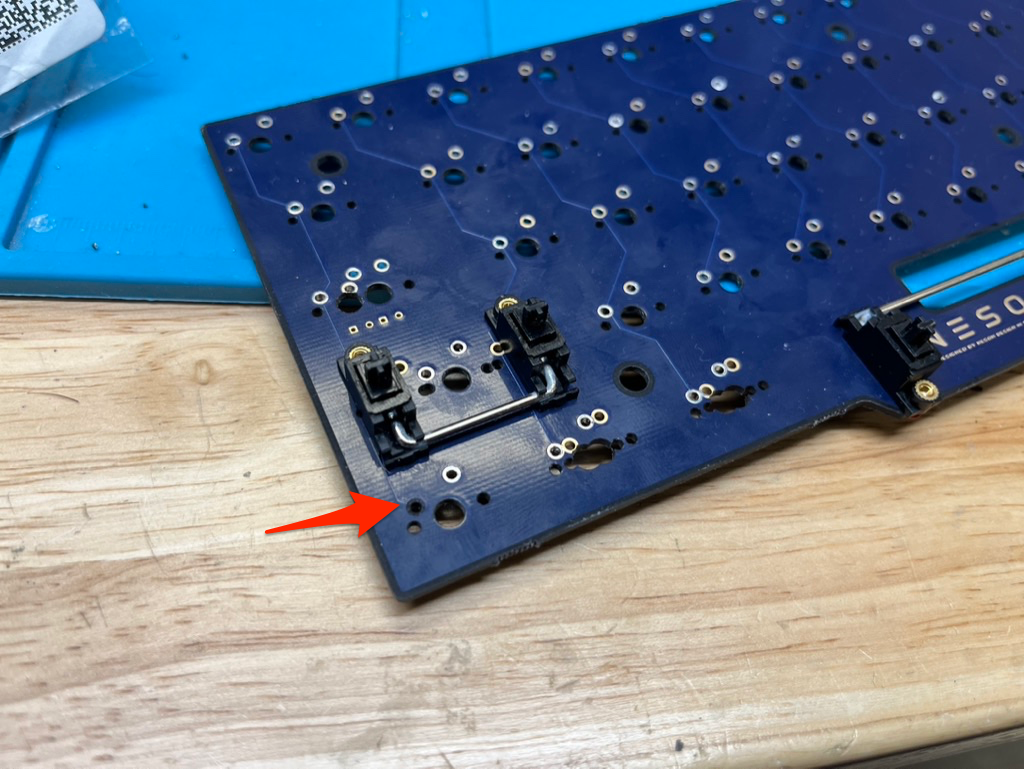
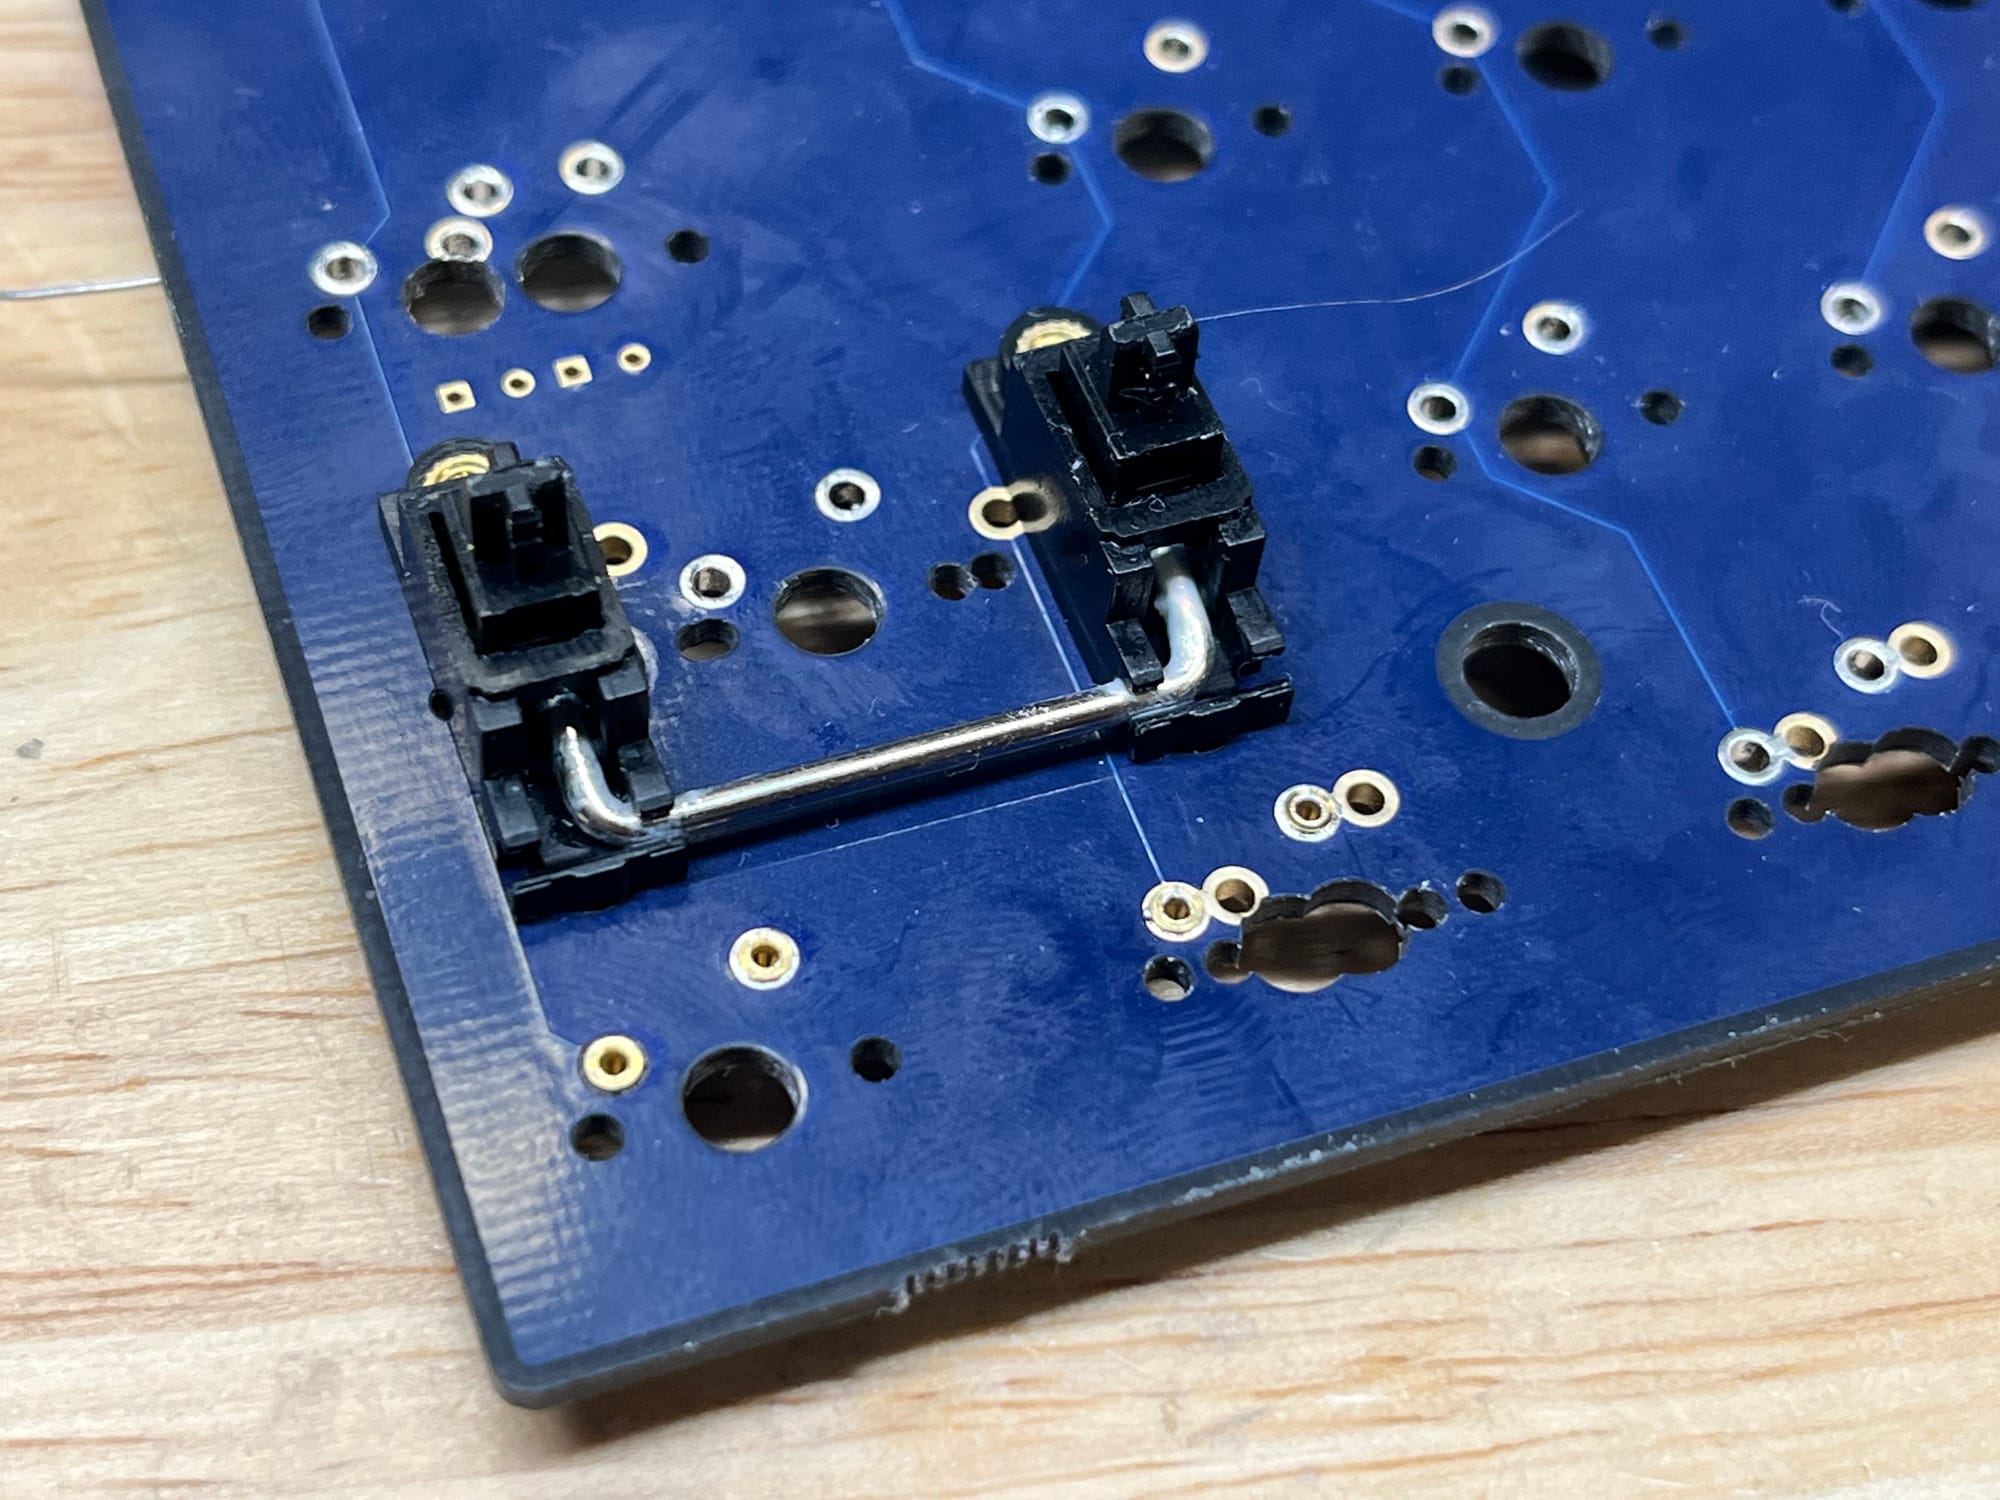
After cleaning out the switch location a bit to make sure the Mill-Max sockets would fit through the PCB, I put the switch/sockets combo on and soldered it on. For the spot with the missing pad, I made sure there was a decent glob of solder on the bottom side of the PCB to prevent it from getting pulled up.
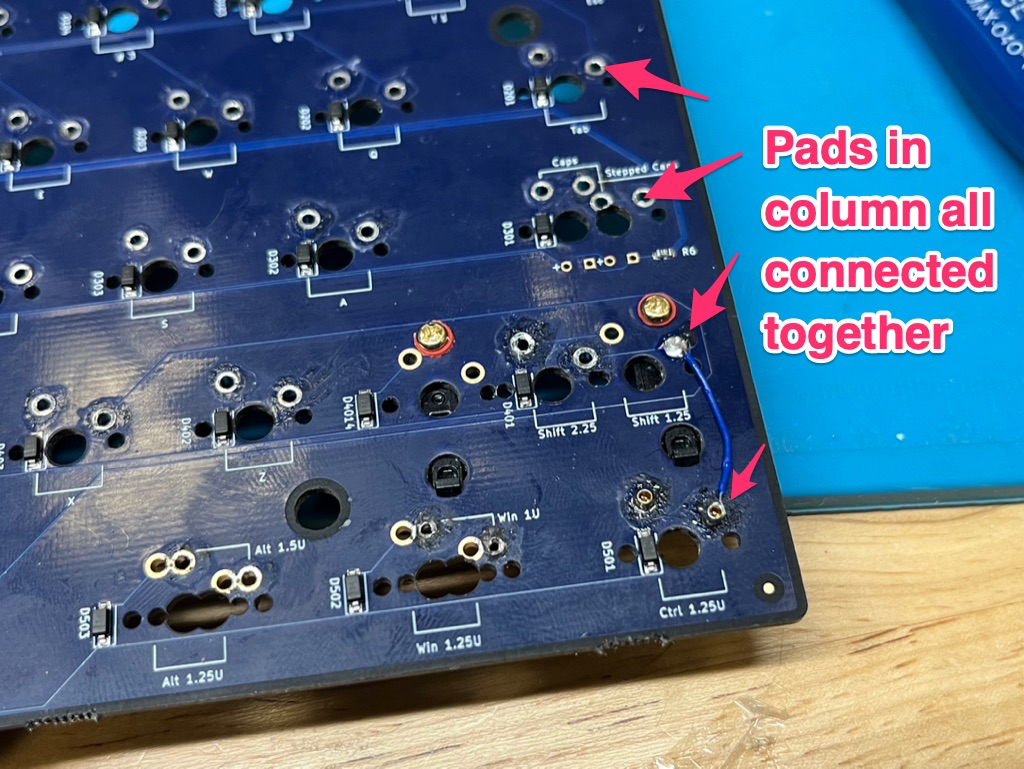
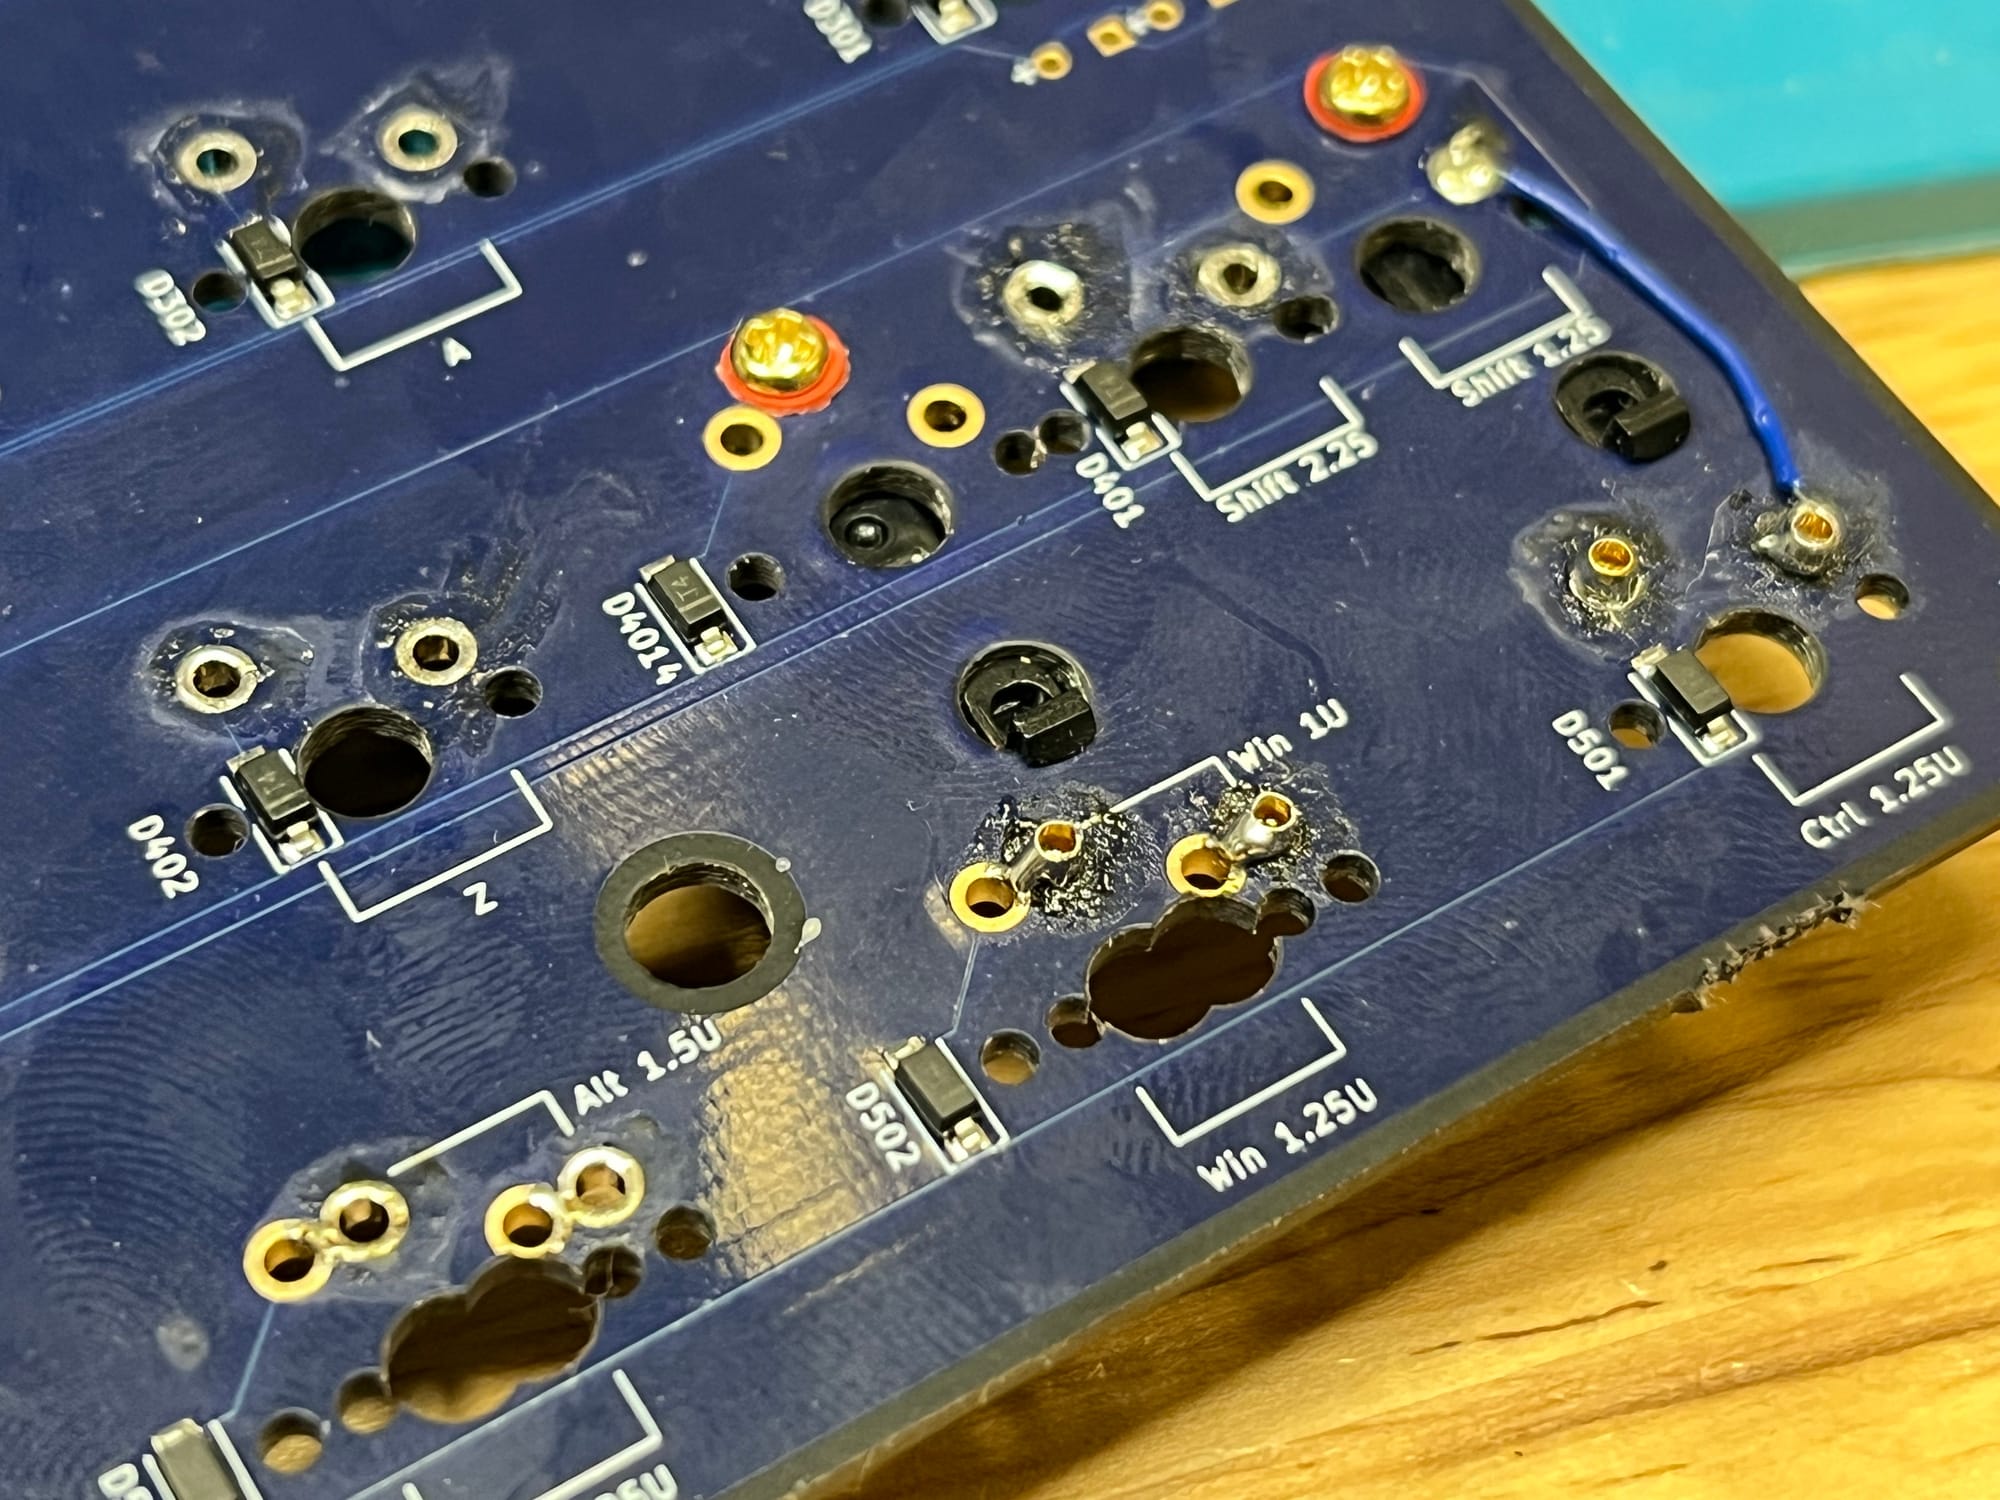
The burned-off pad was connected to the other switches in the same column, so a jumper wire was added from the 1.25u Left Shift that would be un-used to the socket where the burned-off pad used to be.
The pads of the Left Windows key looked a bit damaged as well, so I added Mill-Max sockets there as well.
Testing
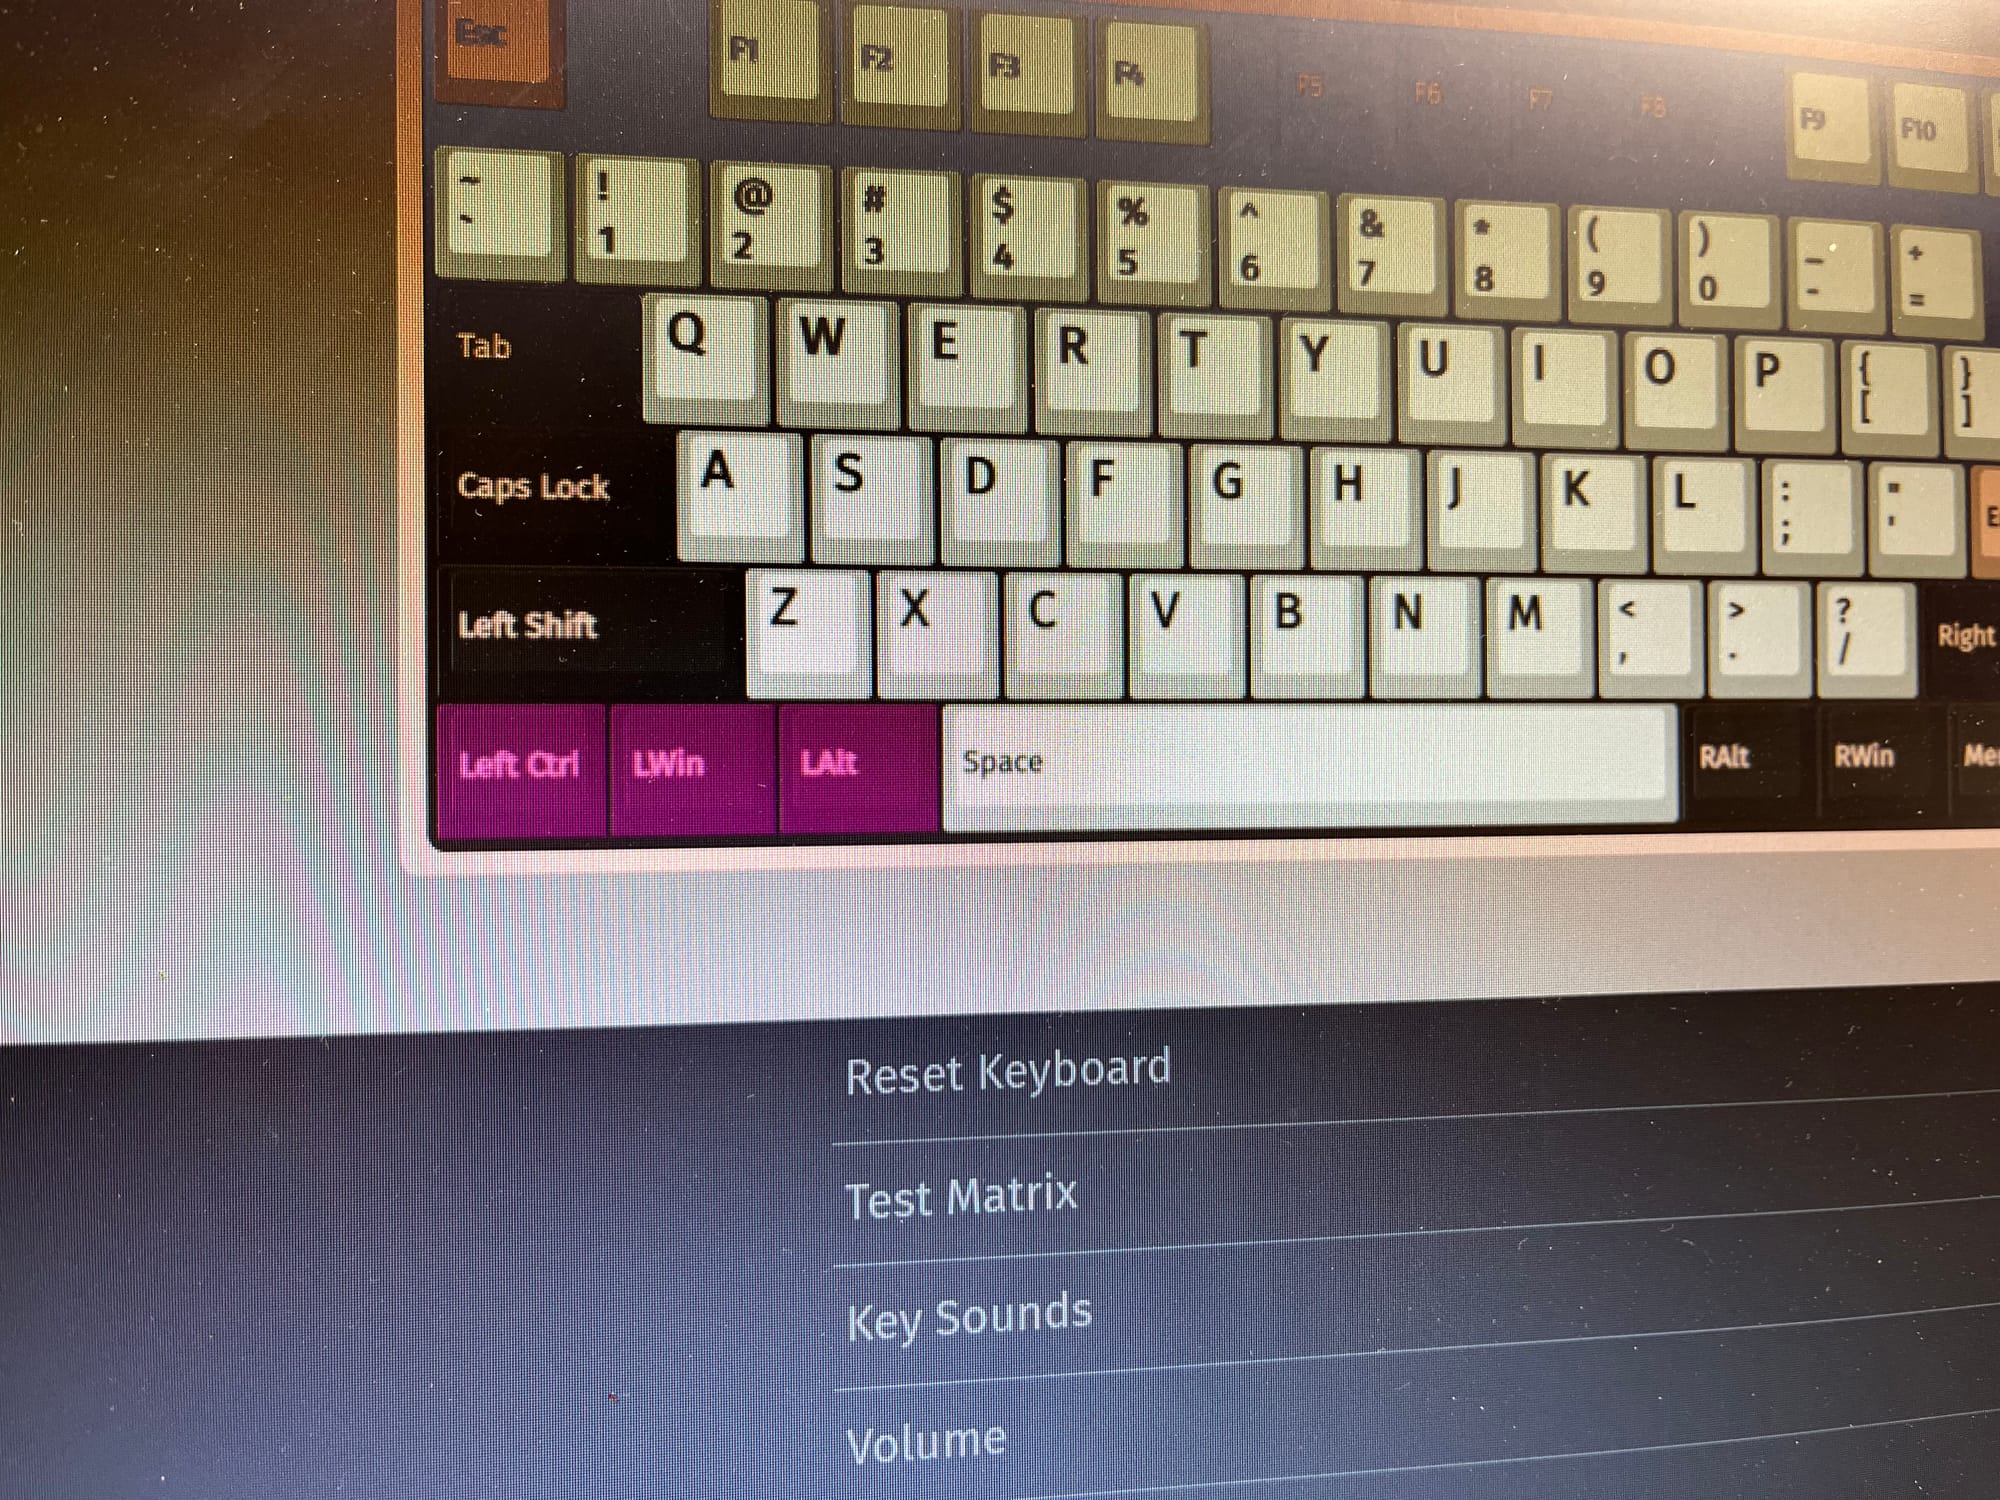
Before putting everything back together again, I tested the keys around that area to make sure the repair was functioning properly.
If you need your keyboard fixed, check out our Keyboard Repair Service! Send us an email at shop@keeb.io and include info on what keyboard make/model it is and any relevant pictures of the damage so we can make an assessment.


Member discussion