


Without any ergonomic keyboard typing experience, you can go from a traditional staggered situation to a columnar stagger. Despite working at Keebio for 3 years, it was my first try at typing on an Iris! It was a fun time, and this post is about what I learned and what I liked. Let me share with you the ways you can cut corners in getting your WPM as high as your old keyboard on the Iris in roughly 10 days.
Big Challenges & How I Handled Them
Muscle Memory
Let's just say that muscle memory is a thing and can be challenging to change. I'm a touch typist and first started learning how to type in elementary school... which roughly adds up to about 20 years. (Can I be the dinosaur with a spikey tail?)
I started out by taking a typing test daily for a few days. The most informative part of diving into typing tests was identifying which keys I was stumbling the most on. It'll be different for everyone, as everyone has different typing tendencies. For example: I only ever strike the spacebar with my right thumb, never my left. Someone else might use both or only their right.
I found quickly that my biggest personal tick was typing the letter C with my index finger instead of my middle finger (a quick Google tells me it's supposed to be with your left middle finger if you want to be to the letter about it...ba-dum-ksh!). Somehow it evolved to be easier for me to type it that way. And I couldn't bear to go without the return key by my right pinky. The Iris doesn't quite accommodate the semicolon, quotation marks, and return key where they usually sit, albeit it absolutely can be placed elsewhere on the board (or on a different layer, even!). But it was hardwired into my brain from muscle memory, so I changed up the location of some of the punctuation for the enter key to be where my pinky usually gives it a poke.
Self-Awareness
Knowing how you best learn a new thing is handy. I knew from my self-awareness that my brain gets overly frustrated if it feels there are too many roadblocks to accomplishing a simple task. I started really slow when I first typed on the Iris. I needed to take my time with transitioning into it and scale up the amount of time I worked with it.

So, for the columnar stagger, the Iris tended to trip me up on these letters: C, V, and X. Primarily the letter C. And then I stumbled around making mistakes until I changed the keymap for the quotation marks and Enter key just because the keymap I started out with did not favor the fact I use those right-hand punctuation keys with quick succession very commonly. This may not be an issue for you, but I needed to change things a little for my keymap!
Another small point: I couldn't recall where I put everything on my keymaps at first! If you can't recall what you keymapped where, then a printout or having a part of your screen dedicated to the keymap visual can be a great help in displaying your map for reference. You'll need it less and less as you go along.
Small Hands
In order to hit the buttons in the far upper-left and far upper right corners I don't really use my pinkies to press at all. It's just too far of a reach for those fingers. However, I can move my hand over on the keyboard and my ring and middle fingers can reach those far keystrokes pretty easily, especially if I turn the Iris right half clockwise and the left half counterclockwise a touch.
Kayla's Top Pro-Tips for Iris Typing Troubleshooting
Some of the things I've learned in this process:
- Take typing tests at first. Just gauge what feels hard. It's info to help you take the next step forward.
- Take it slow if you need to. No shame in taking your learning at a pace that's good for you. Be kind to yourself, yo.
- Once you figure out what letters/keystrokes are challenging, google some words to practice. Start slow and get the letters right. Speed will come to you in time! :)
- Have your keymaps easily visible somewhere nearby you. Some struggle is good, but if you're giving yourself a headache, you're pushing too hard too fast.
What helped me speed up the transition
If you're a touch typist already...
Needless to say, it'll be a tad easier if you already have some typing skills under the hood. With that said, though, there's still an impressive learning curve. Let me show you what I mean.
Slow doesn't even begin to illuminate the meaning of how starting on the Iris felt. Awkward, wonky, and like you're trying to walk normally underwater.
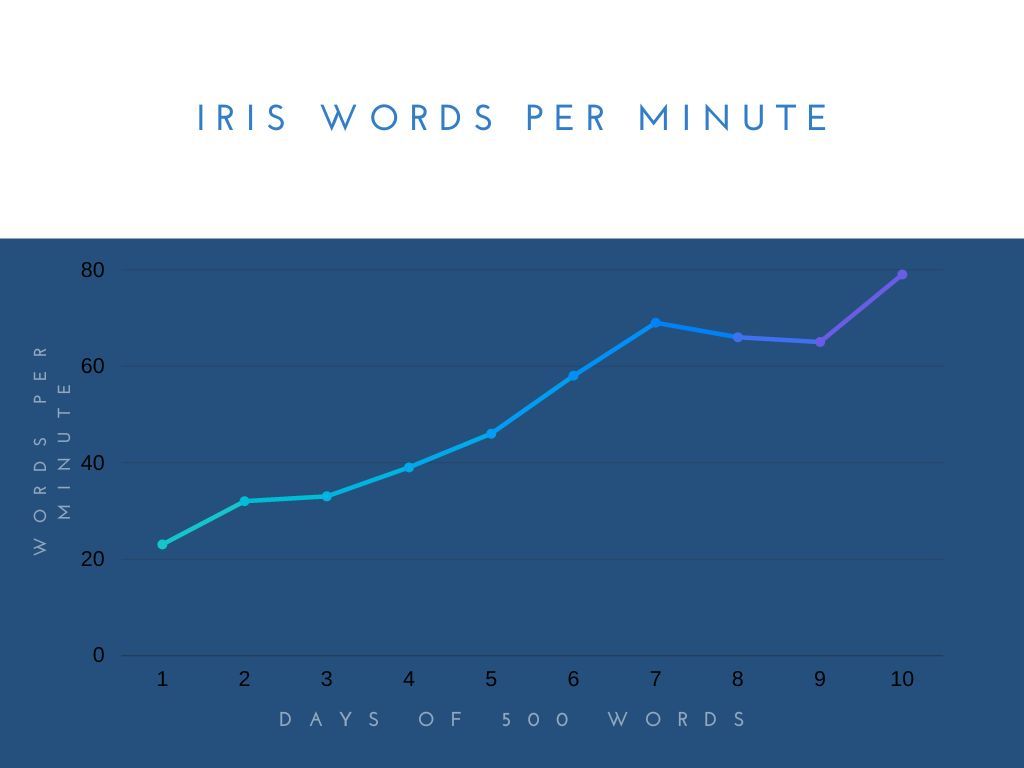
After a few typing tests, I started to get a feel for what letters were giving me the most trouble. Six days of typing 500 words on the Iris a day and I was mostly back up to my WPM. I was still about 20 WPM off, as I'm normally about 85 WPM.
I set aside time for just typing out words that held the letters I botched frequently. I was happily surprised the Scrabble community is still going strong (thanks for all those cultivated words pages!) as it was fairly easy to Google lists of 'words that contain the letters c and v' without any trouble.
Sometimes I'd practice typing stream of thought (usually my faster typing mode), and then once I got a little ways past 'words that have these specific letters' practice, I would read some of my favorite poetry and just type it out verbatim. (Quite the mood. While listening to my favorite film and video game soundtracks!)
If you are a beginner typist...
Starting a new skill is always a little uncomfortable and wonderfully eye-opening. Getting started with something fun will be the best way to help motivate you and keep you going when things are tough.
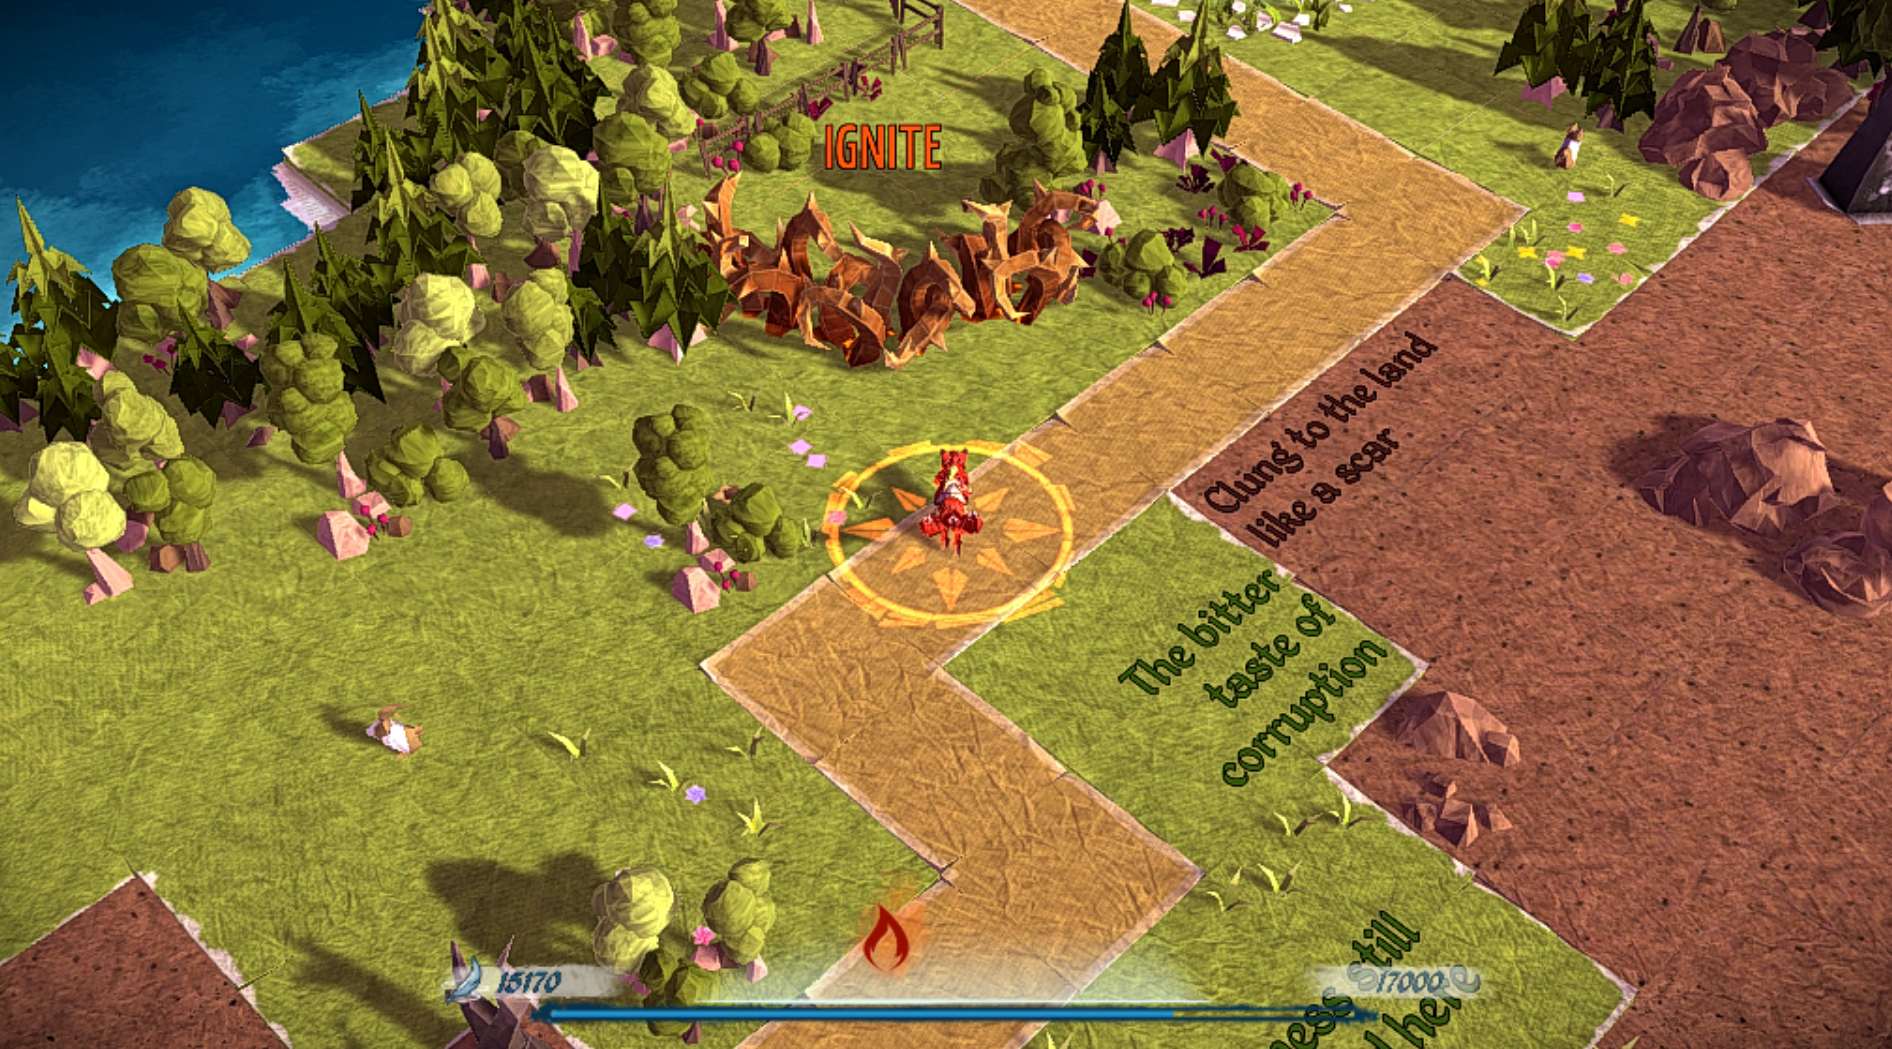
How does one make typing fun? One way is with a game, and the one I'd recommend is Epistory! Ride a fox through an origami world fighting dastardly bugs. Words start small and scale upward as you go. You can also get a good feel for what letters are giving your brain a workout quickly. This is also fun if you already know what you're doing.
I'd strongly recommend a keymap displayed somewhere visible where you are typing. That can be on the screen where you are working, or a printout so you don't lose screen space.
Figuring out keymaps and layers
I definitely dipped my toes into learning only the alphas (the alphabet letters only) first before trying to learn multiple keymaps, but others may be better served learning it all at once. I admittedly had a bit of a struggle getting all my punctuation figured out, so maybe that would've been helpful if I had figured that out earlier. (Either that, or if I had figured out augmenting my thumb cluster earlier.)
Learning the alphas was its own challenge for me, as I learned very early on that my index finger was reaching for the letter C. So effectively relearning letter C was first priority.
Iris: Aluminum Edition Pizzazz!
If you noticed the image at the top of the post, it is, in fact, the aluminum case for the Iris PCB that I used. We occasionally sell an Iris half on its own, which is why I got to have fun with borrowing a navy blue half and a green half for my learning experience. ;)
Switches, Keycaps, Desk Material
I had the Iris populated with our Silent Tactiles, the Durock Shrimps, which were great and had a nice sound. (The sound will change depending on your desk material...mine is a one-inch thick solid wood board supported by two end tables. Friend, furniture is pricey! I make do.) The keycaps were MT3 profile, which feel great and are nicely sculpted.
Tenting?
From my experience with this case for the Iris, I would go so far as to say that the Iris is incomplete without the tenting that the aluminum case offers. While my hands are small, it's easy to tent the Iris in a way that suits your ability to reach things with your longer fingers (like your ring finger or middle finger). Another solution is to even keymap onto a separate layer stuff (like brackets, parentheses, etc.) that's a little tricky to reach: then you don't have to do any reaching at all! Stay comfy.
I would recommend you try out different lengths of USB-C to USB-C cord to go between your halves. Once I started getting more comfortable typing on the Iris, I wanted to spread out the halves a little farther to genuinely match my shoulder width.
Best Parts!
The biggest highlights of using the Iris in its aluminum case entail: weight, lighting and, of course, the capabilities of the PCB inside it.
Due to its weight, I'm not accidentally going nudge my keyboard out of position by fidgeting. Whenever I'm thinking or just need to shift positions in my chair, I tend to bump things around. (My coffee mug placement must be strategic, you see.)
The PCB it houses has per-key RGB making low-lighting typing lovely. I tend to do some of my remote work in the evening, so having a soft light emitting from my keyboard instead of a big headlamp is a welcome setting adjustment.
Not only is that lighting super sweet, the keymaps make it as though I have multiple keyboards folded into one. I definitely took my time dipping my toes into this aspect of the Iris, but once I did it's a beautiful resource that you reward yourself with. I have a few keystrokes that take legit four buttons pressed at once, which is a pain and slows me down. I save so much time having that distilled down to one keypress.
If you're looking to invest in an Iris case, the aluminum edition will serve you well.
Post-Experiment
If you’re currently on a regular staggered keyboard and touch type, this is a great way to further improve and accelerate your typing skills. I’ve even found that some weird typing tendencies of mine have been corrected (looking at YOU, letter C!) from my time typing on the Iris and then typing on a normal stagger board. I’m curious to take this a bit farther and fiddle with a Nyquist form-factor board, but that will be a blog post at a later date.
I enjoyed taking the plunge into ergonomic typing! It helped me learn some of my typing tendencies and aided me in correcting them. There's also just the plain fun of seeing the rainbows dance in the per-key RGB.
If you’re concerned about switching between boards making it so you can’t type on your old board, no need to be! You’ll learn skills that’ll make you more proficient as a typist overall. But let’s be real: extra hotkeys and layers are the bomb. It’s hard to go without once you’ve learned those tricks and it opens up a whole world of ease in your digital space. Having a single key to the work of two keypresses or a key that would be farther to reach for normally in an easily accessible spot makes navigating digital life 10x better, hands down.
It's easy to build the aluminum case! Check out our video on it!
Some CNC'd aluminum for you?


Member discussion