


If you’re a first timer to mechanical keyboards, read on! This will help you choose the best keyboard for your needs, and help you understand keyboard anatomy, split keyboards, switches, and split keyboards we have at Keebio.
Psst! If you’re familiar with mechanical keyboards, but are a first timer to Keebio keyboards skip here.
Keyboard Anatomy
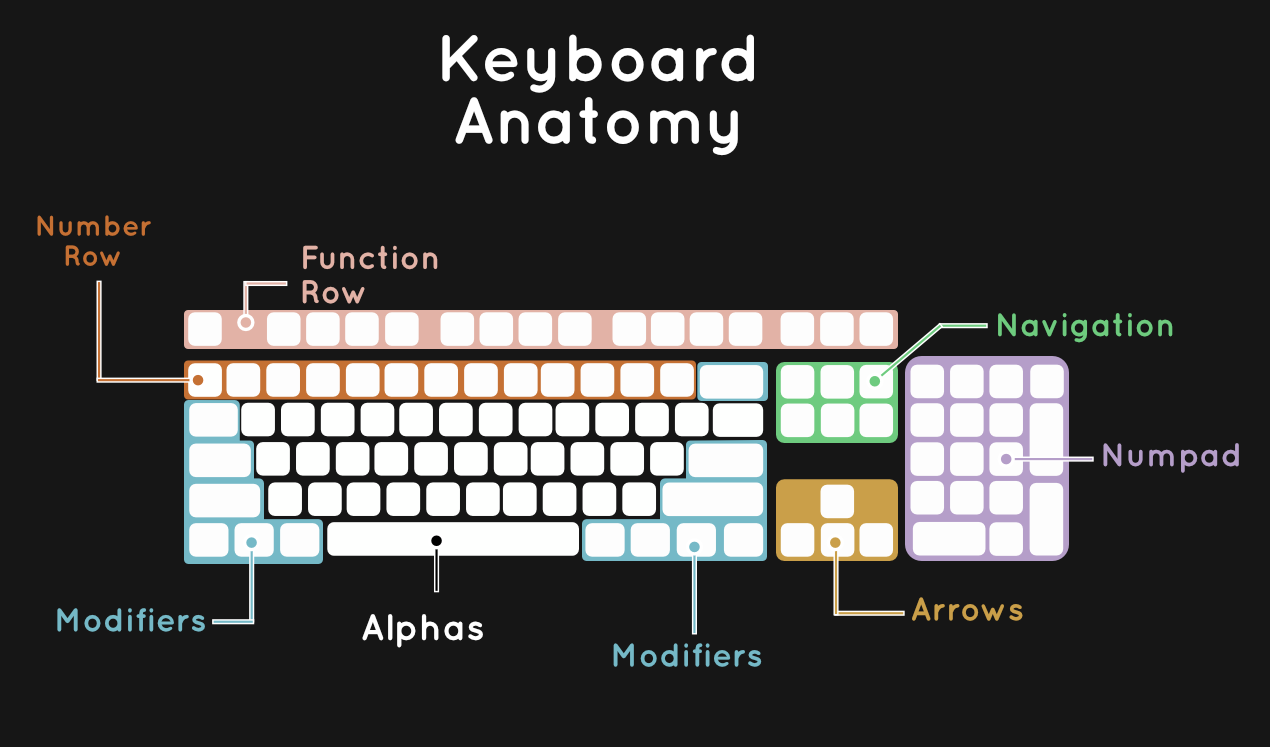
Before we talk shop about what parts of keyboards are left out of smaller kinds, take a look at the anatomy visual below.
Keyboard Sizing
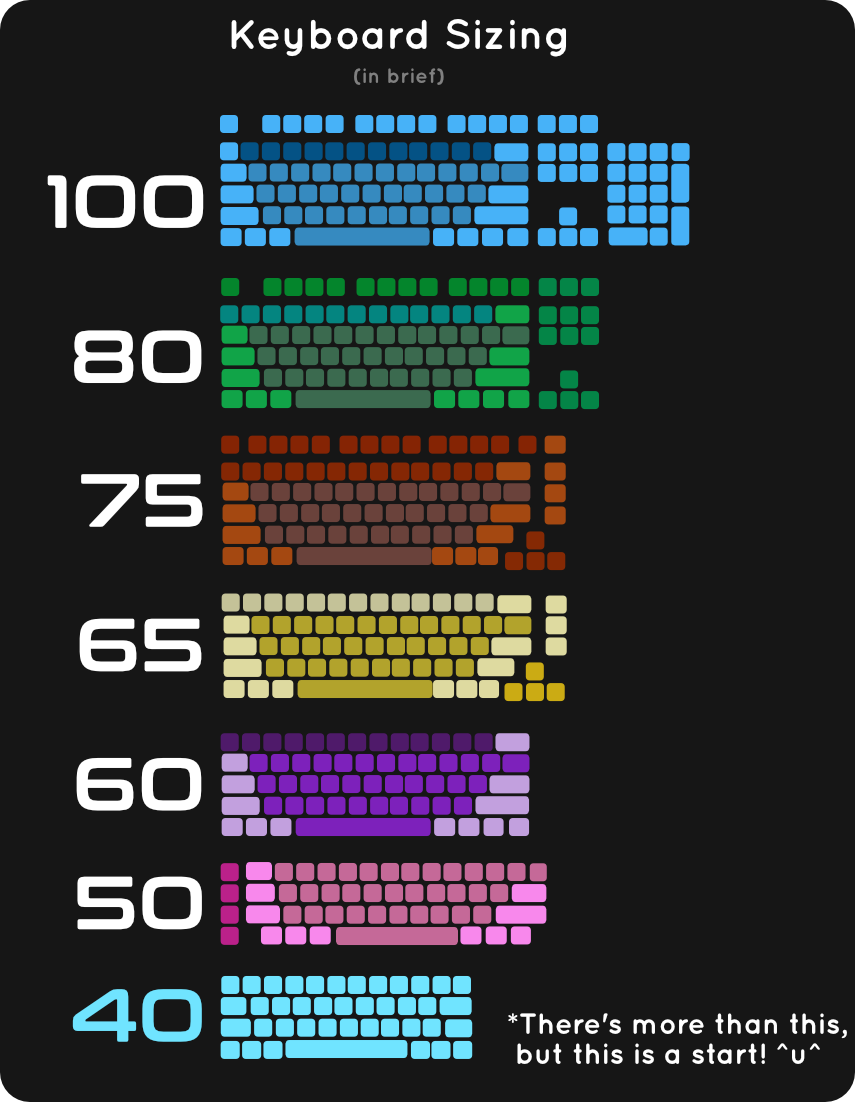
You’ll see a lot of percentages used to describe the size of a keyboard. A small list for you:
- 100% = full keyboard This has your numpad (short for number pad), function row, arrow/navigation keys and alphas, naturally.
- 75% = without numpad, but all the rest of the keys are scrunched together
- 65% = no function row, numpad is absent, but the navigation cluster is smushed up to the right side.
- 60% = Chop off the navigation cluster and arrows from the 65%, and this is what you have.
- 40% = Very smol. This keyboard heavily relies on layers for its usability.
There's more granular detail to sizing, but this is for starting and getting some basics under your belt.
Once you hit 40%, it's a good time to talk about your staggered versus ortholinear. Ah! What're those?! It's okay, we'll take it one step at a time.
In a staggered layout, your keyboard keys are in a zigzag arrangement from row to row. The letter "V" is placed between and below the letters F and G, for example.
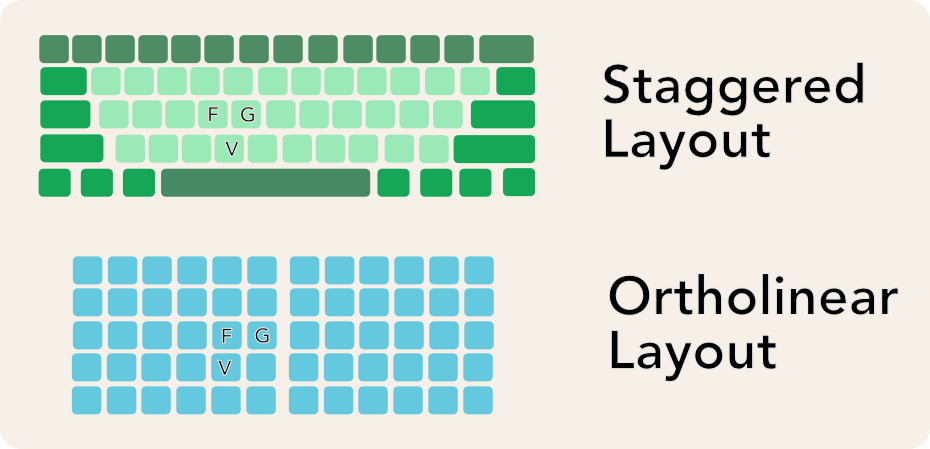
Whereas on an ortholinear layout, the V is situated directly under letter F, and B is under letter G. Ortholinear designs rose up to say that human fingers are not entirely meant to move side to side, but rather up and down.
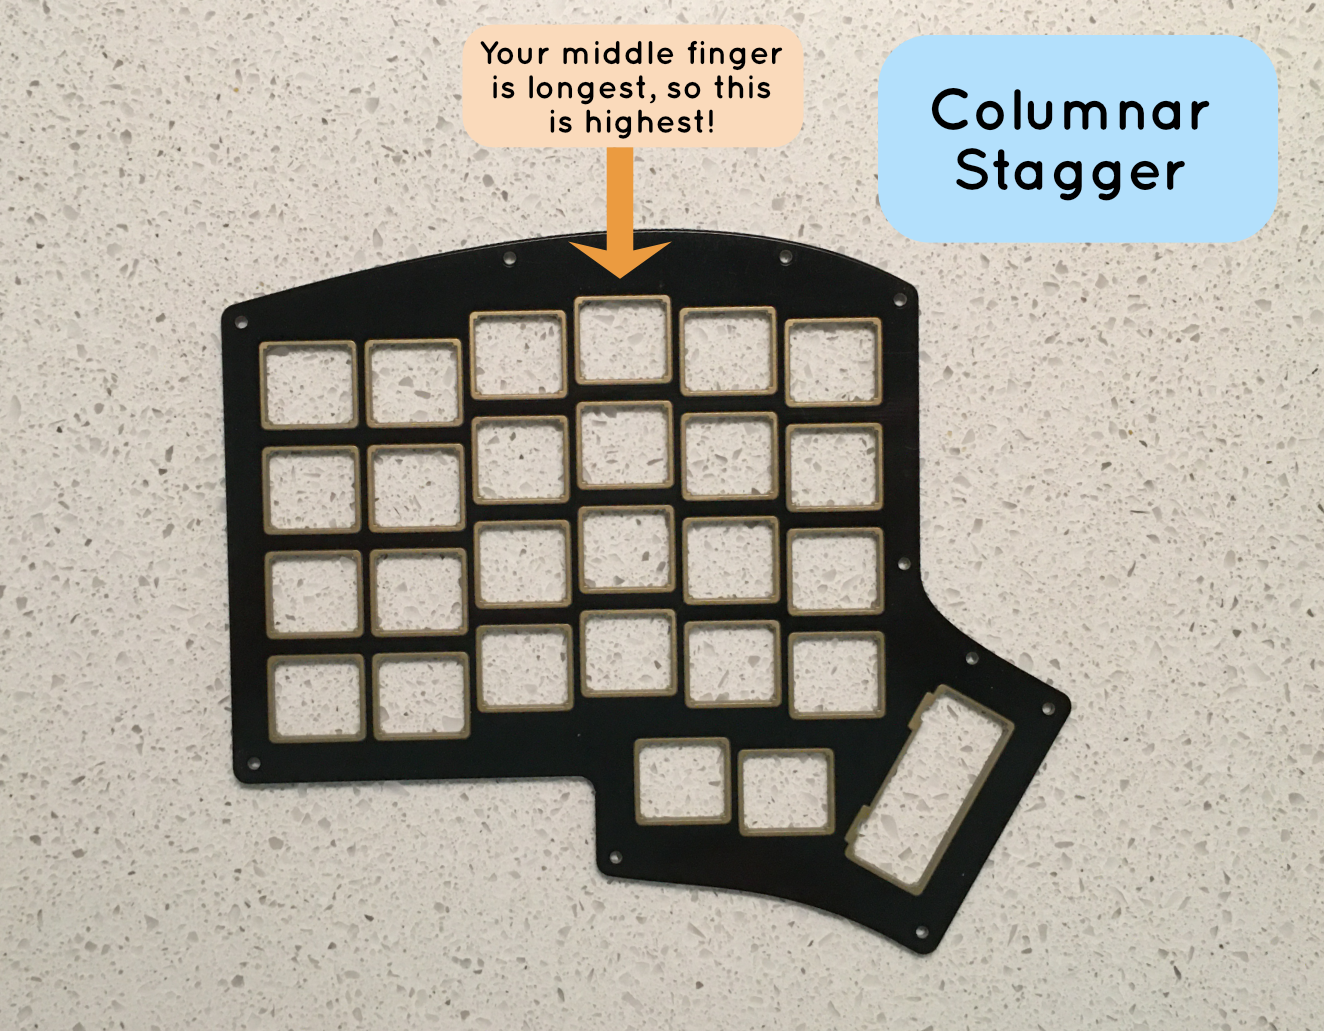
While on the other hand, if a keyboard has each of the columns catering to the different lengths of your fingers that is column stagger. The Keebio Iris is a great example of this.
Another development in keyboards came from the awkward wrist bend that can occur from a 40% keyboard. Let's talk split keyboards.
Split Keyboards
The biggest reason behind split keyboards is typing comfort. A spot for your cat to sit between your typing halves is a bonus. Typing comfort comes from allowing a natural distance between your hands. If your hands are scrunched together, you may be bending them awkwardly to make use of a standard unibody (non-split) keyboard like below.
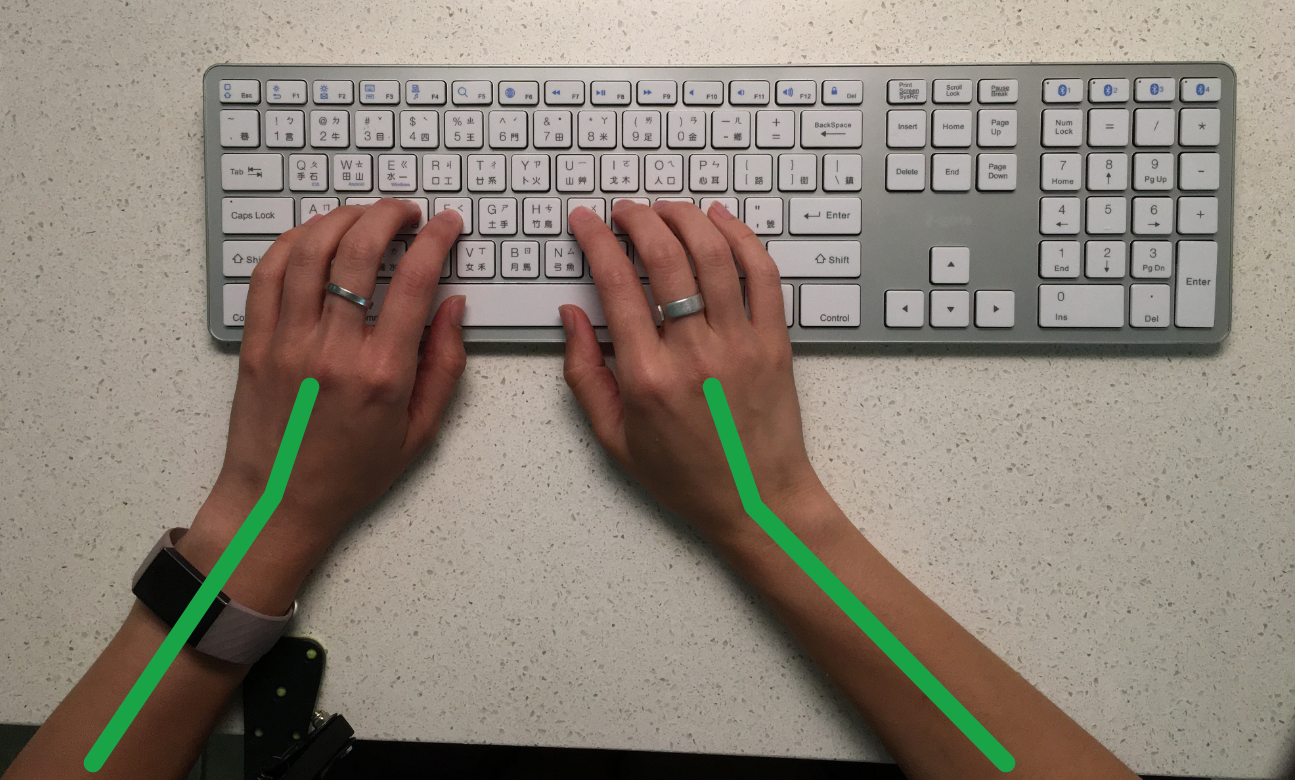
Many people take it as a granted that’s how keyboards just are, but consider: if you’re here, you are looking to expand your viewpoint on the world of typing. Spending so many hours daily typing, it is worth considering different ways to make it more comfortable and sustainable with less pain to be dogged by. (Because we all know doggies are great at making sad faces while you eat.)
Let your arms rest naturally at your sides. Ah. Feels nice, right? Your arms relaxed at your sides (but on your desk) is achievable with your keyboard setup. The common keyboard that comes with a computer doesn’t give you that relaxed distance. And that distance is one of the goals with a split keyboard: for your body to be in its natural position. Tenting takes this concept even further, so put a pin in that, we’ll come back to it.
By typing in a more natural position, you’re reducing strain on your shoulders and neck. The idea of not hunching over a keyboard seems nice, yes? Now to talk about the critical pieces that makes up your keyboard: switches!
Switches
With so many switches under the lovely mechanical keyboard umbrella, I'll stick to covering the ones Keebio carries in-house here.
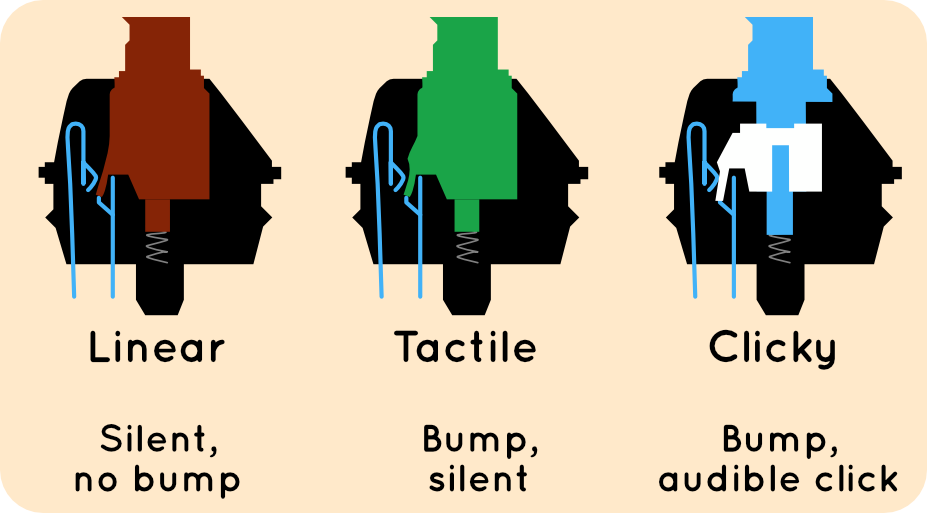
Switches can dictate how your keyboard feels to your hands and your wrists. Switches are linear, clicky, tactile, or a combination of clicky and tactile. For all kinds of switches, the grams of force needed to actuate (get the switch to send data to the computer) the switch can vary.
 Keebio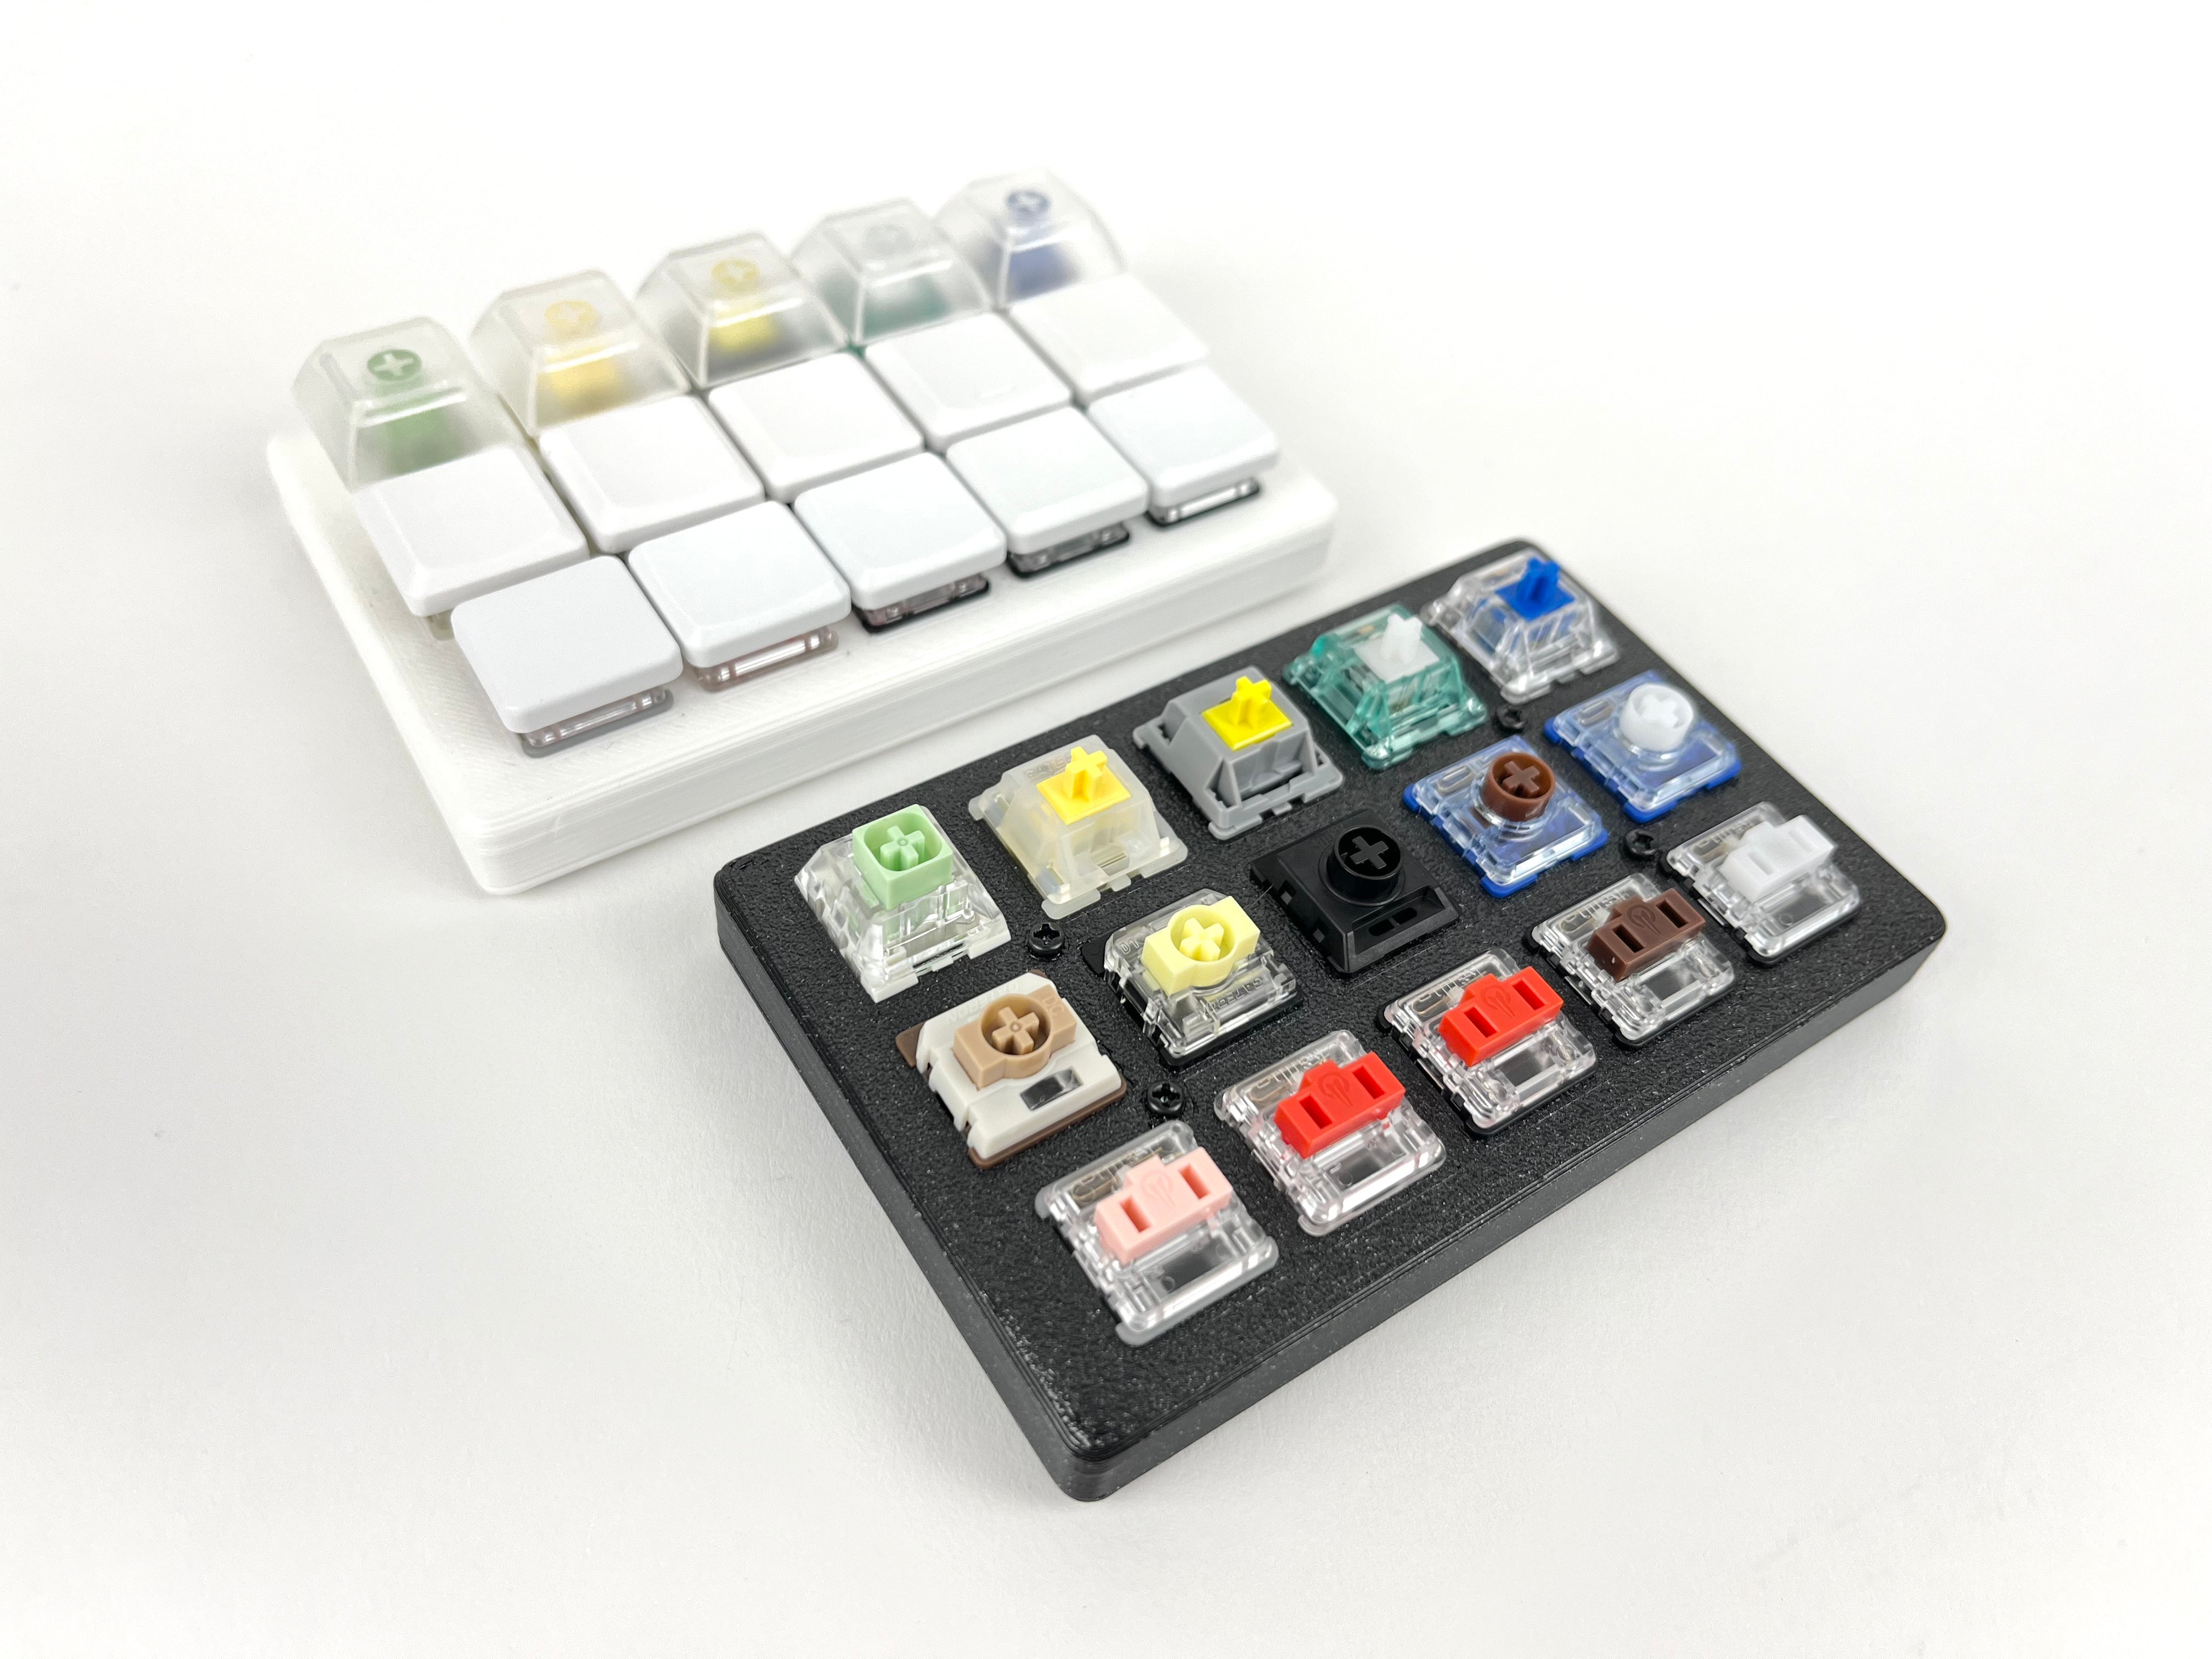
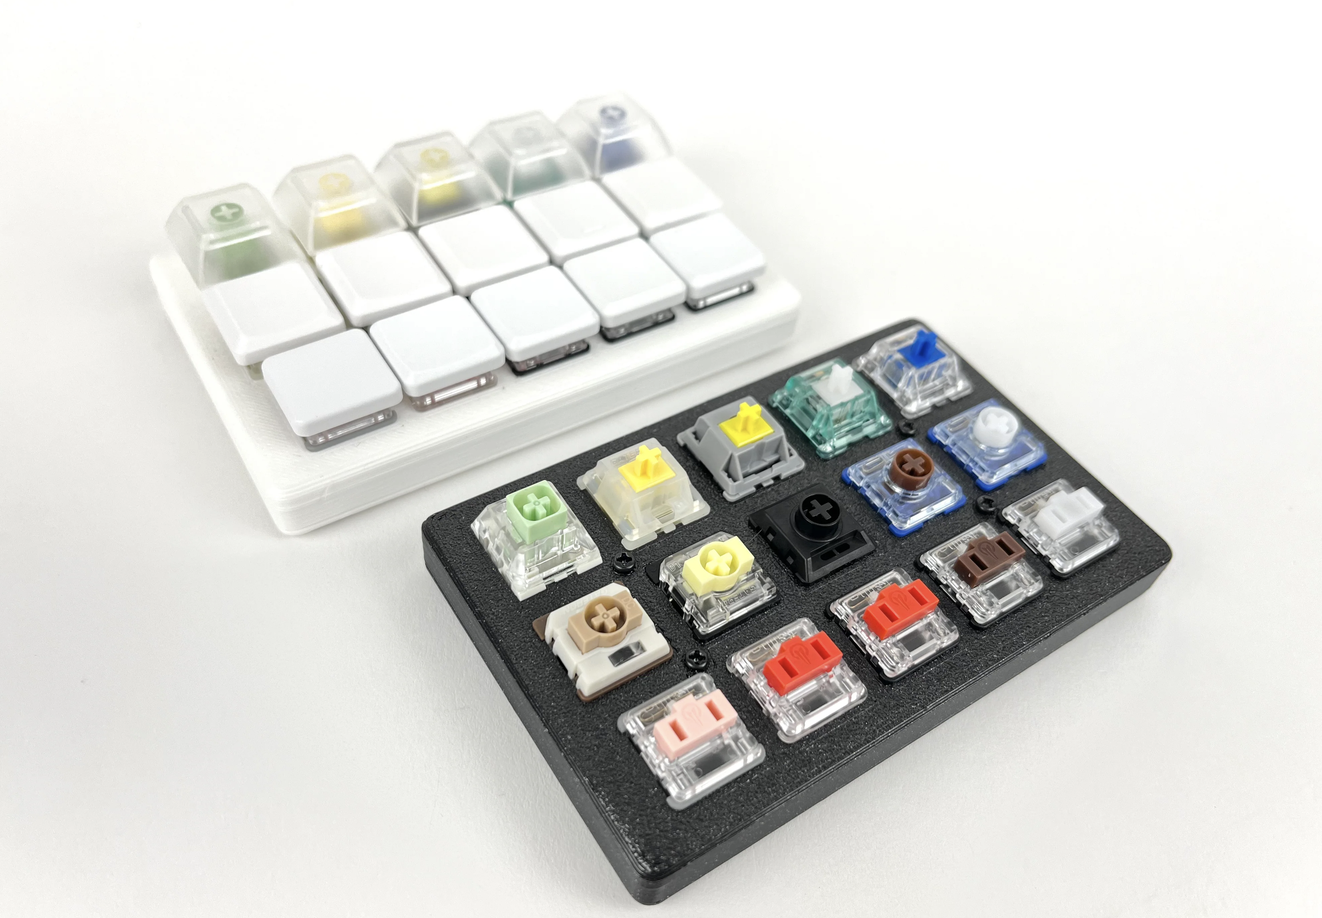
Keebio carries one of each kind most of the time (if we're out of something you'd like, email us to check when we're getting another shipment in). Check out switches of three different kinds: MX, Kailh Choc V1, and Kailh Choc V2 on our Switch Tester. And once you know what switch you like best, this is honestly the best fidget. Ever. Well, maybe second only to our PCB keychain swag.
 Keebio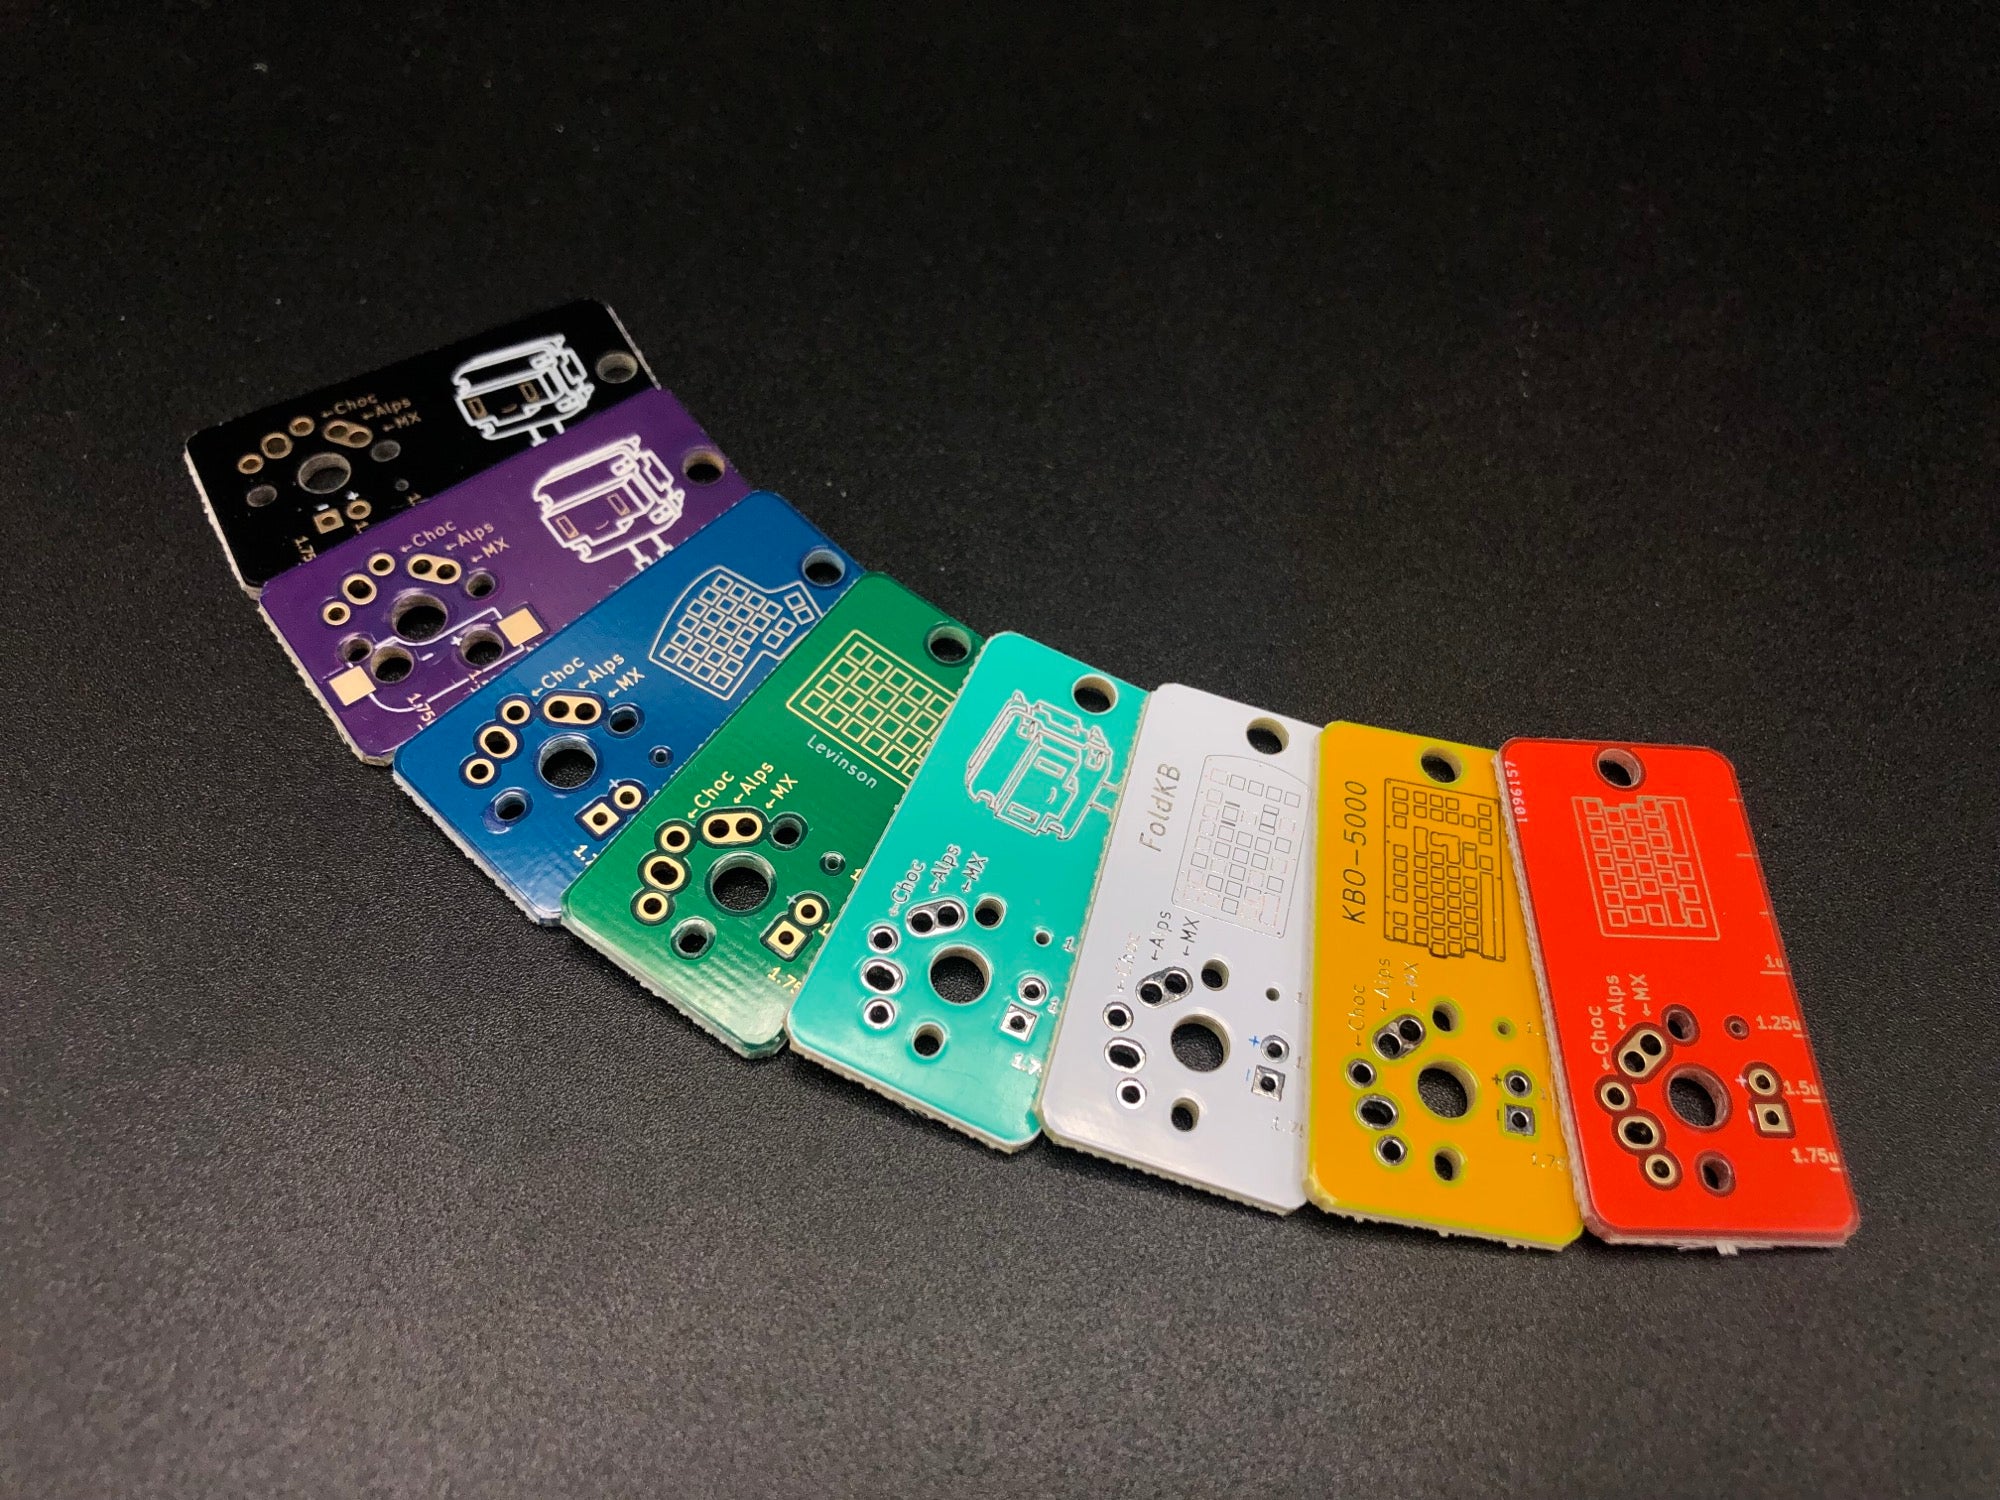
Kailh Choc switches are low-profile. That means a switch takes less pressing to send information to your computer (or whatever device you're hooked up to). Kailh Choc V1 switches have two rectangular slots for keycaps, while Kailh Choc V2 switches have an MX, cross-shaped, stem.
So, does the difference from MX to low-profile matter? Researchers have found that the resistance we put on our fingertips matters. You can choose your switches to best meet your needs. Maybe lighter if you have a challenge with CTS, RSIs or hypermobility, or a bit heavier if accidental keypresses are a concern. And if those worries aren't on your mind, going for the switch that just feels good can be reason enough to build your board based on it.
Our MX lineup consists of the clicky Kailh Box Jades, the linear Durock Milky Yellows, the tactile Durock Sunflowers, the silent tactile Durock Shrimps, and the linear Durock Dolphin switches.
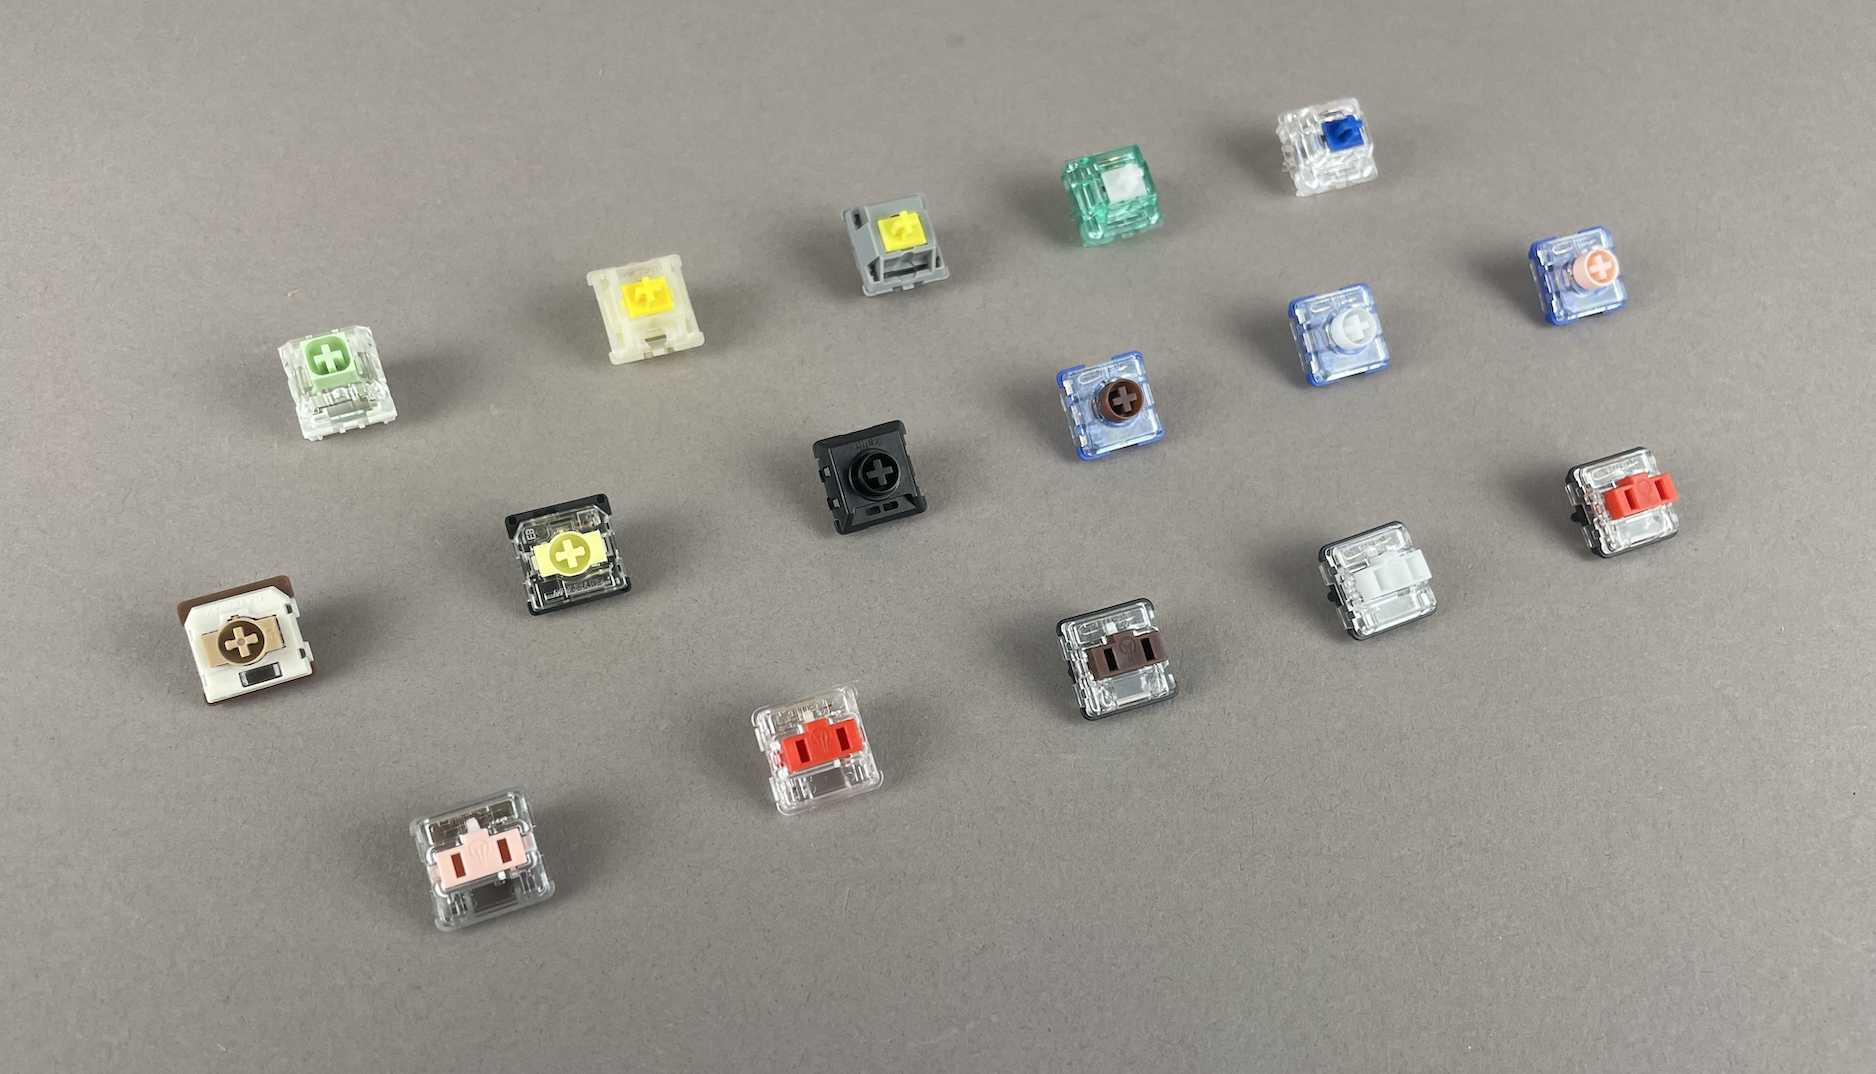
Our Kailh Choc V2 switches are our newest switches we offer! Here's a little on each of them:
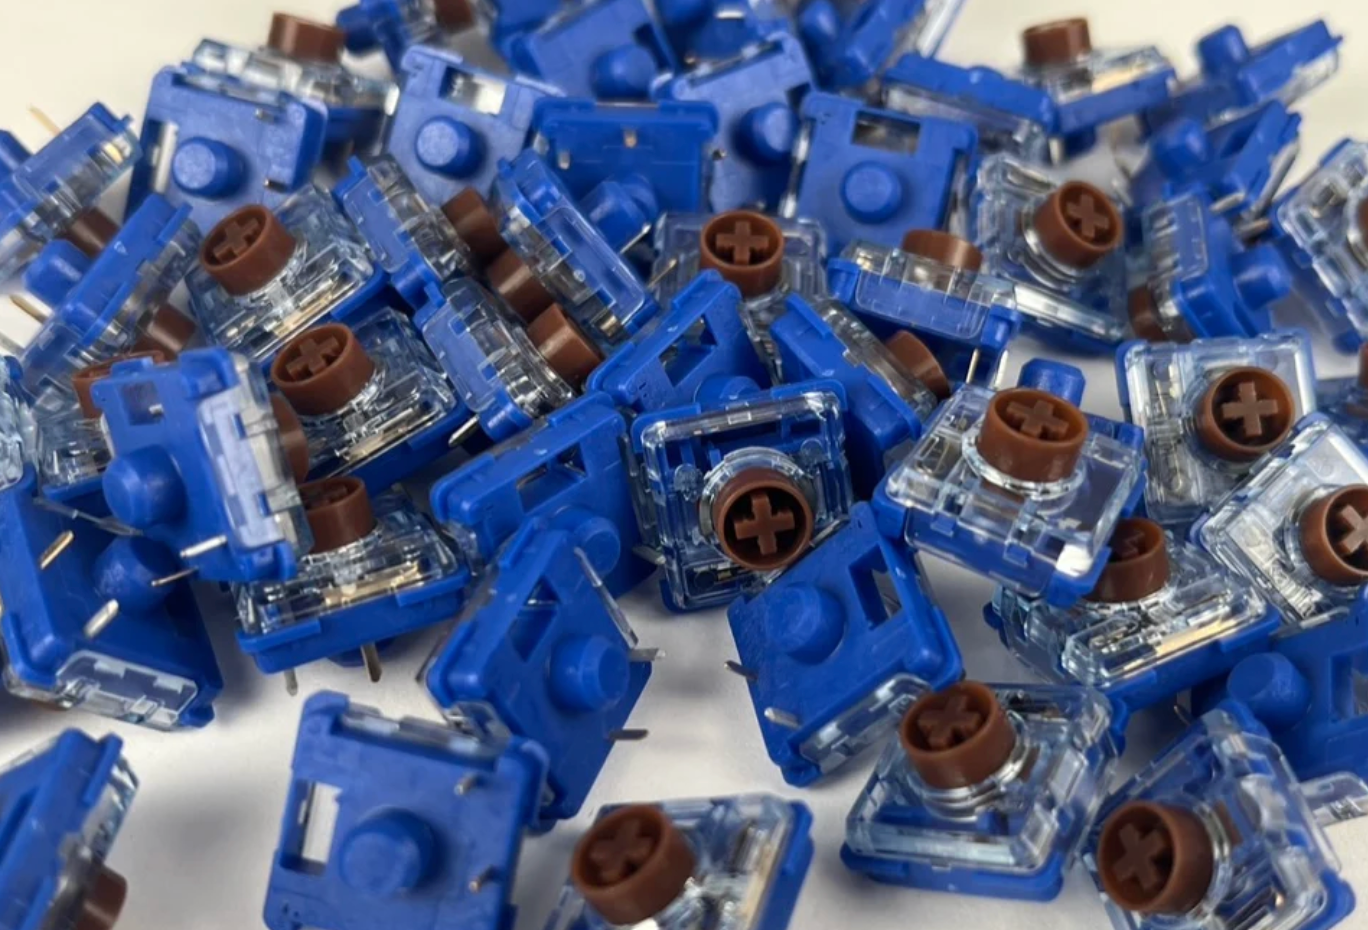
Deep Sea Mini Whales
These Mini Whales are best for anyone who wants a bit of tactile feedback with a near-silent press: a solid all-around default.
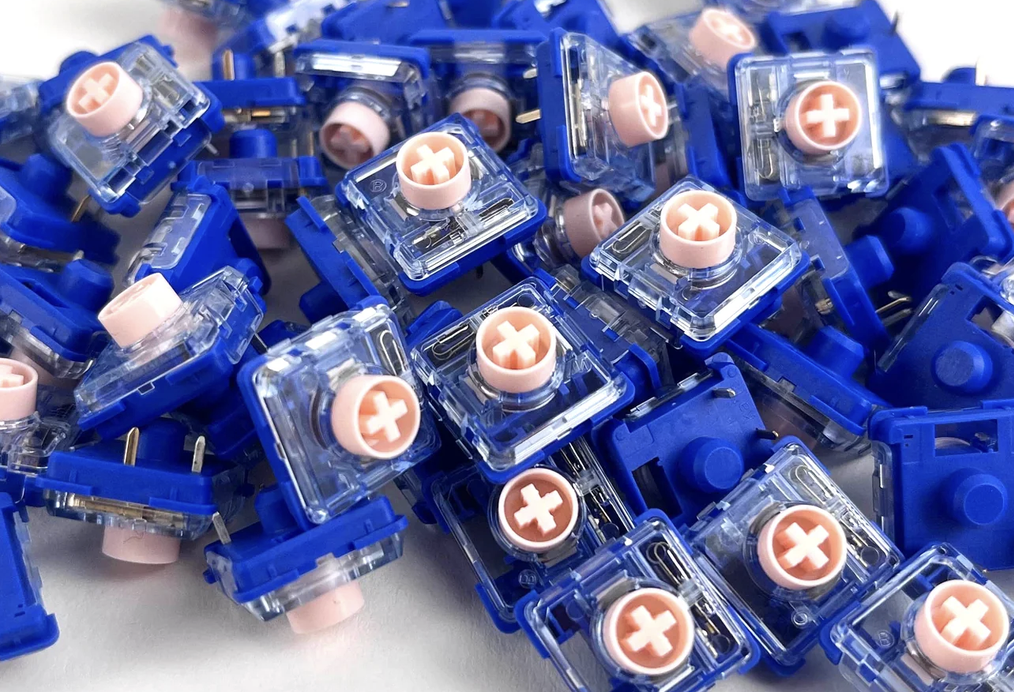
Deep Sea Mini Pink Islands
Continuing with our aquatic trend, these Pink Island linears are great for hands dealing with strain or fatigue that need the lightest possible press to get through a long typing session. (Author's note: I had a bad spell of CTS, and these were a huge help when I could finally type in little bursts again! What helps each person with CTS is different, but the Pink Islands did a huge favor for my fragile wrists.)
 Keebio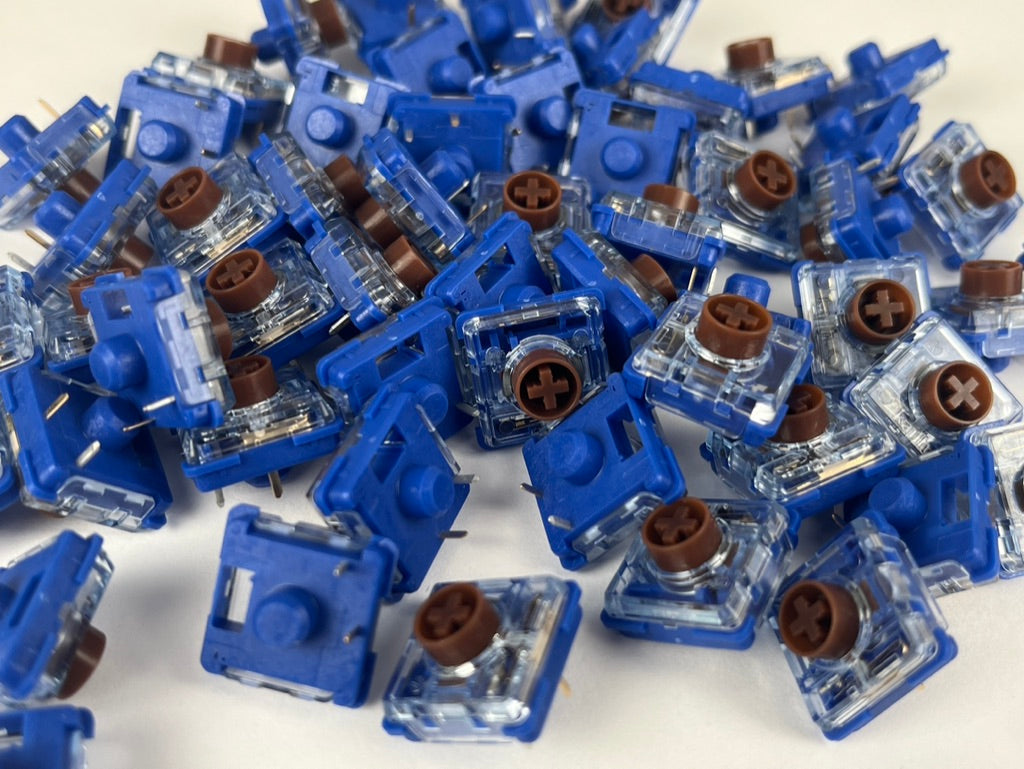
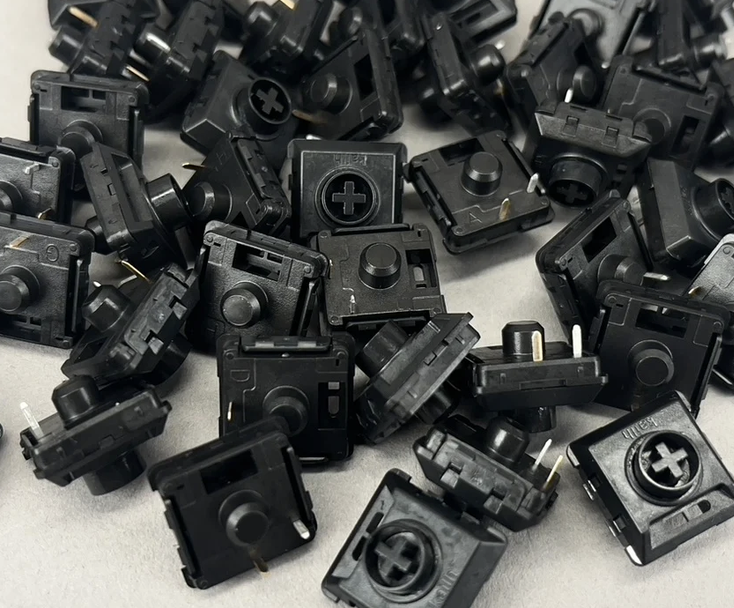
Black Clouds
Indeed, our black sheep of our naming convention, these have a full POM stem, housing and bottom that will give you years of tactile typing without worry. These aren't silenced like the other Kailh V2s we carry, so you can have a little more typing auditory feedback with these friends.
 Keebio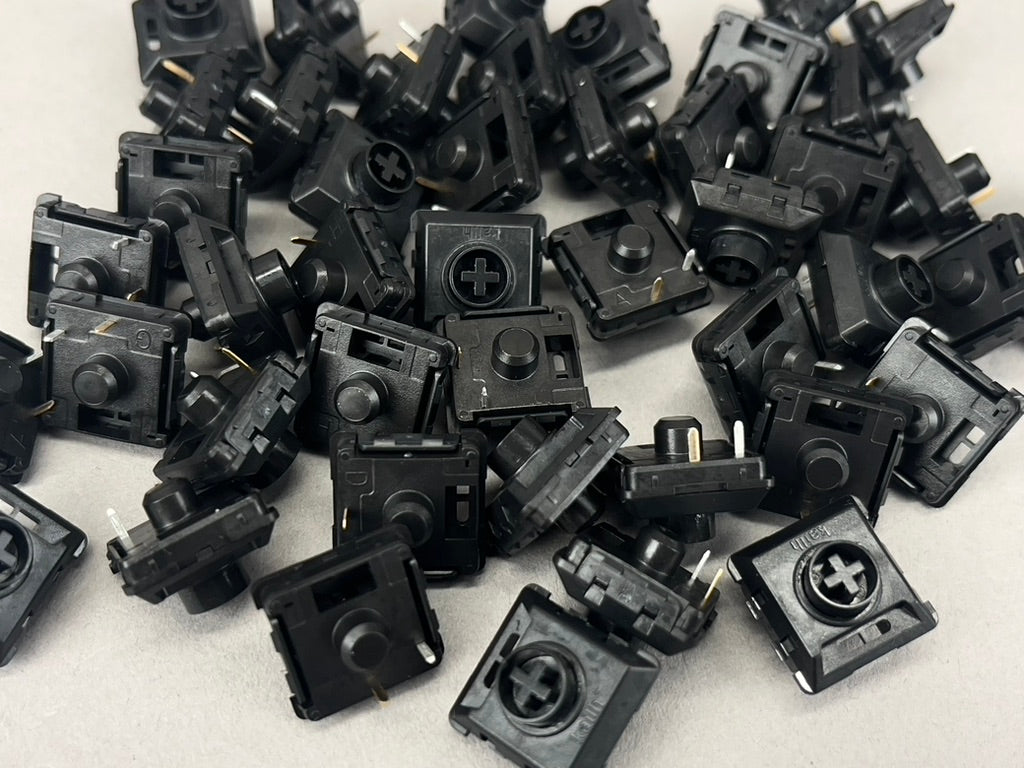
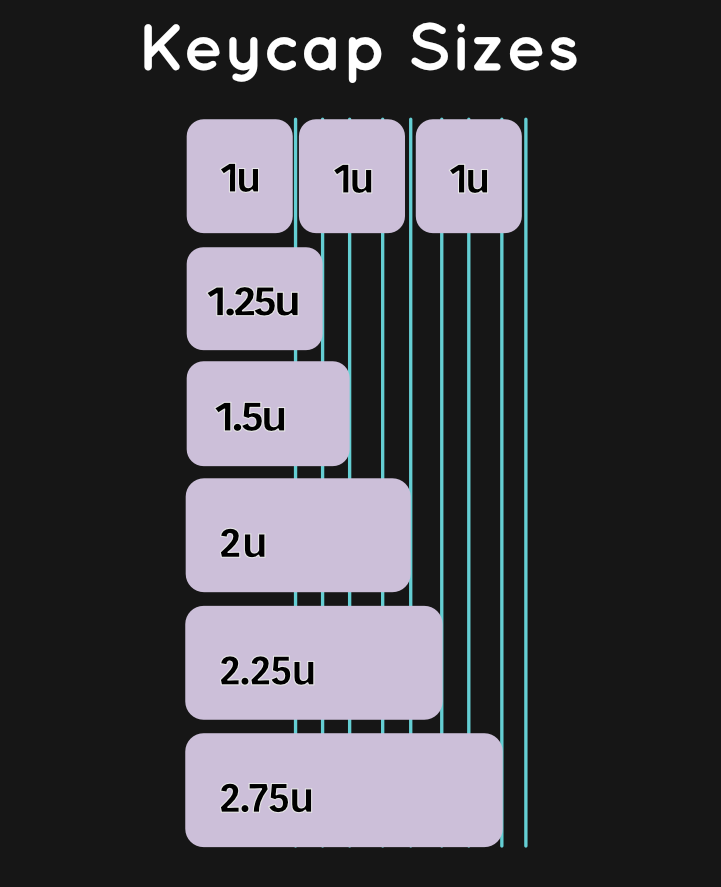
2.25u, 1u, so many u’s!
The small u that follows some numbers that you see is telling you the size of the keycap that will go over the switch. 1u is the smallest, and 7u or 8u are the biggest, depending on the keyboard you’re looking at. (Those big ones are saved for the spacebar on a unibody keyboard.)
What’s up with tenting?
Tenting is cool. It’s also cool to reduce wrist strain, babyyyy! If you’ve ever been unable to fully use your wrist/hand you know what I mean. Doorknobs become the bane of your existence. Handles are superior! Ahem.
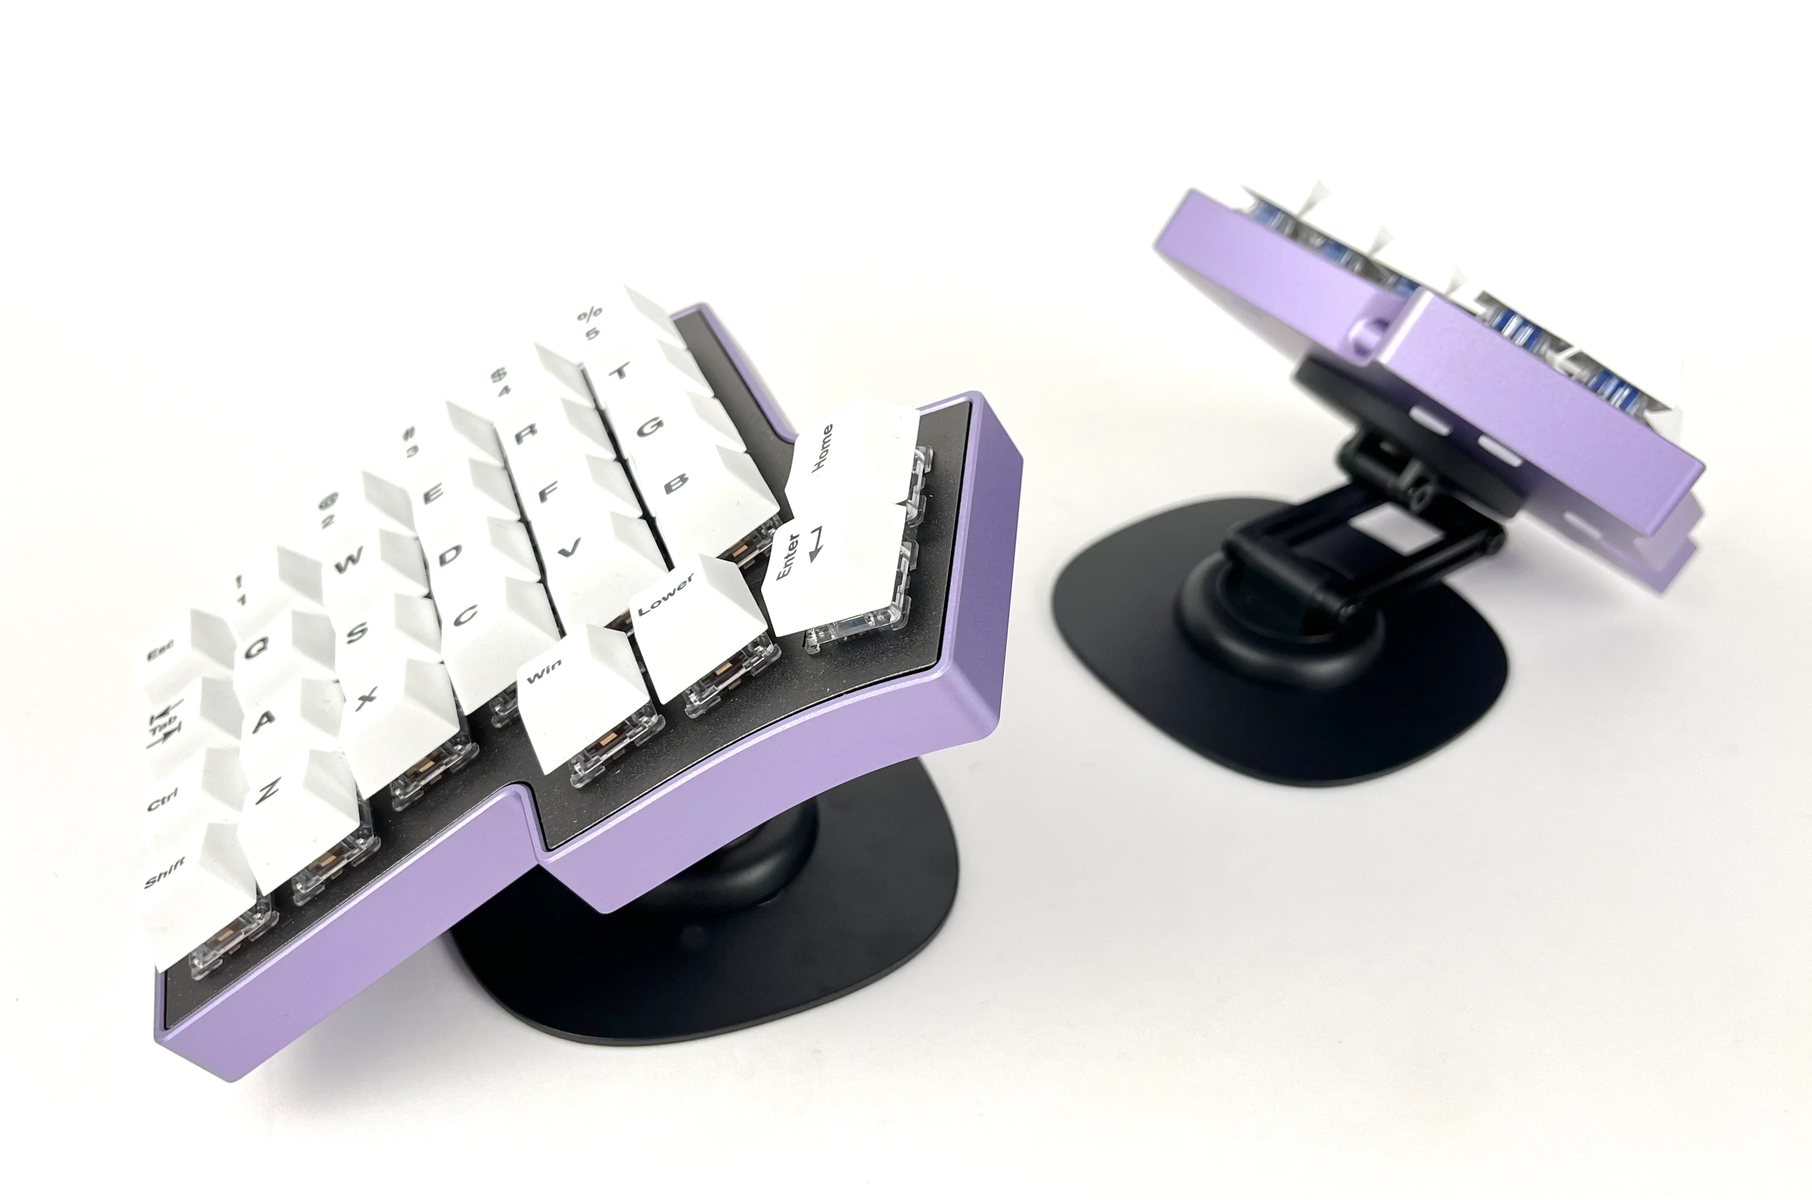
There are easy steps you can take to reduce wrist strain. We talked of natural positioning for the body, right? By angling a keyboard so it is highest toward the center you’re bringing your wrists into a position that is more natural for them.
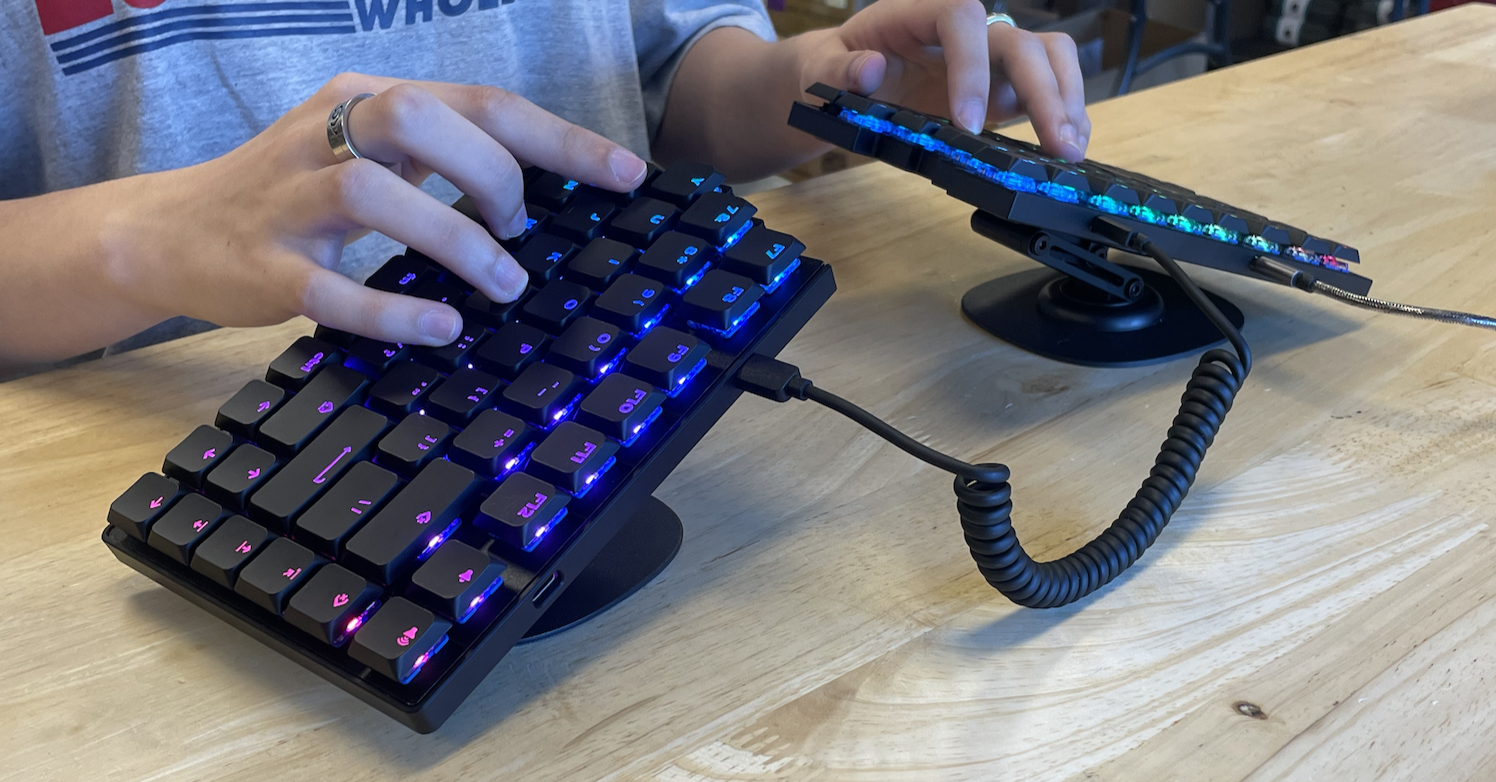
The way the Sinc LM above is positioned is closer to neutral position for your wrists: the angle is raised toward the center, which may alleviate some pressure in your wrists.
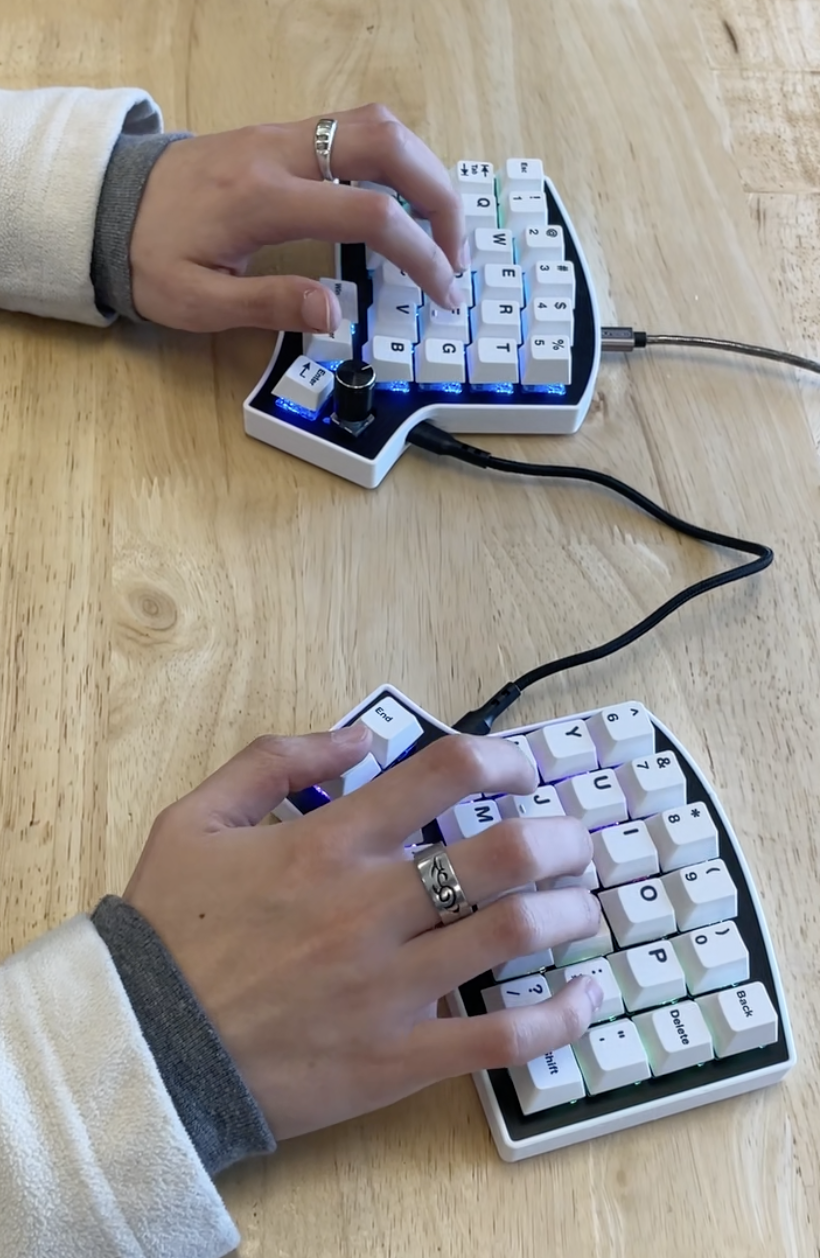
Above is the Iris SE with Emily typing in a fully pronated hand position: the radius is fully twisted over the ulna here.
 Keebio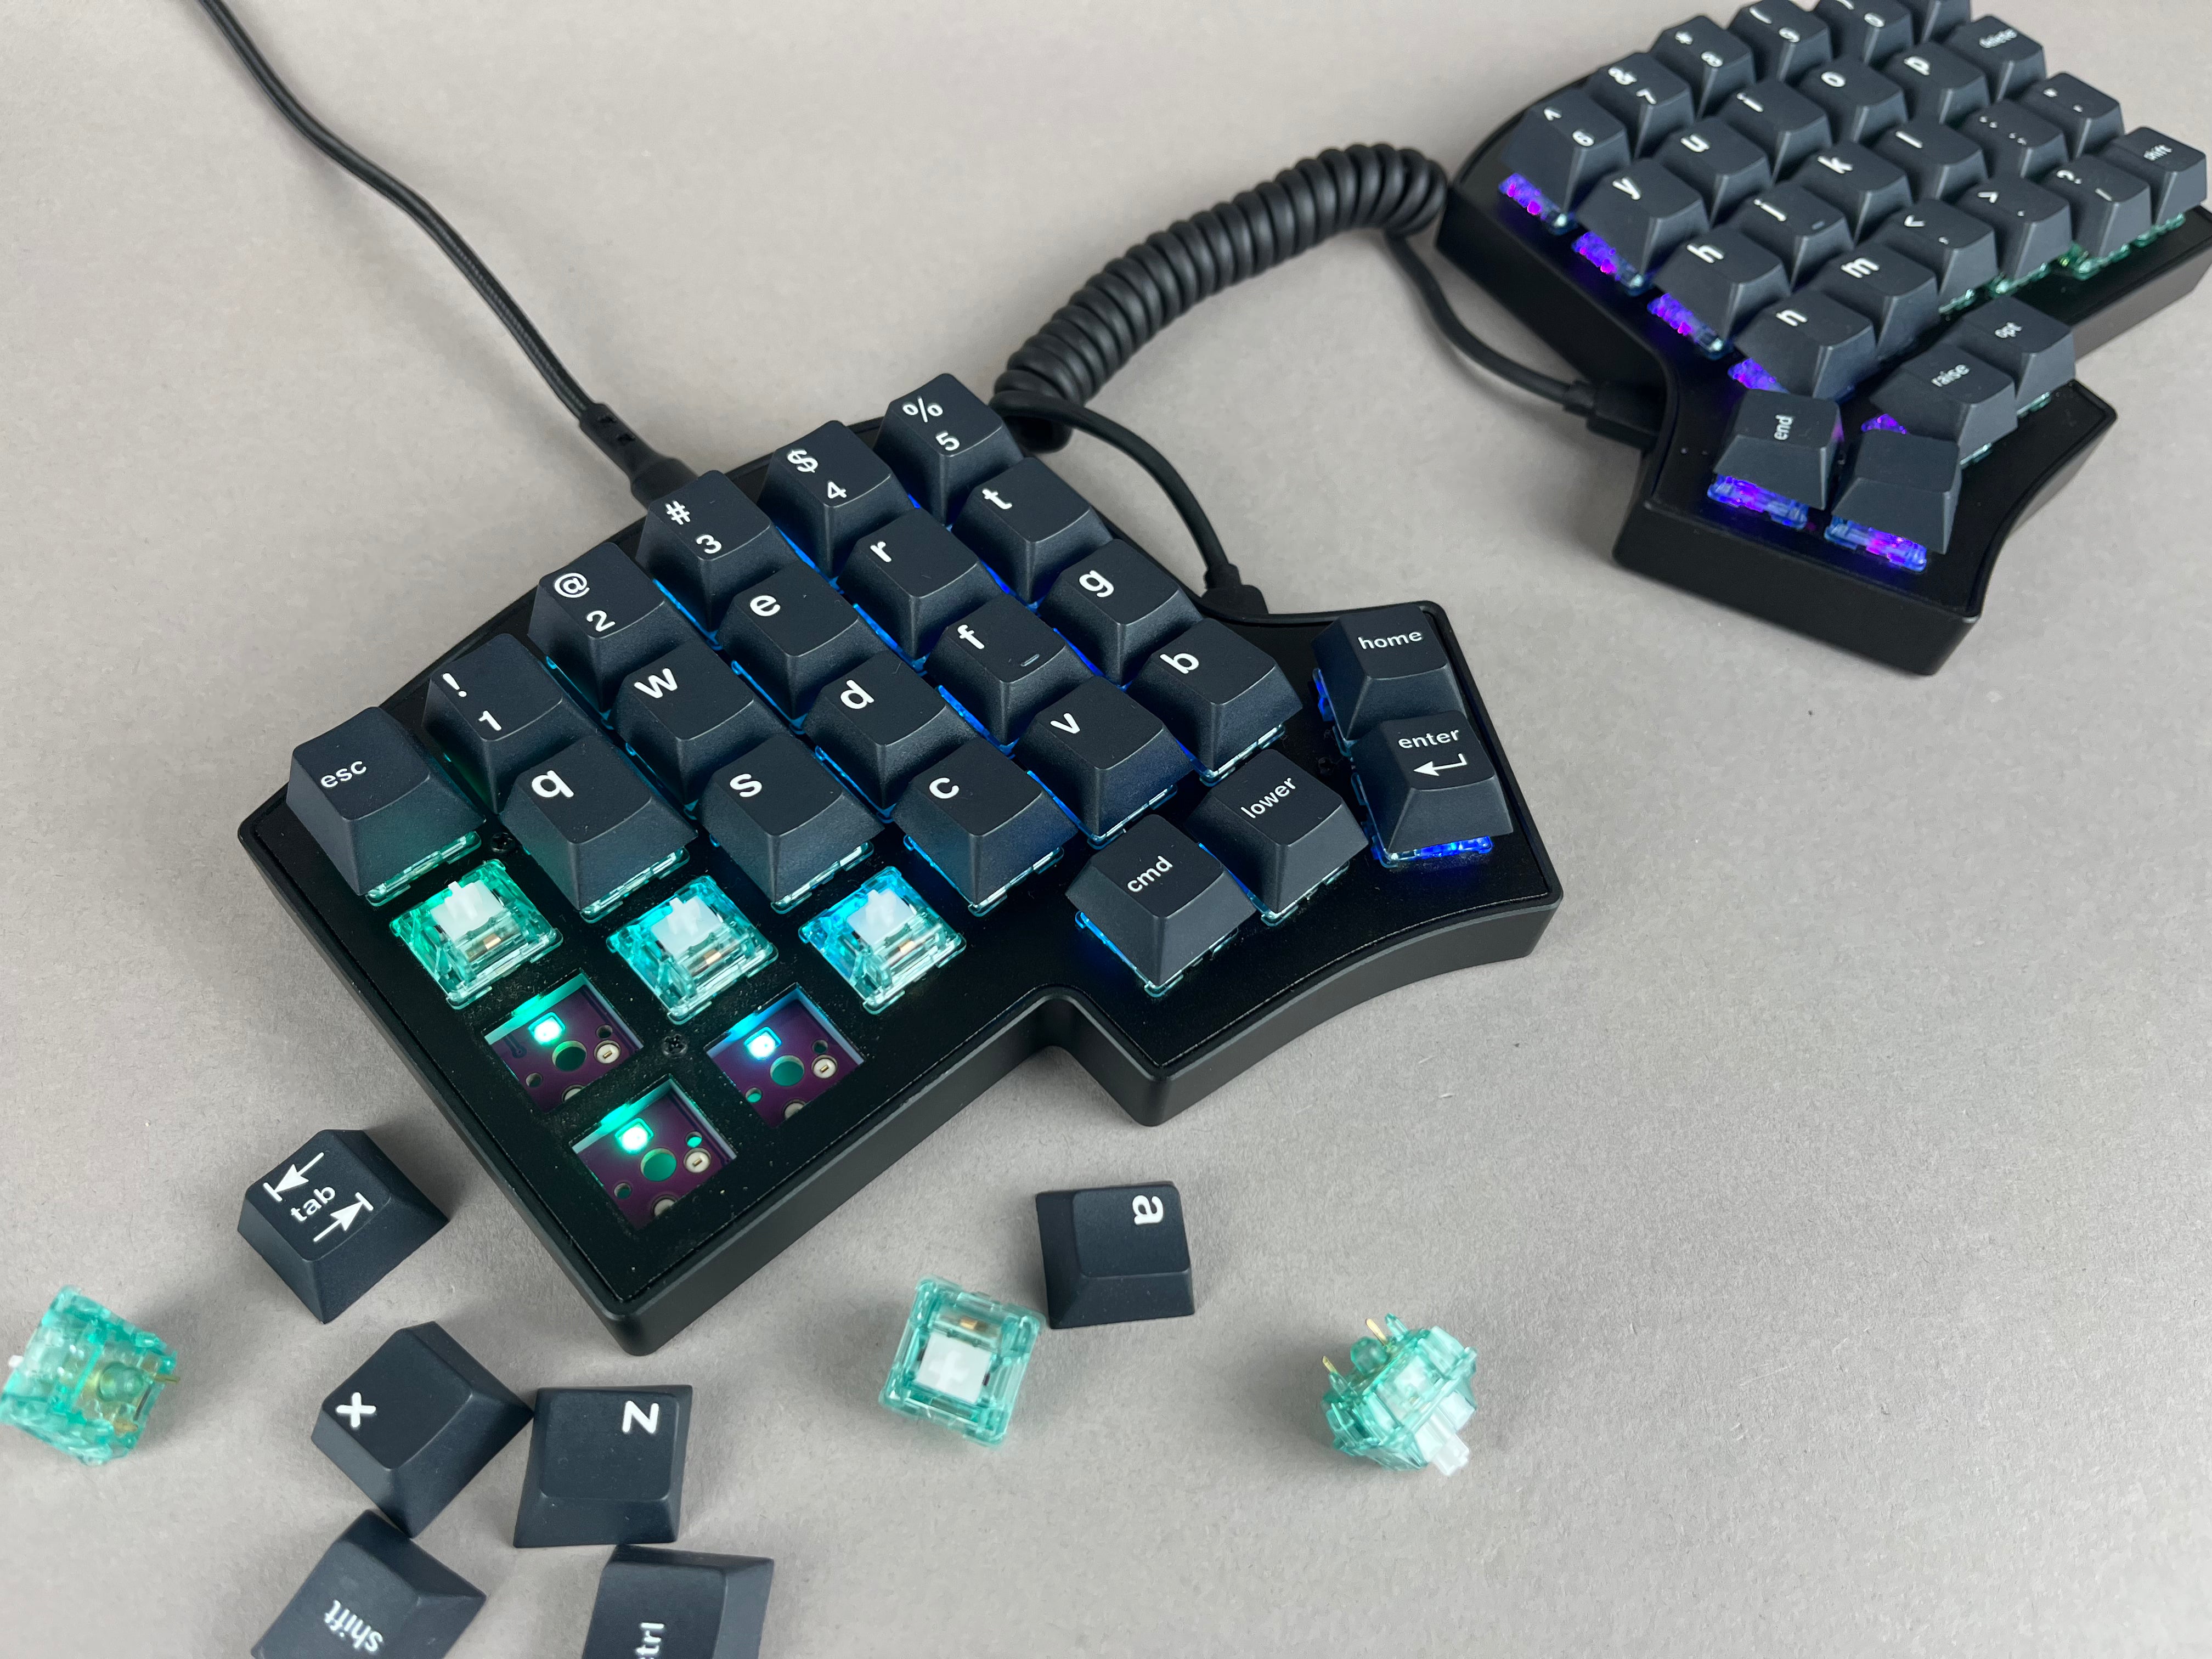
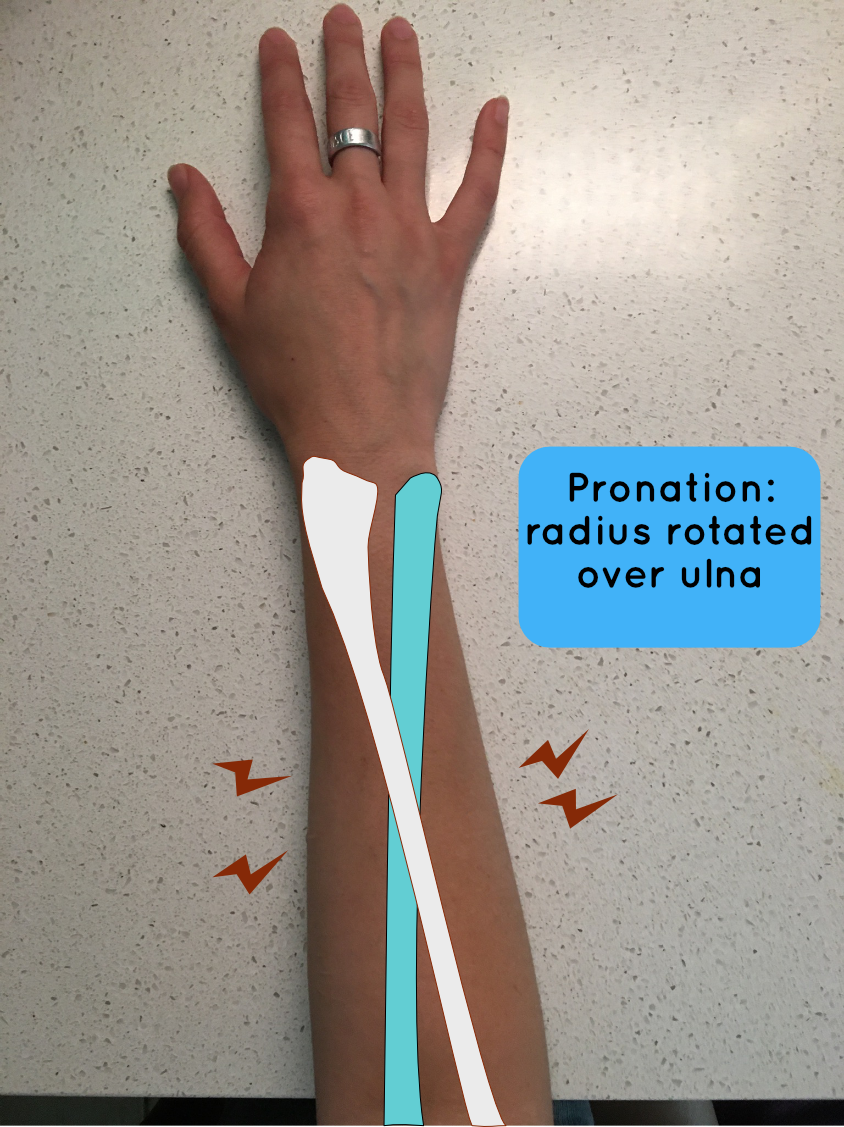
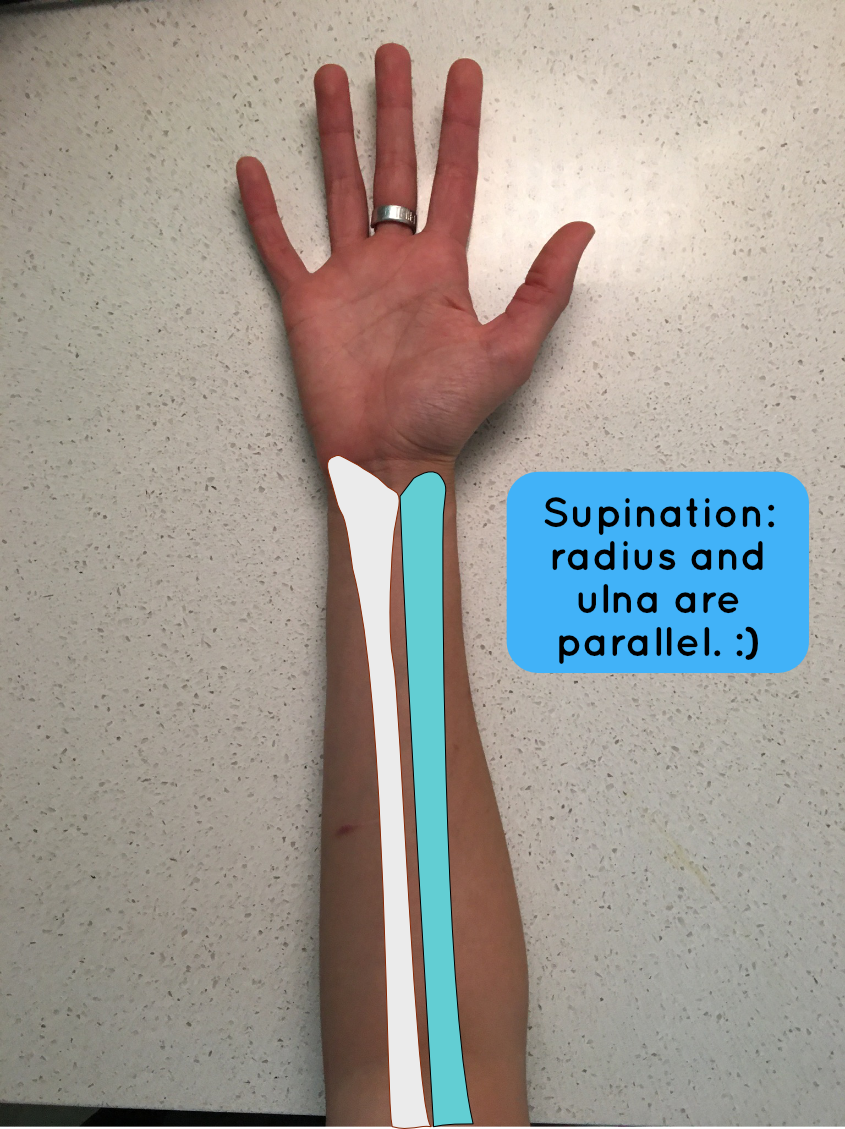
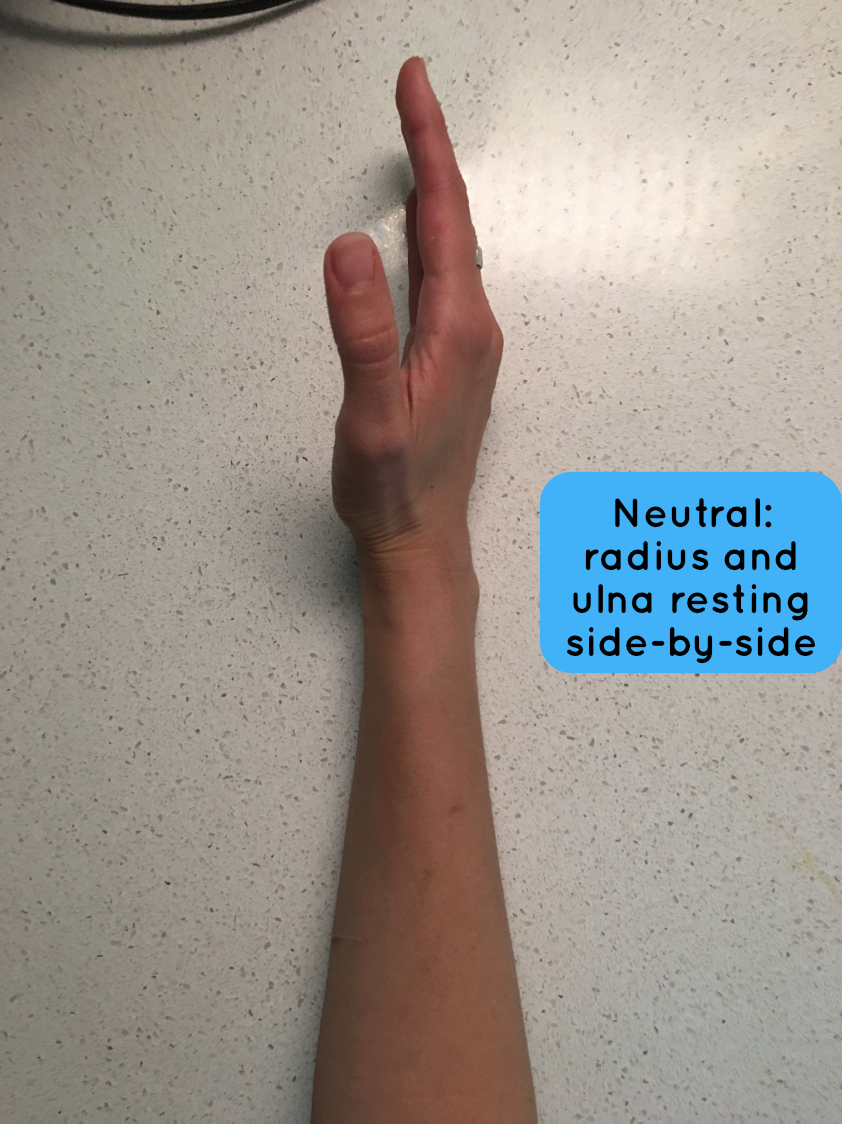
The bones in the forearm are built to overlap. They are, perhaps, not designed to overlap for the hours of typing that people currently do today. It is entirely possible to reduce that strain, and make your keyboard look mega cool.
Vocabulary: know what's what!
What is tenting? How is tenting ergonomic?
Tenting angles your keyboard so that your hands position themselves more closely to their natural resting position. On a flat keyboard, your hands are facing downward. That means one bone in your forearm is twisted over the other. That can cause some pain for some folks. The tenting alleviates the twist by producing an angle closer to the natural resting position of the bones.
What are hotswaps?
Hotswaps are a non-heat connection between the metal pieces of your switches and a board. Meaning: no soldering!
You don't need extra tools to assemble a keyboard if it's got hotswaps. Almost all of ours do, the only exceptions being the BFO-9000, WTF60, Dilly, and DSP40. For the Quefrency, Sinc, Nyquist, and BDN9 soldering is only needed if you're wanting rotary encoders on your board.
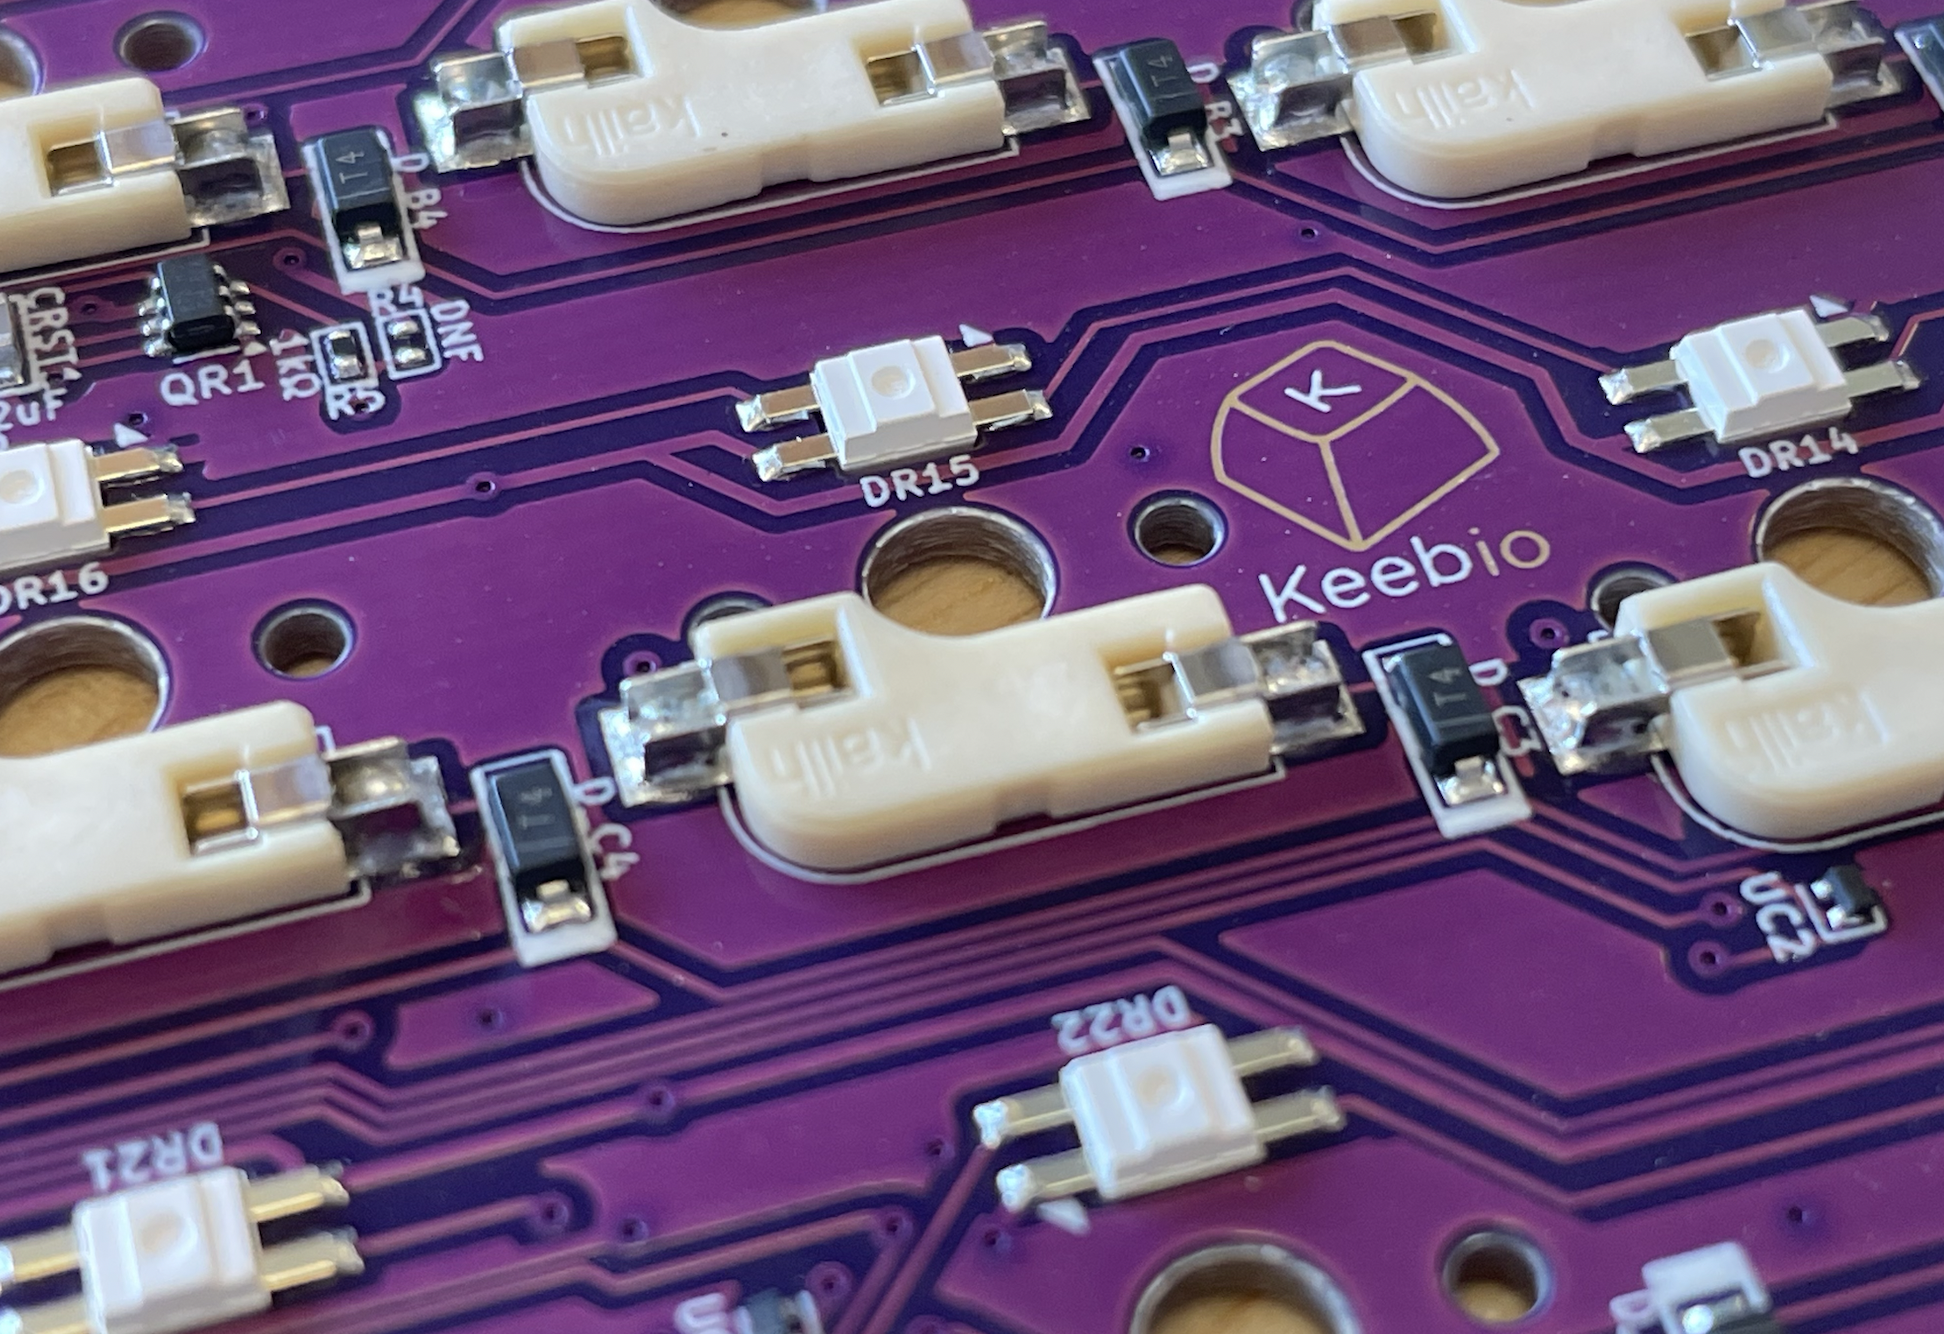
What is FR4?
It’s the material PCBs are made out of. And, incidentally, also makes cool plates to hold your PCB and switches.
What is a macro section? Do I need one?
A macro section offers you more physical keys for hotkeys/keyboard shortcuts. If you're looking for more details on macro stuff, here's a link for you: https://www.gomechanicalkeyboard.com/guides/what-are-keyboard-macros/
What on earth is NKRO?
N-key rollover. Not an instruction to give your pup, but this indicates how many inputs a keyboard can take until it no longer takes inputs.
All our boards have this ability, but you do need to activate it in your firmware.
Too many choices on keycaps! Am overwhelm.
The top things you need to know are that keycaps are made of primarily two different materials. ABS and PBT.
Keycaps from the top row of keys to the bottom row of keys may be shaped differently. Some are contoured to your fingers, and others are not.
Keycaps are made for MX switches and Low-profile switches. Keep in mind that MX, Kailh V1 and Kailh V2 switches need different keycaps! MX switches match to a plus sign shape, Kailh V1 switches match to two rectangles, and Kailh VF2 switches also match to a plus sign shape but only for low-profile.
First Keebio Keyboard, eh?
Rock on! I'll talk about how Keebio boards are different from other shops and direct you to some resources.
Three Ways to a Split Keyboard
Danny, Keebio's founder, breaks a lot of barriers to bring people new models of keyboards. We primarily offer split keyboards but we still have some classy keyboards without splits. Emily is doing some stunning work with Danny for our aluminum cases as well as PCB design! #goteam!
Three pathways to order keyboards from us are to:
1) Order Assembled. Pick out your switches, keycaps, cable and we'll build it for you. When it arrives, unbox, plug in, and enjoy typing comfortably.
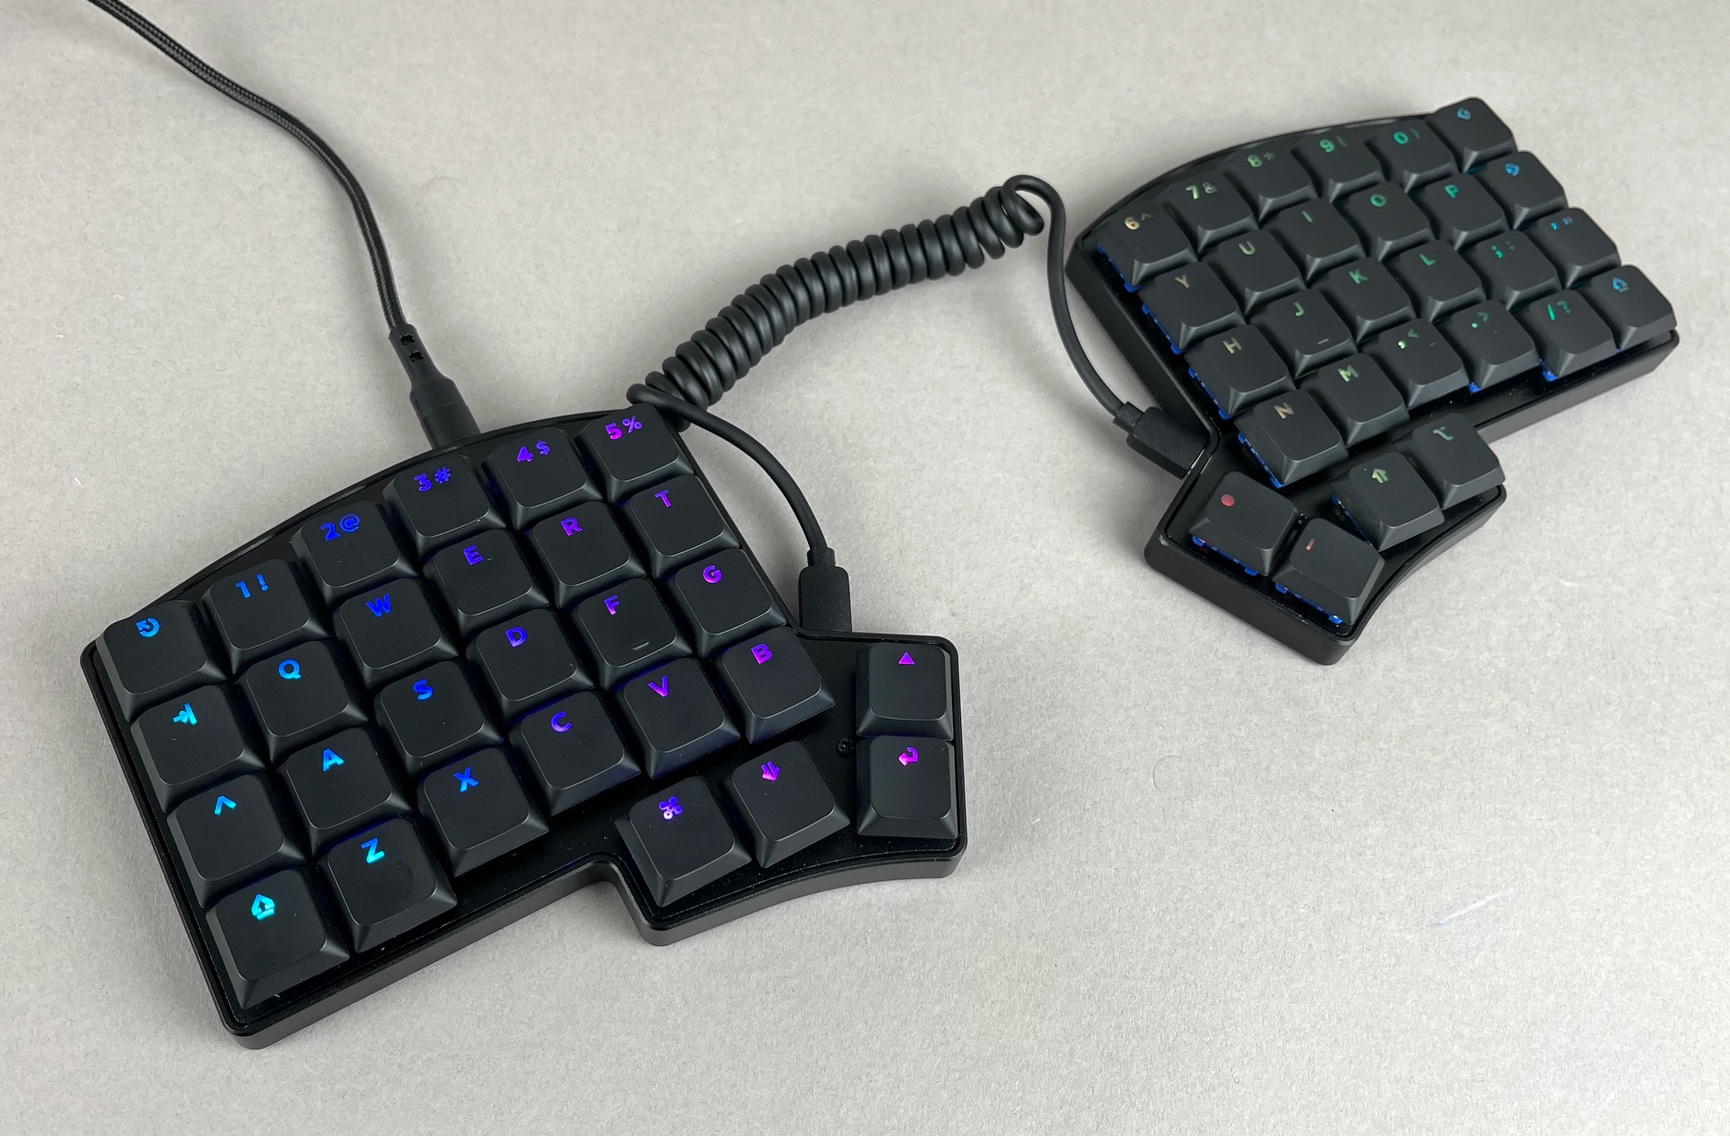
2) Order a Kit. Pick out the same stuff but enjoy the building part too. When it arrives, you'll have all the parts you need to assemble and then plug in to enjoy.
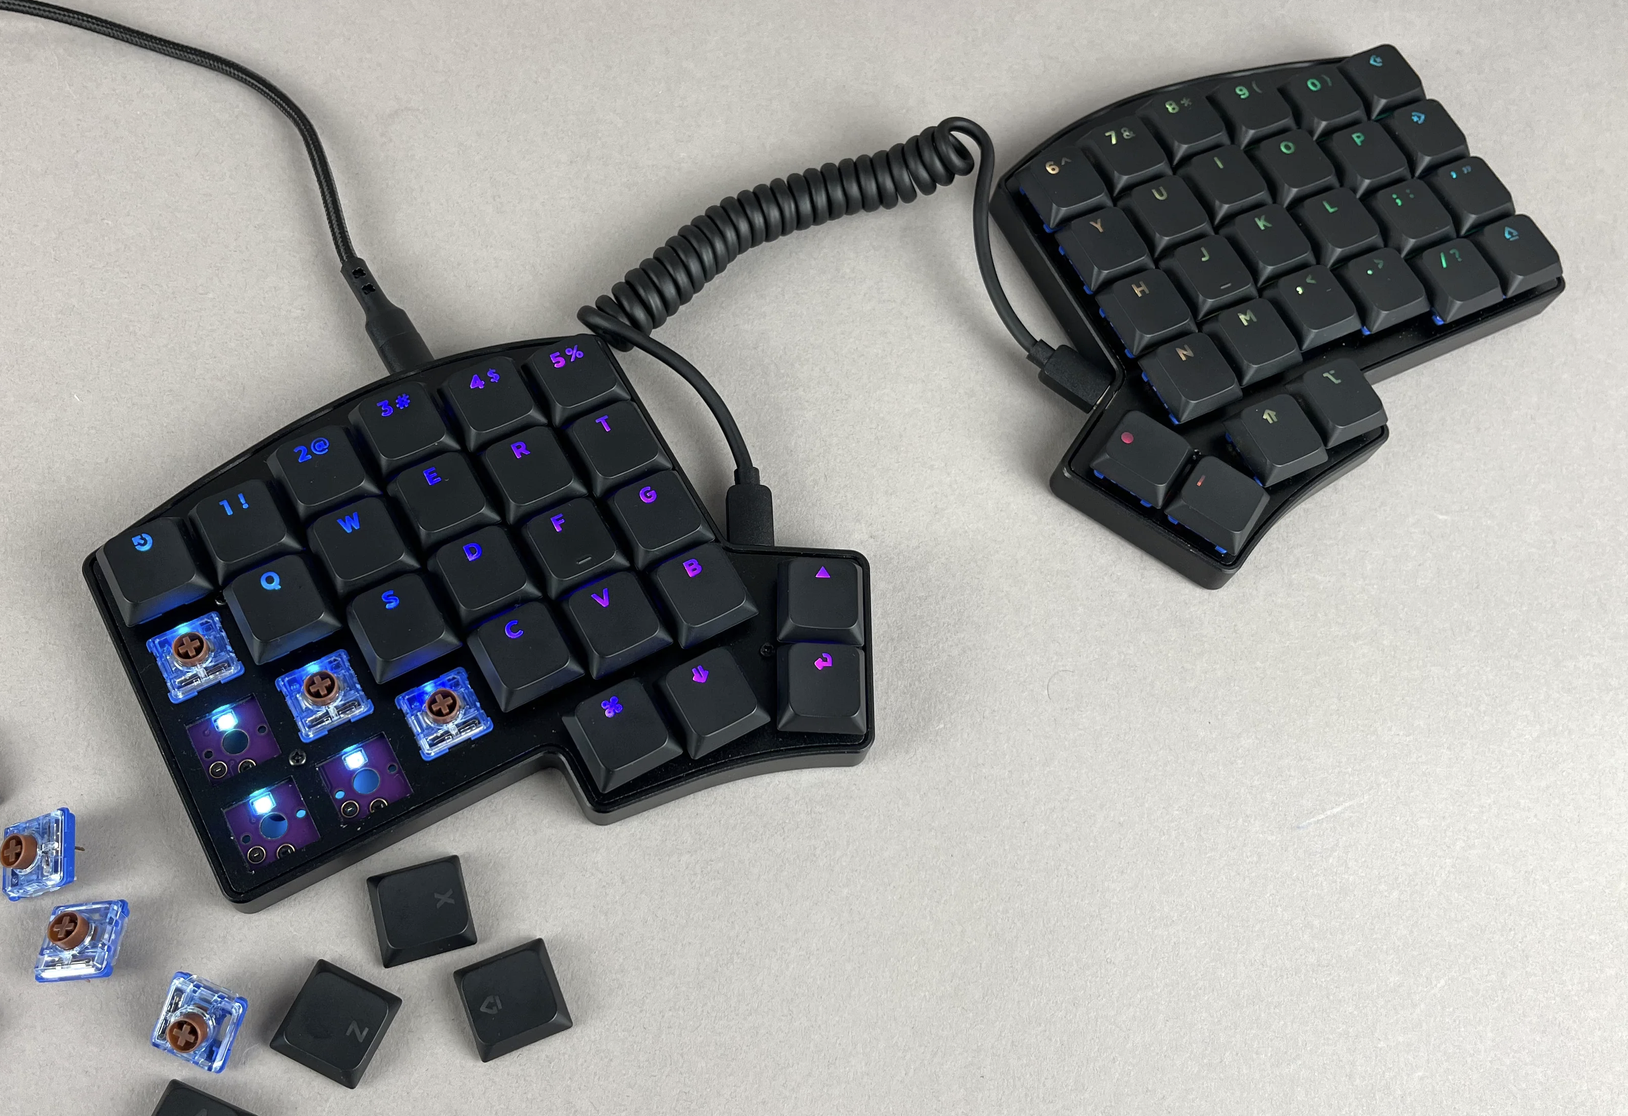
3) Order Barebones. Pick out the keyboard model you want, and then source your other gear elsewhere if that's your jam.
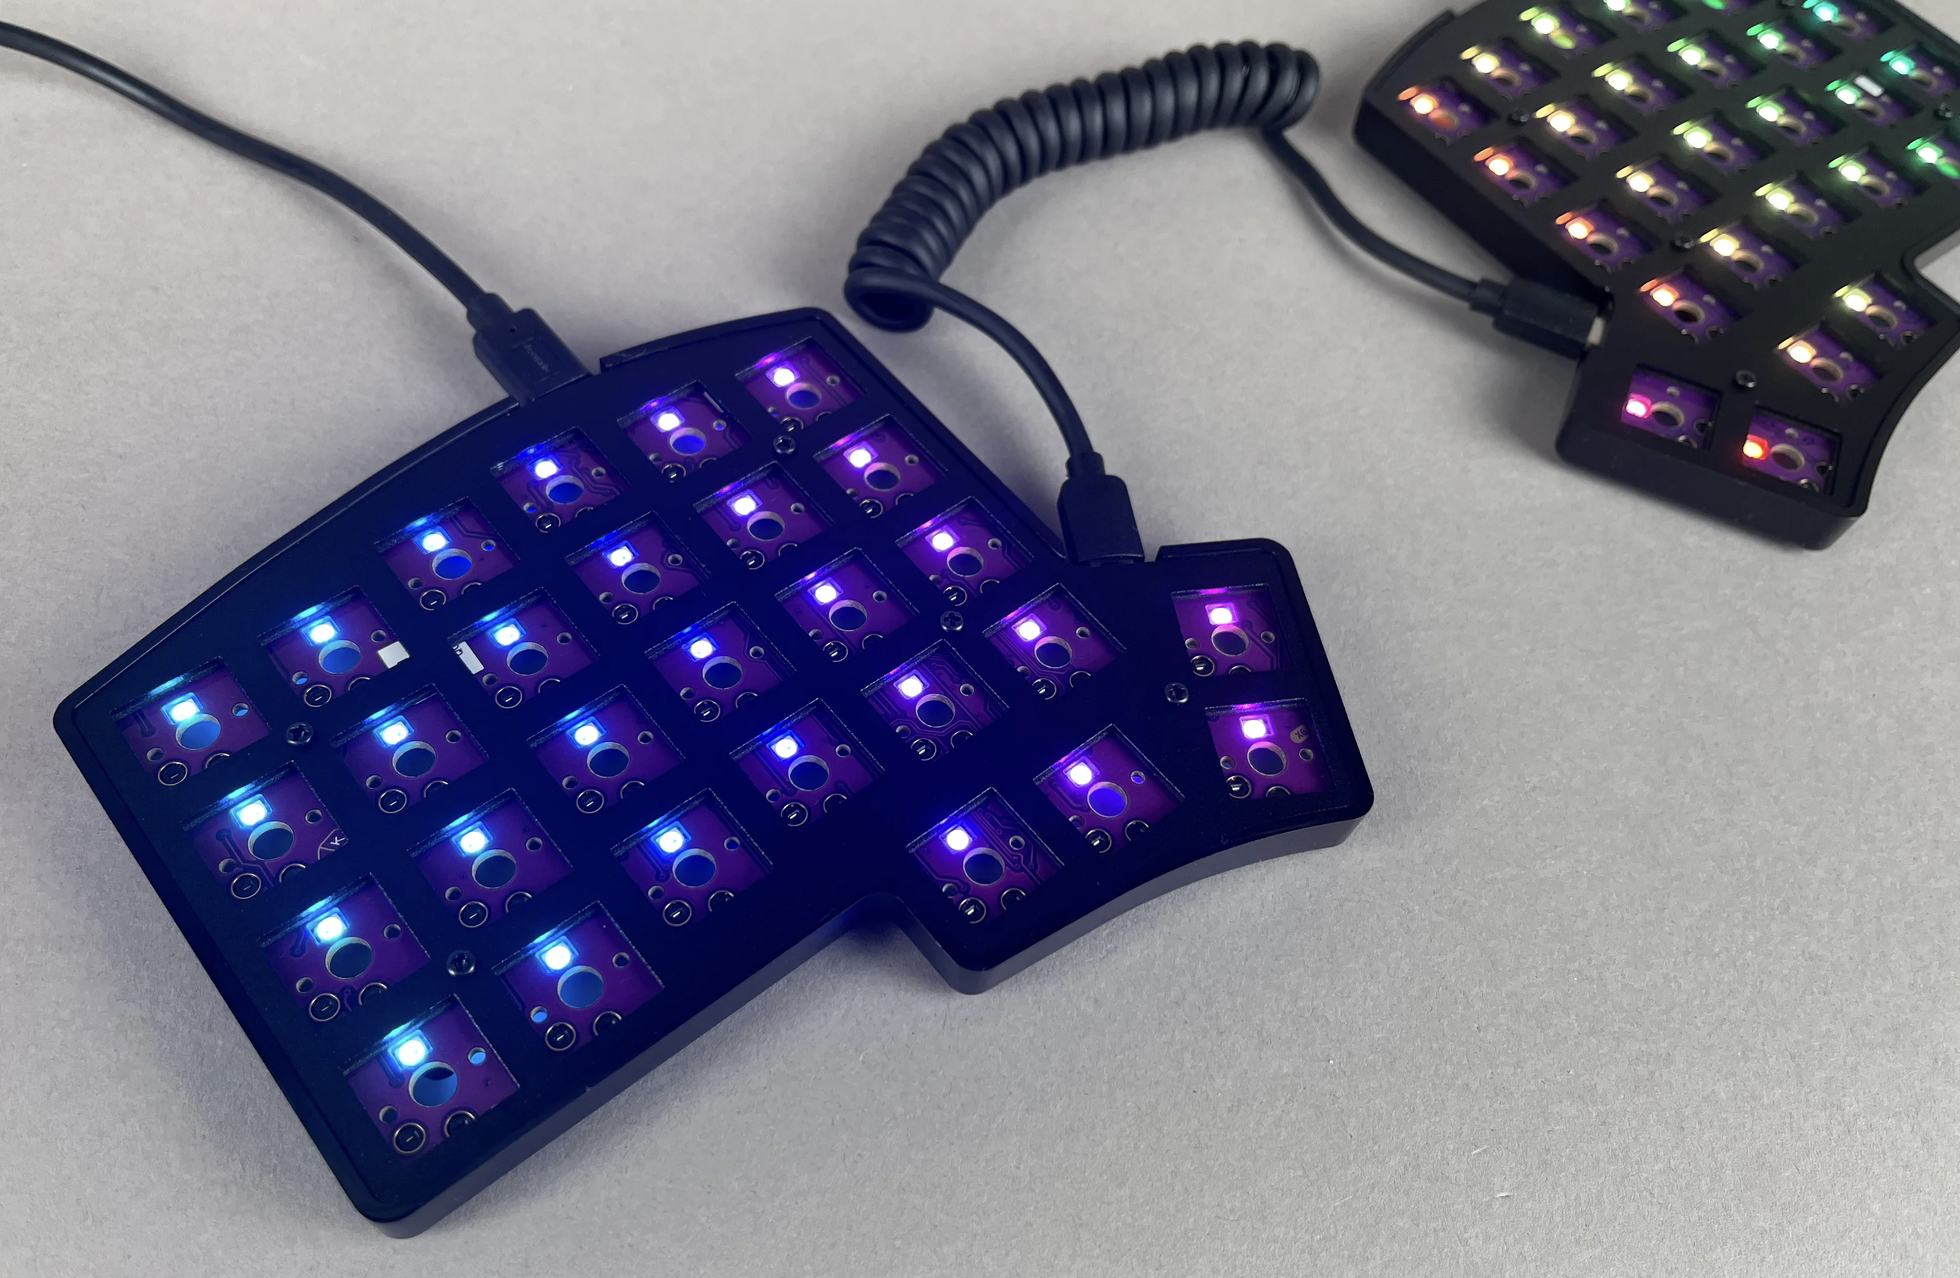
Depending on how ergonomic you want to get, we've got various options for you. We tend to divide our categories into traditional split keyboards, which you're likely familiar with, and ergonomic split keyboards. This second category is usually where folks go a little deeper to understand their personal wrist needs. If you're not sure where to start, we have a great quiz to help you out with that.
Split Staggered
If you are just treading into the waters of split keyboards and want something that's similar to your current keyboard, a split version of a traditional staggered board is probably for you. For that, we've got the Quefrency, its low-profile version the Quefrency LM, Sinc, and its low-profile version, the Sinc LM.
Quefrency
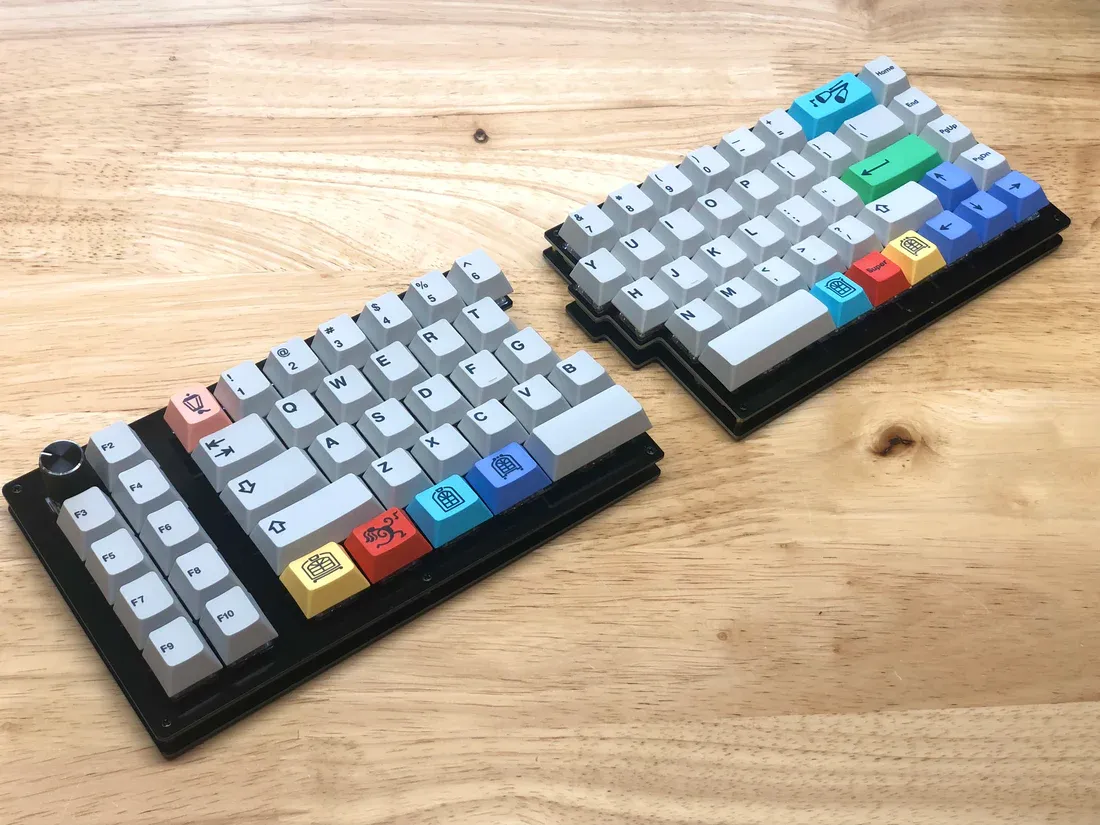
One of our most popular boards is the Quefrency, which is a 65% keyboard, with an additional 2x5 macro section on the left half of the board. That extra set of keys grants it the 65XT layout name. This can be a great keyboard to get started on your split journey, as this feels like a lot of standard keyboards, just split in half.
You can also get the Quefrency without that macro section if you want things to be more compact! One thing that makes this model different from its low-profile brother, the Quefrency LM, is the rotary encoder option on both halves. Rotary encoders give you stepped control over things like volume, page up/down, zooming, etc. Just keep in mind if you want the rotary encoder on the left side, the macro section needs to be there! The way switches versus encoders attach to a PCB are different.
Just like our other split friends, this one is compatible with our Magnetic Tenting Stand kit, to give your wrists more options for comfort. With the Rev. 6, you've got hotswaps which make builds fast and easy, and changing out your switches anytime you want a task you can easily tackle while listening to a podcast of your choice.
Quefrency LM
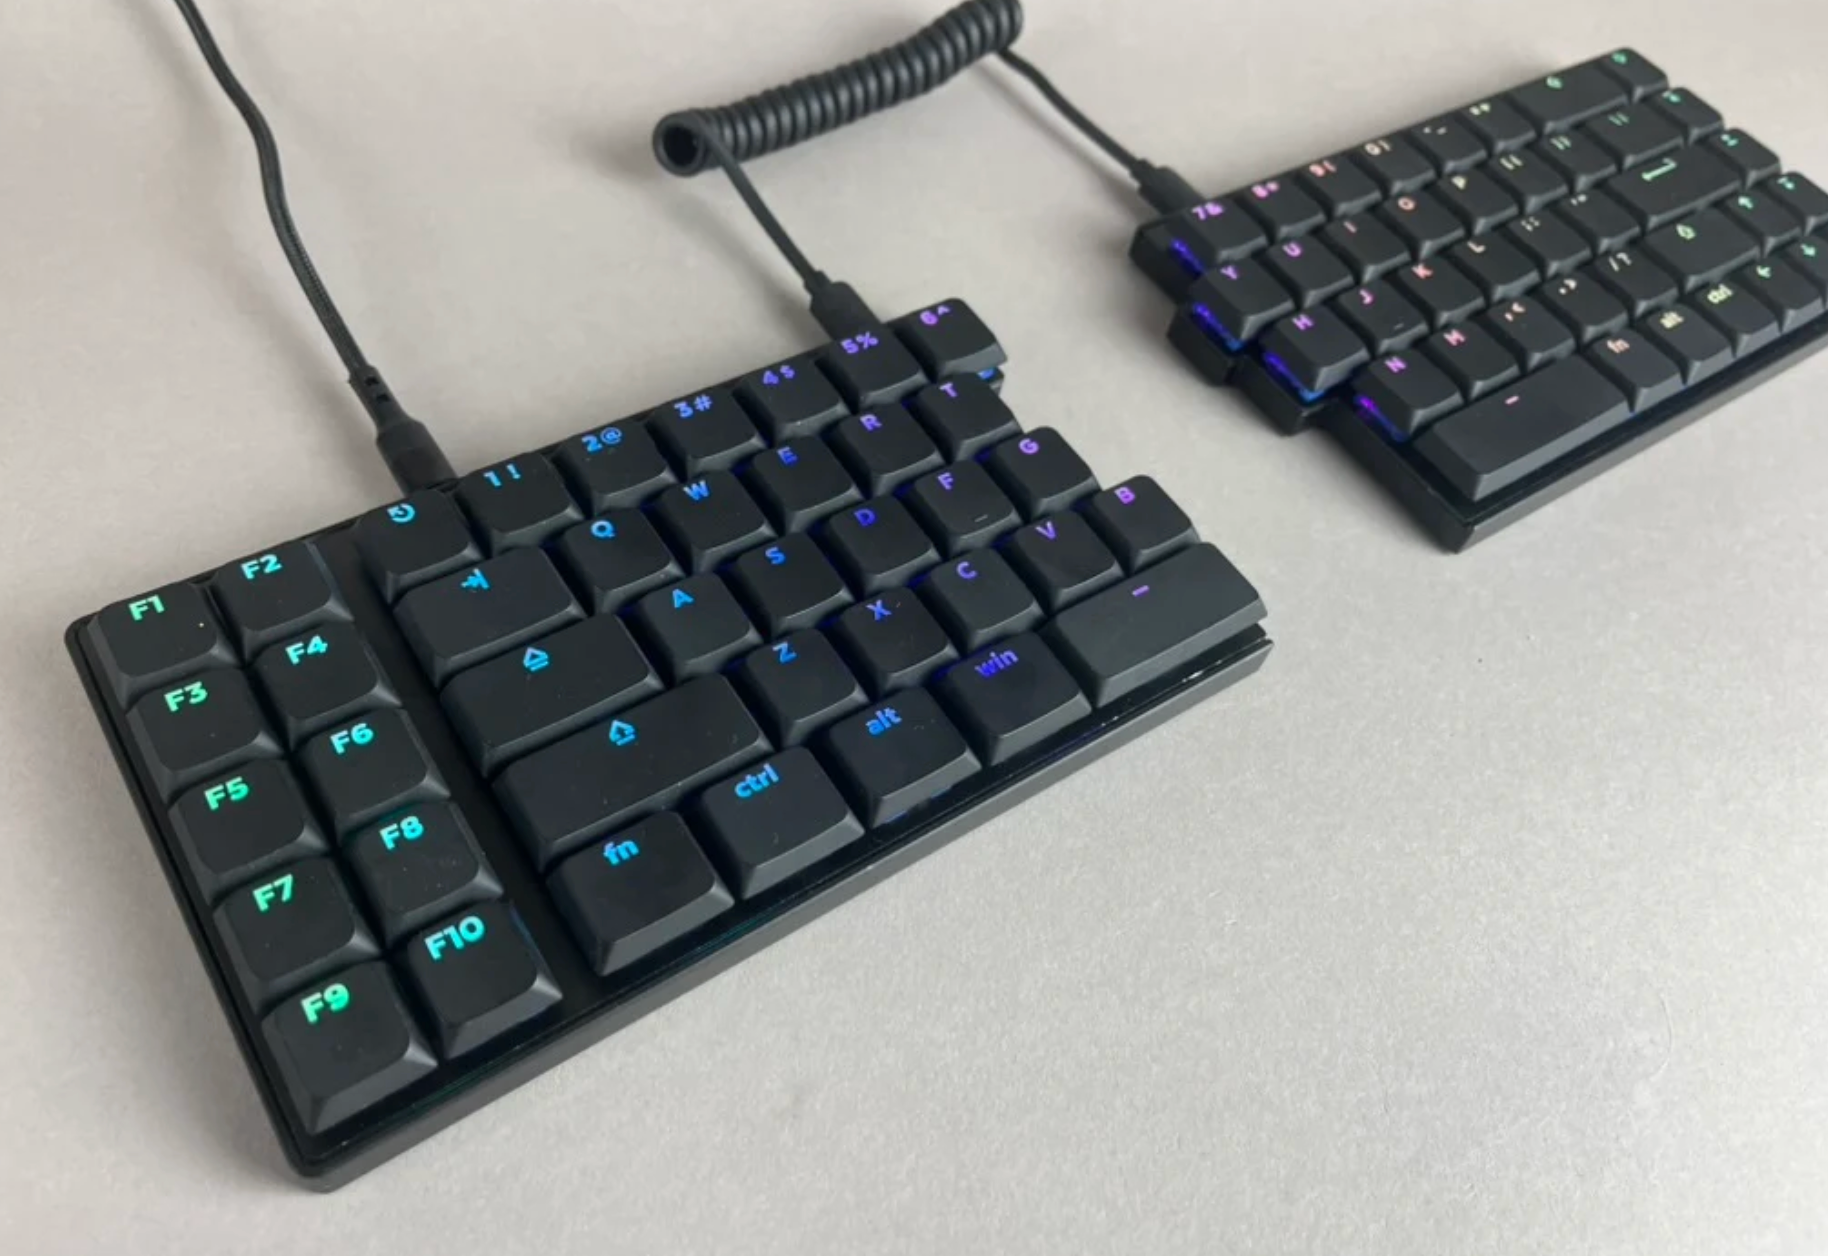
An even more wrist-friendly traditional stagger that's shed its function row to leave a streamlined keyboard: the Quefrency LM!
This keyboard is loved populated with the Deep Sea Mini Whale silent tactile switches. You don't have to lose any WPM speed in order to get comfortable ergonomics with a familiar keyboard.
Sinc
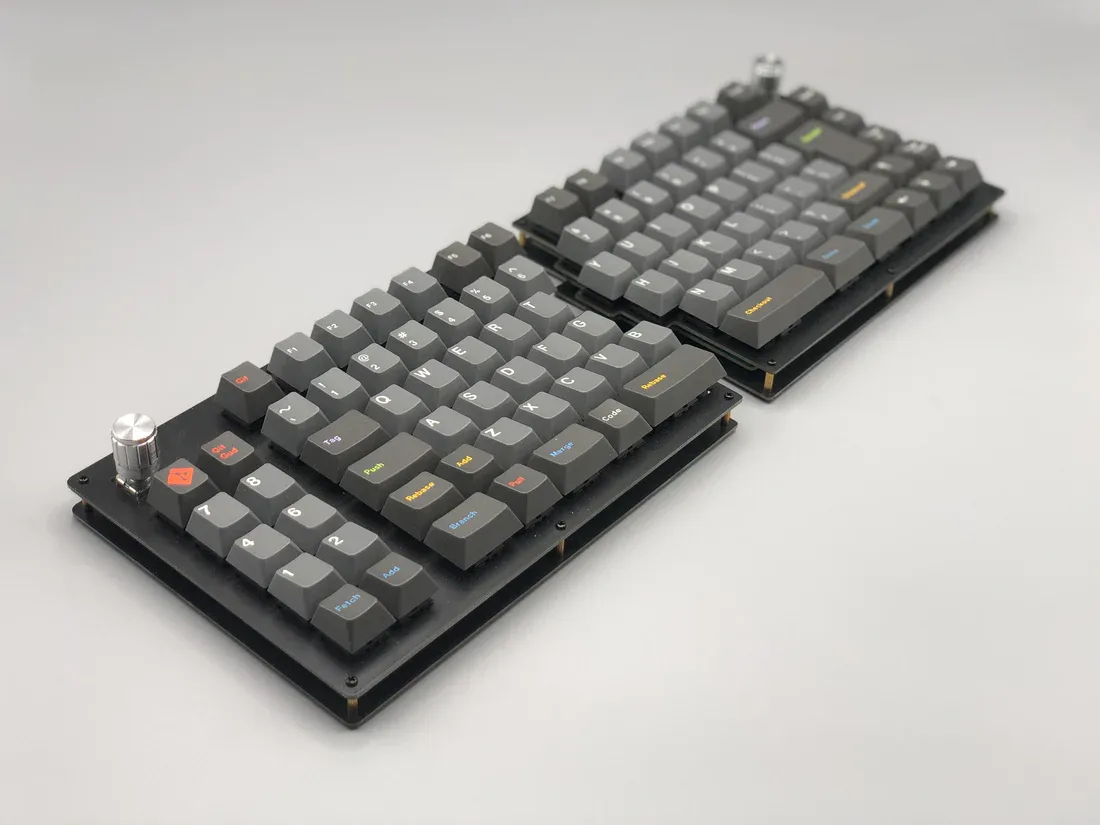
For an even more familiar setup, the Sinc is our 75% (or TKL, tenkeyless) board. This split is also compatible with our Magnetic Tenting Stand kit, even with its generous amount of keys.
For a 75% keyboard that retains the Function keys at the top of the keyboard, you'll want a Sinc. Just like the Quefrency, it has the option for the macro section to the left and rotary encoders. Same encoder situation as the Quefrency.
Sinc LM
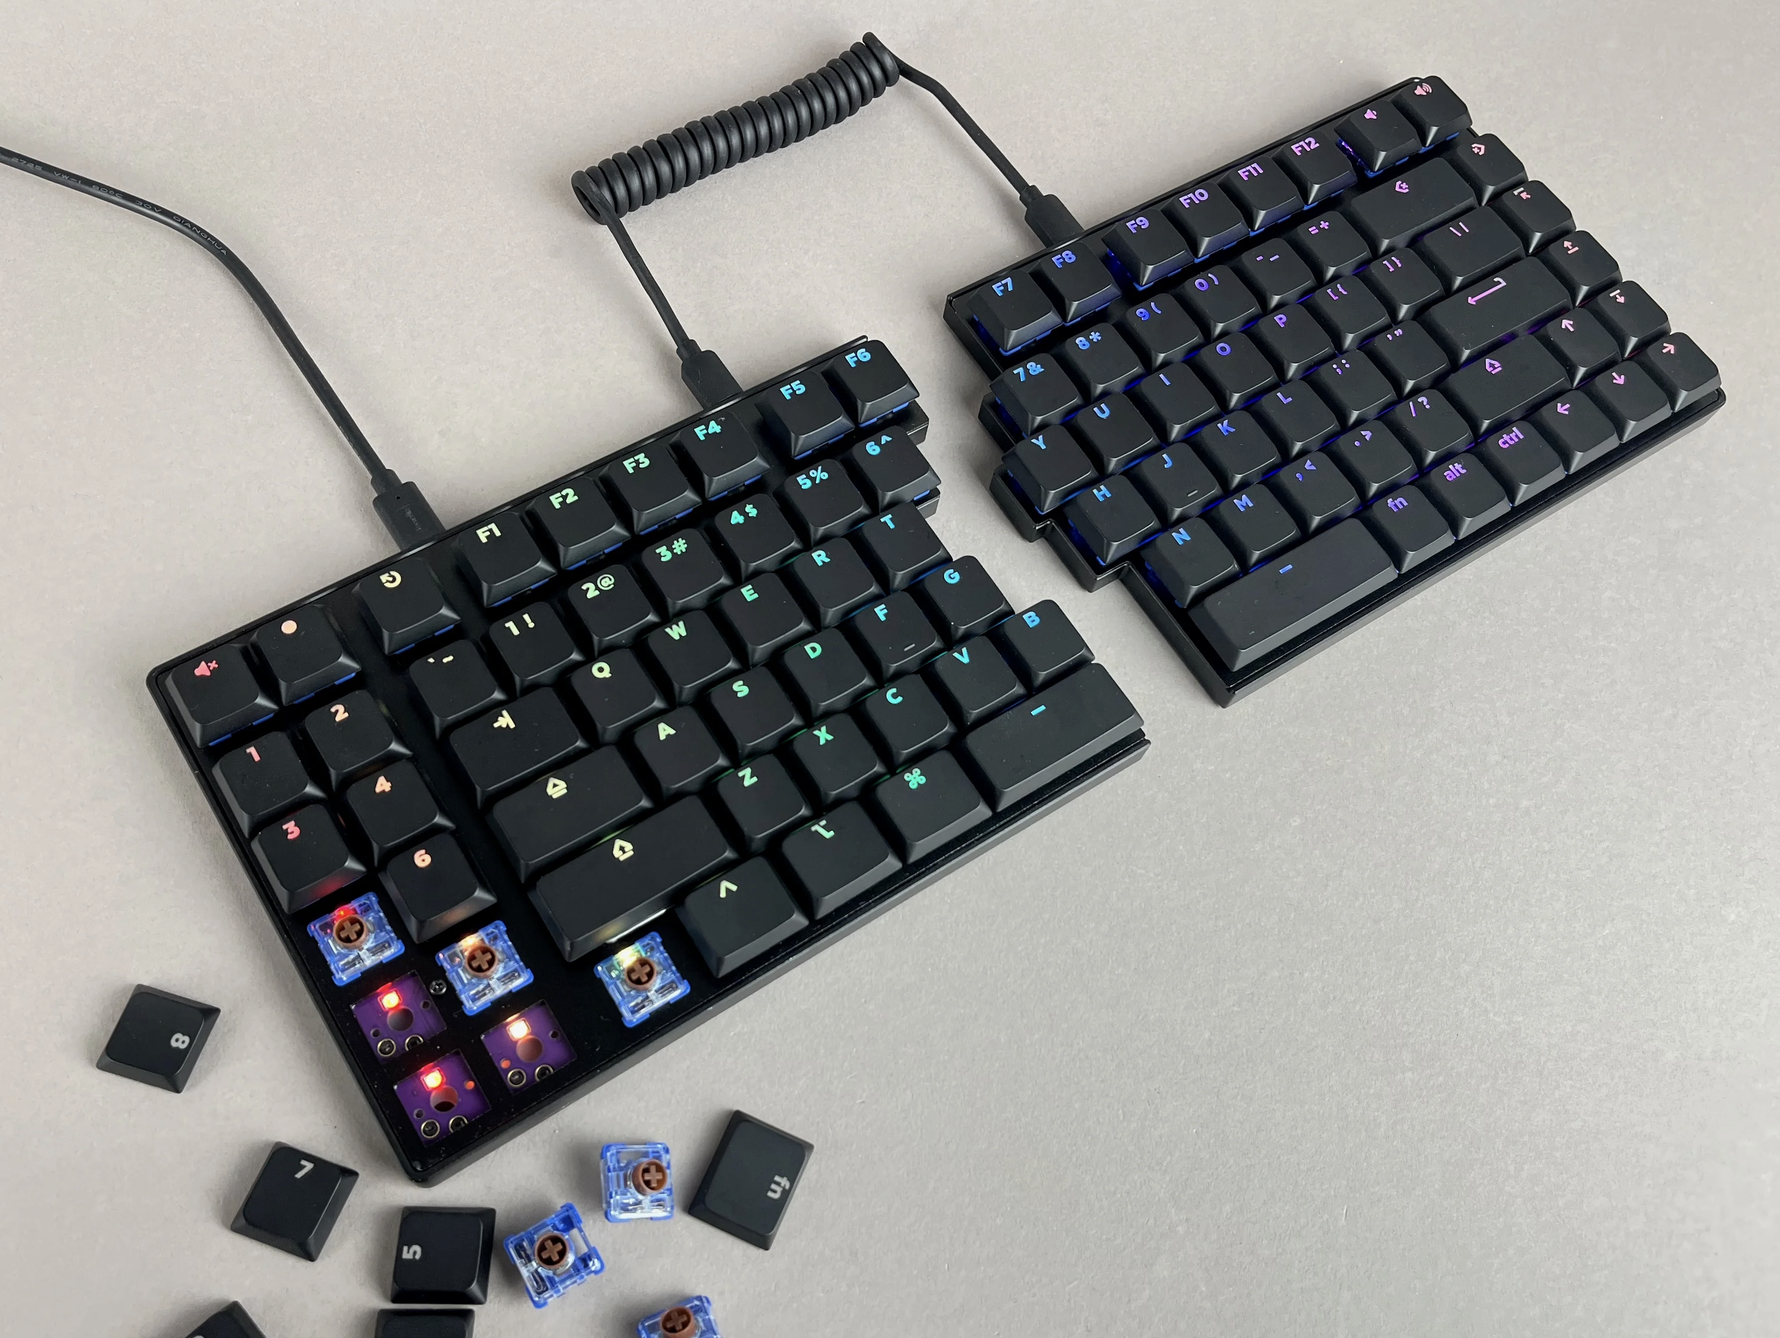
You don't have to learn a new layout to open up better wrist position options with the Sinc LM. Like all of our boards, this friend is compatible with our magnetic tenting stand kit to give your wrists even more options than a unibody keyboard could give you.
Column Staggered/Ergo/Ortholinear
If you want to expand what is possible in keyboards a bit more than the staggered boards, we've got these boards:
- Iris SE or its two low-profile versions, the Iris CE and the Iris LM, (Column Staggered)
- Nyquist (5x6 Ortholinear), or its low-profile version, the Nyquist LM
- FoldKB (Ortholinear)
Due to the different arrangement of keys, it'll take about 2-3 weeks for you to get used to the layout, but in the end, our users of the board have said that using them has improved their issues such as RSI or carpel tunnel syndrome. Also, you'll still be able to type normally on a regular keyboard whenever you need to, so no fear!
Iris SE
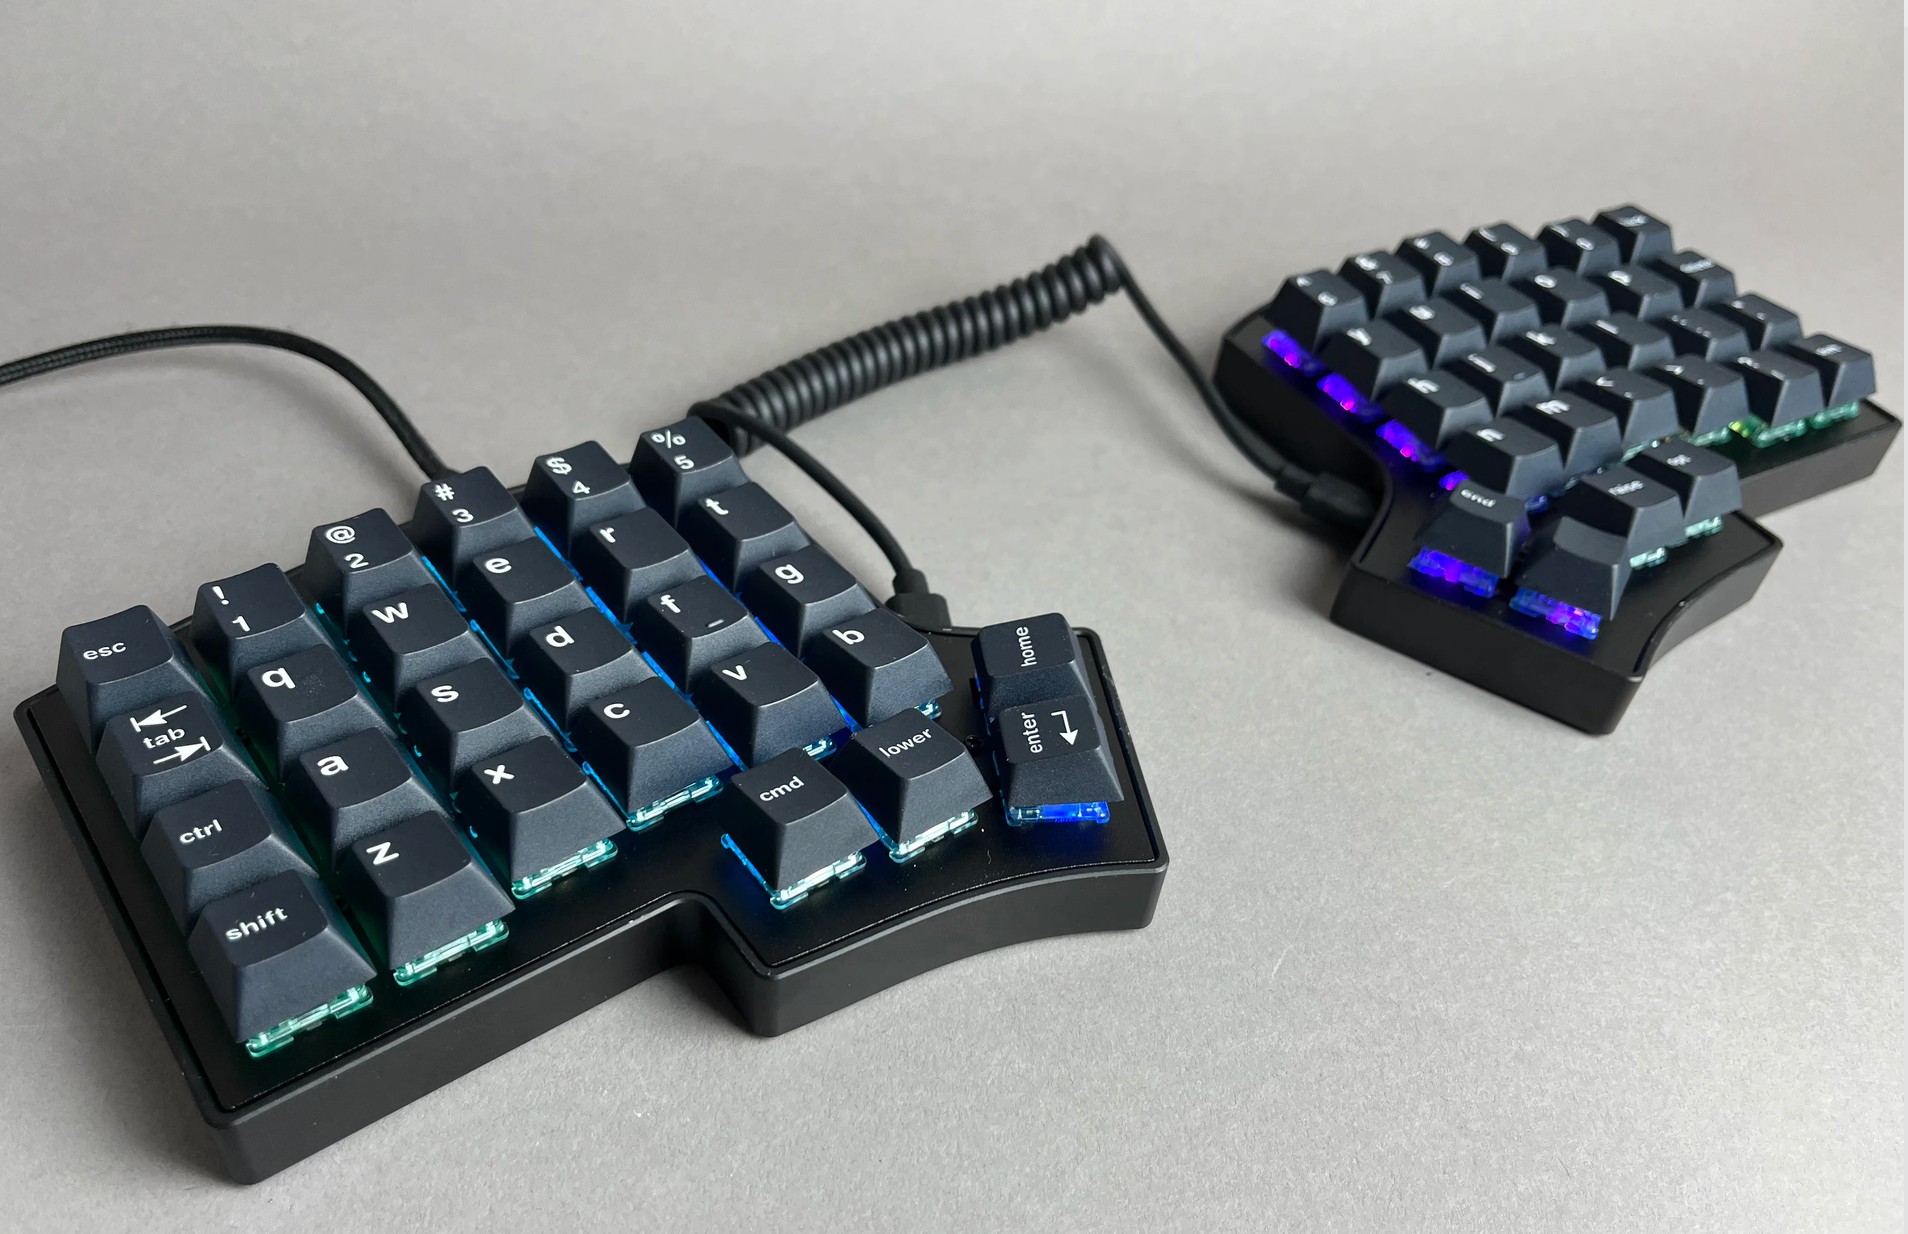
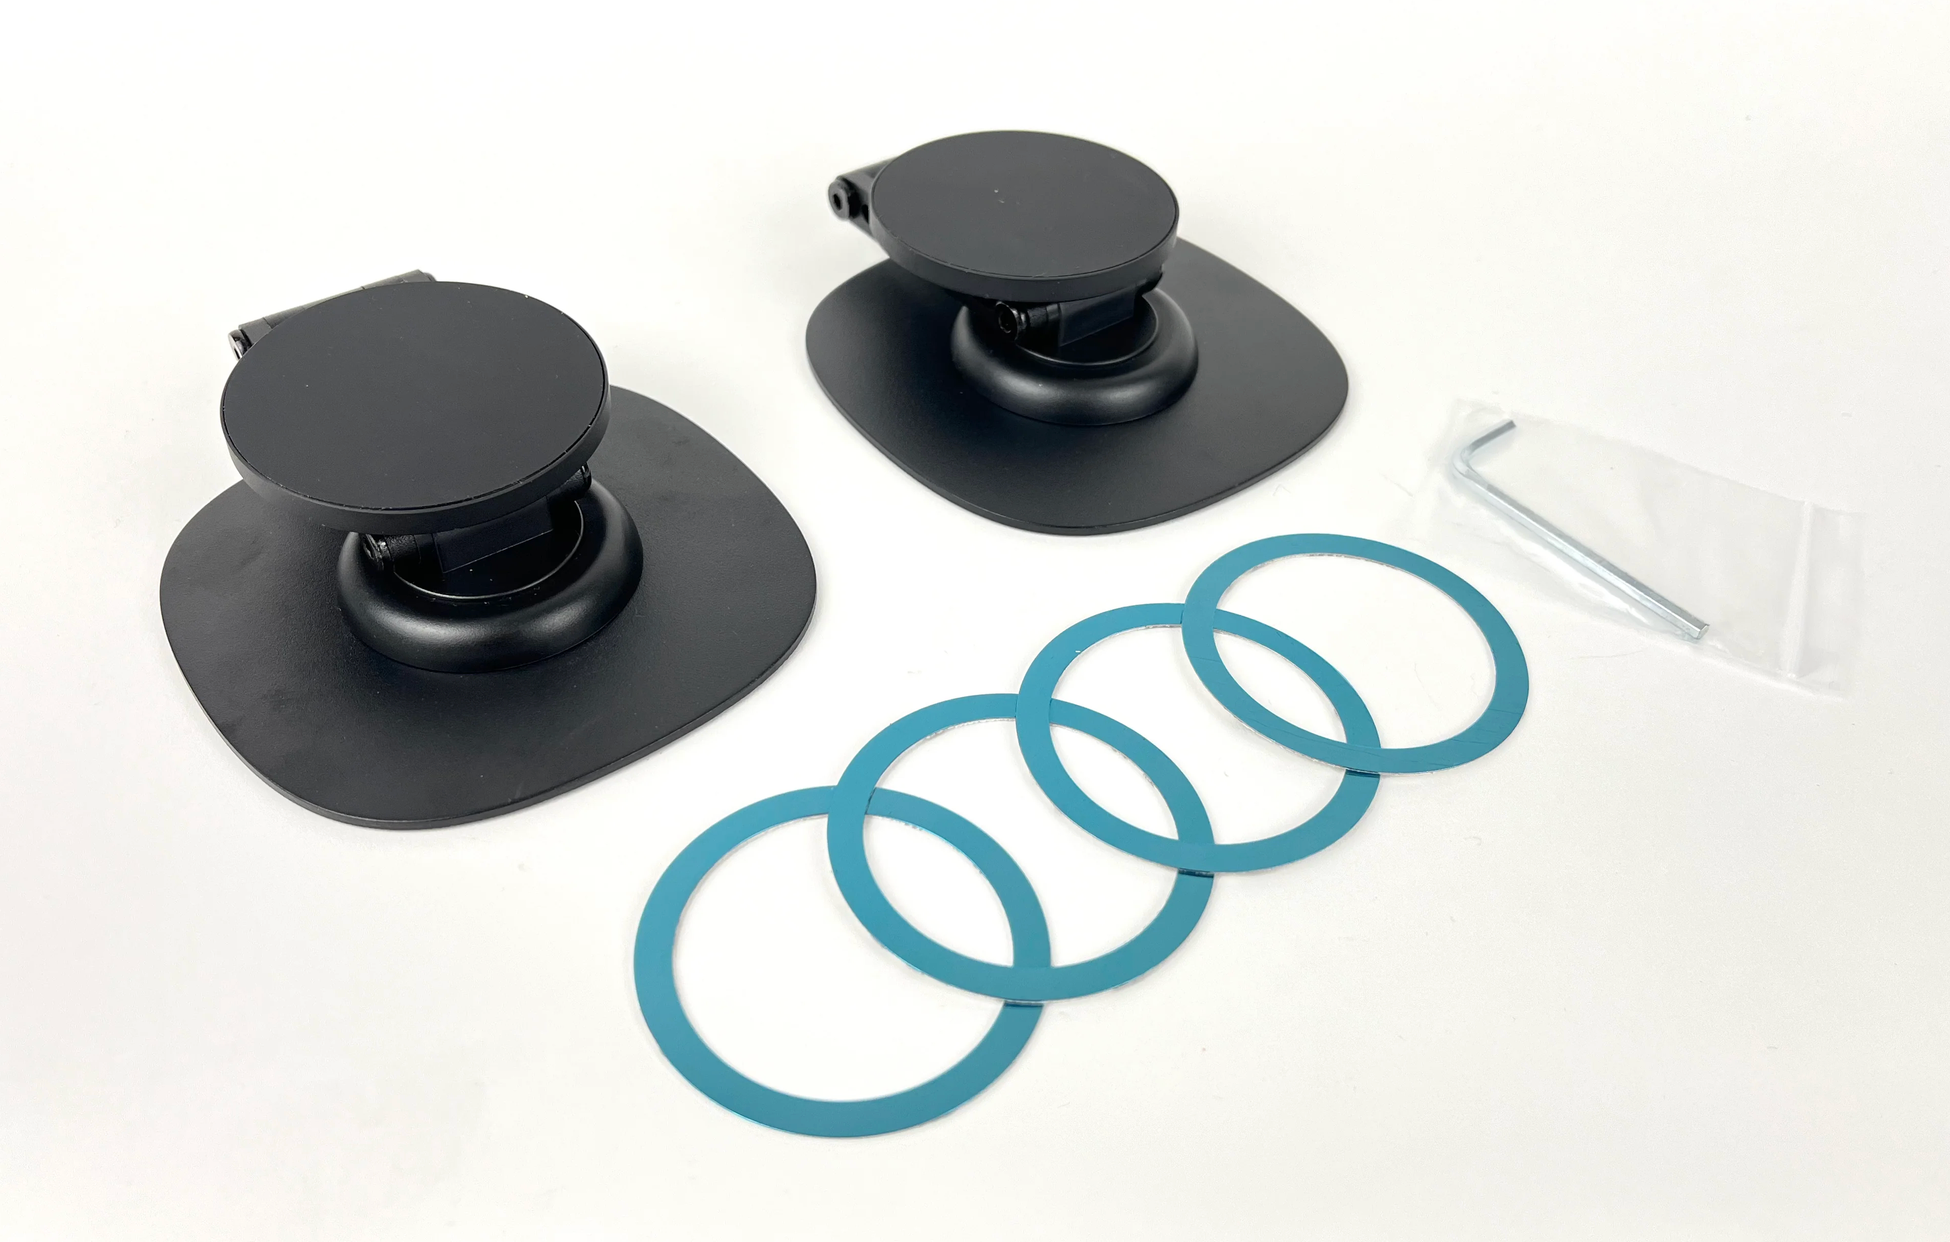
The Iris SE is our most popular keyboard, as it's got vertically staggered keys as well as thumb keys. Tenting your Iris SE (or any of our splits) is a snap with the Magnetic Tenting Kit. Slap on a magnet on the back of each half and boom! Begin tenting.
The Iris not only allows you to have your hands rest in alignment with your shoulders, but also offers a more neutral position if you tent it in one way or another. And if you're looking to take the strain out of typing in another way, you can reduce the amount of pressing your fingers are doing by going low-profile. With the Iris, you have two low-profile options.
Iris CE
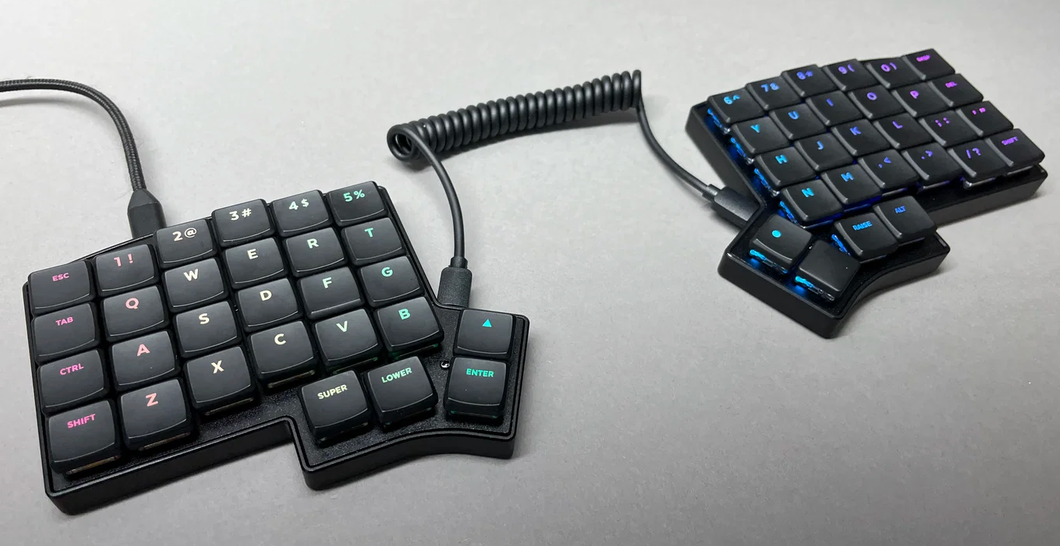
The Iris CE is designed with tighter spacing between the Kailh Choc V1 switches that are compatible with the board. This is a worthwhile option to consider for those with small hands, in need of a light touch for their typing, or want to reduce the amount of movement in their typing.
Iris LM
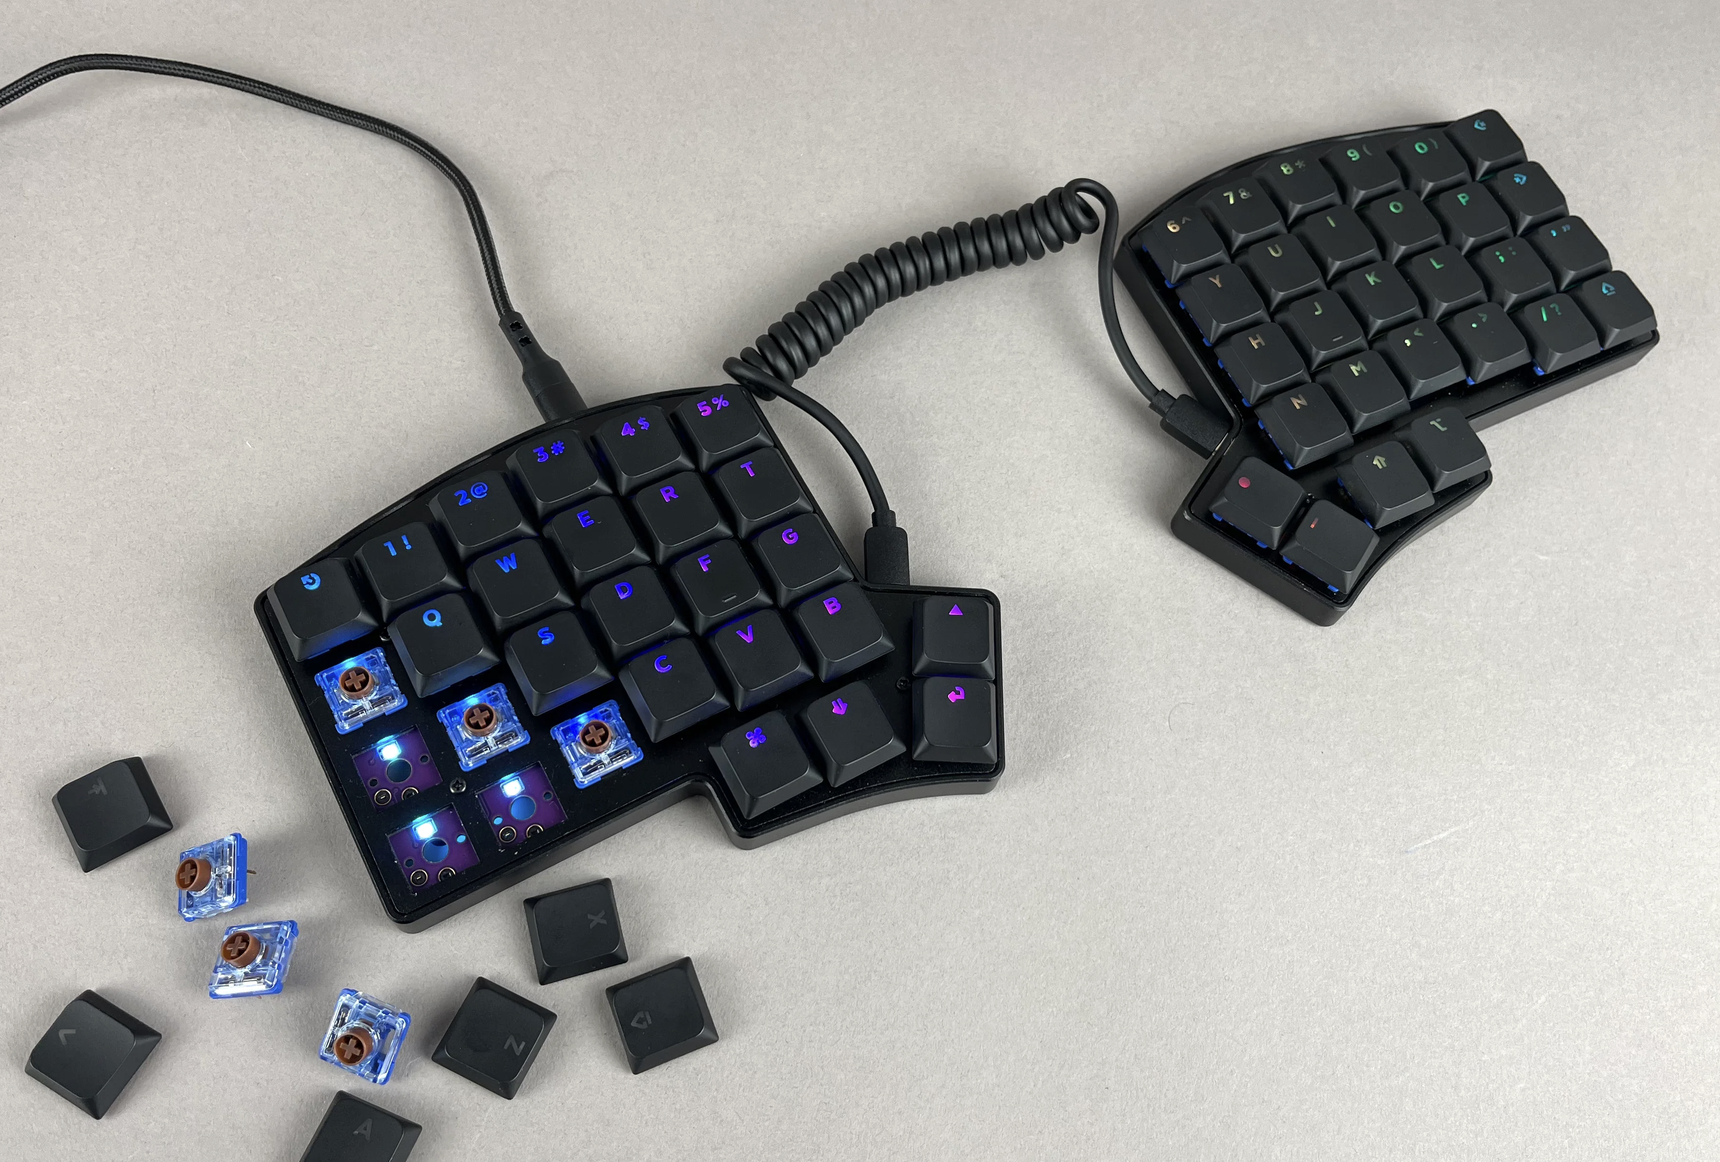
This low-profile Iris is the Iris LM: its low-profile is combined with MX-spacing. Meaning you get that nice, low-effort minimal press with the spacing you're familiar with from any standard keyboard.
The Iris LM is designed for the Kailh Choc V2 switches, but will also take the Kailh Choc V1 switches and the Gateron low-profile switches in the Gateron version of its PCB.
While light switches are available for our other boards, our lightest we carry in-house can populate the Iris LM (as well as any others in the LM line!). Those switches are the Deep Sea Mini Pink Islands.
Nyquist
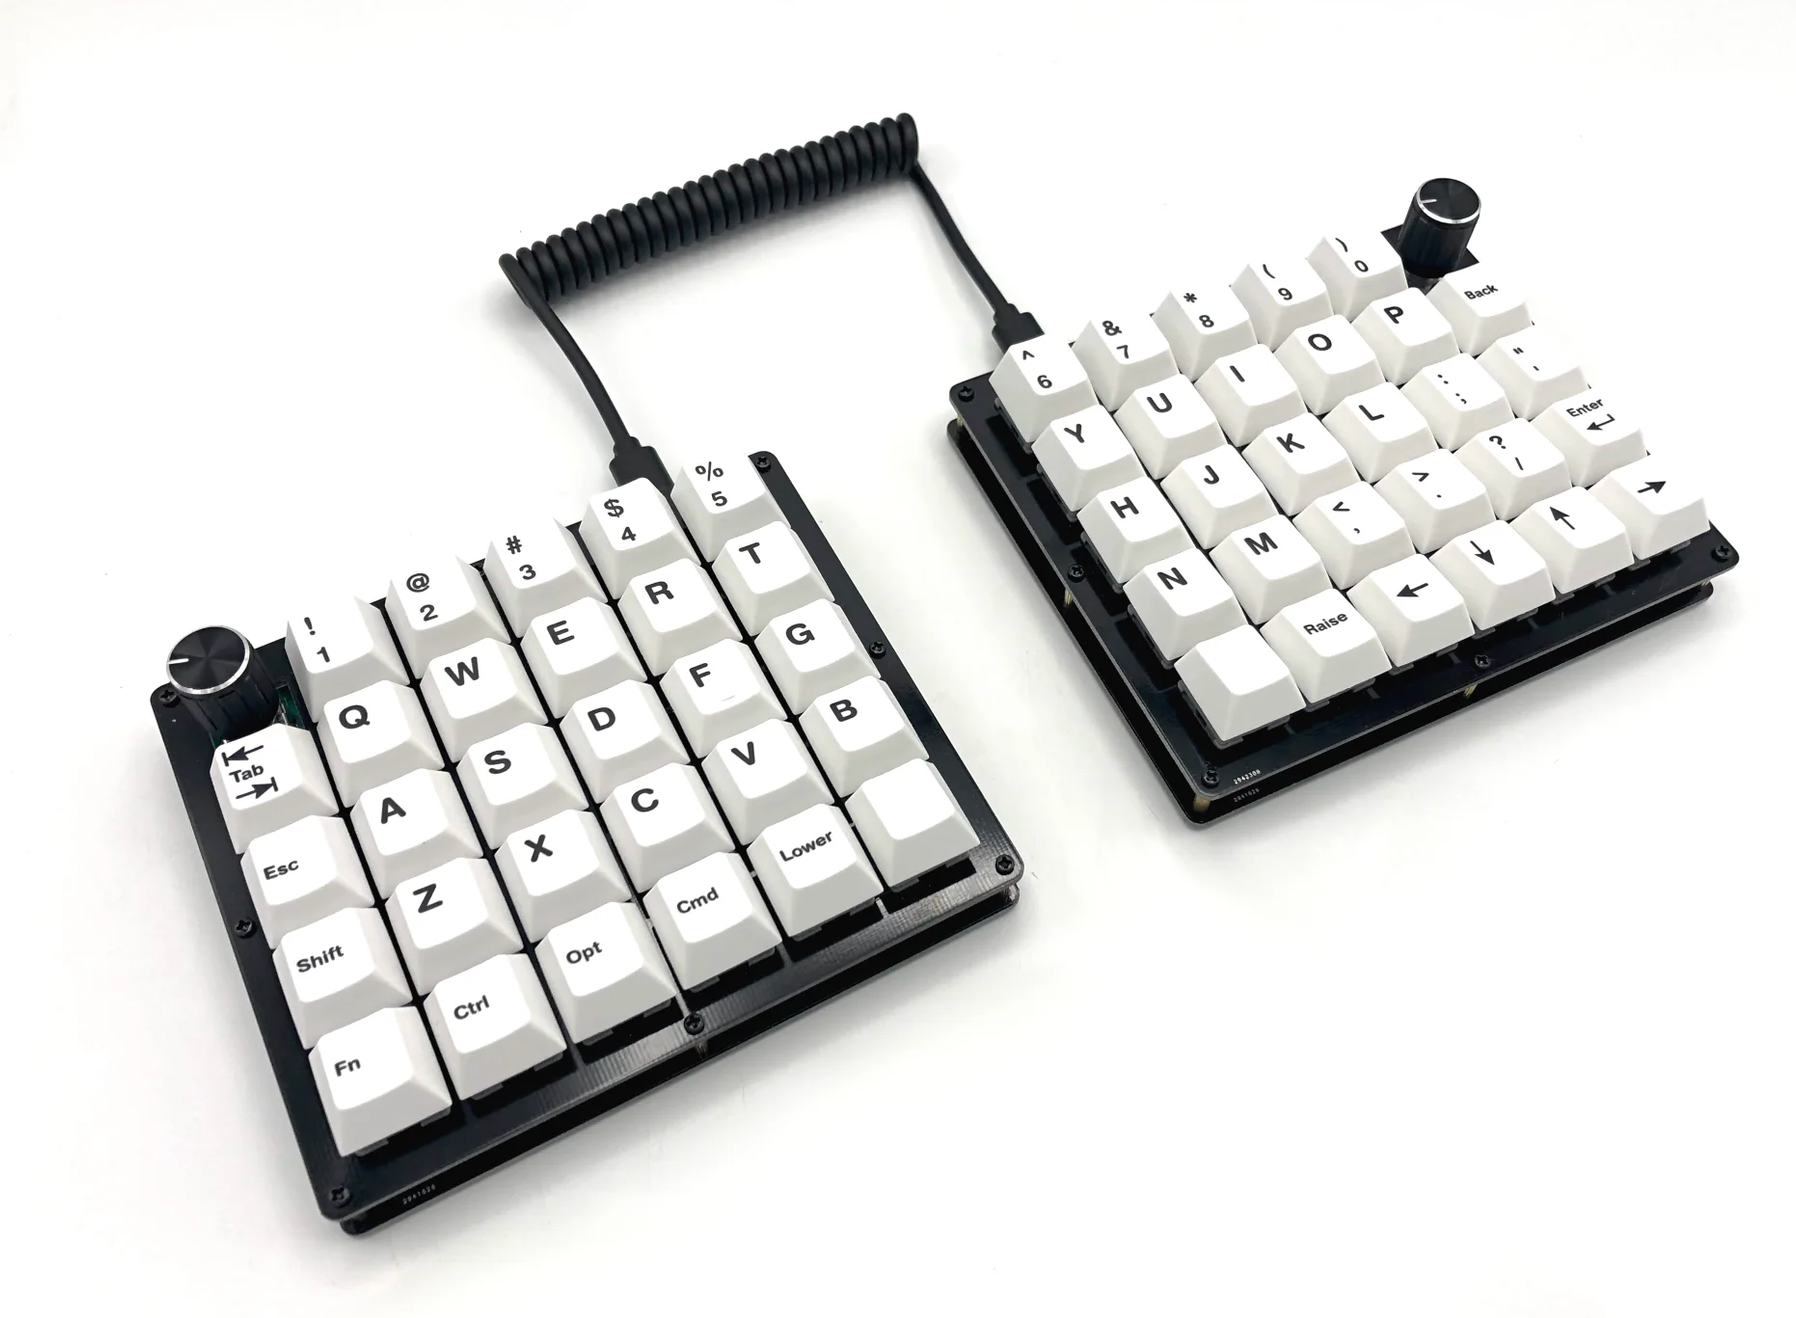
The Nyquist is one of our ortholinear boards, with a space-saving form factor in two 5x6 grids. Or go for the even smaller version, with two 4x6 grids, which we call the Levinson.
Why grids, you ask? Natural movement. While our fingers can move from side to side, it may be less taxing on your hands to limit that kind of movement, and focus on the bending-forward-and-back thing.
An additional bonus: the Nyquist/Levinson is perfect for trying out a new typing layout like Colemak or Dvorak.
Nyquist LM
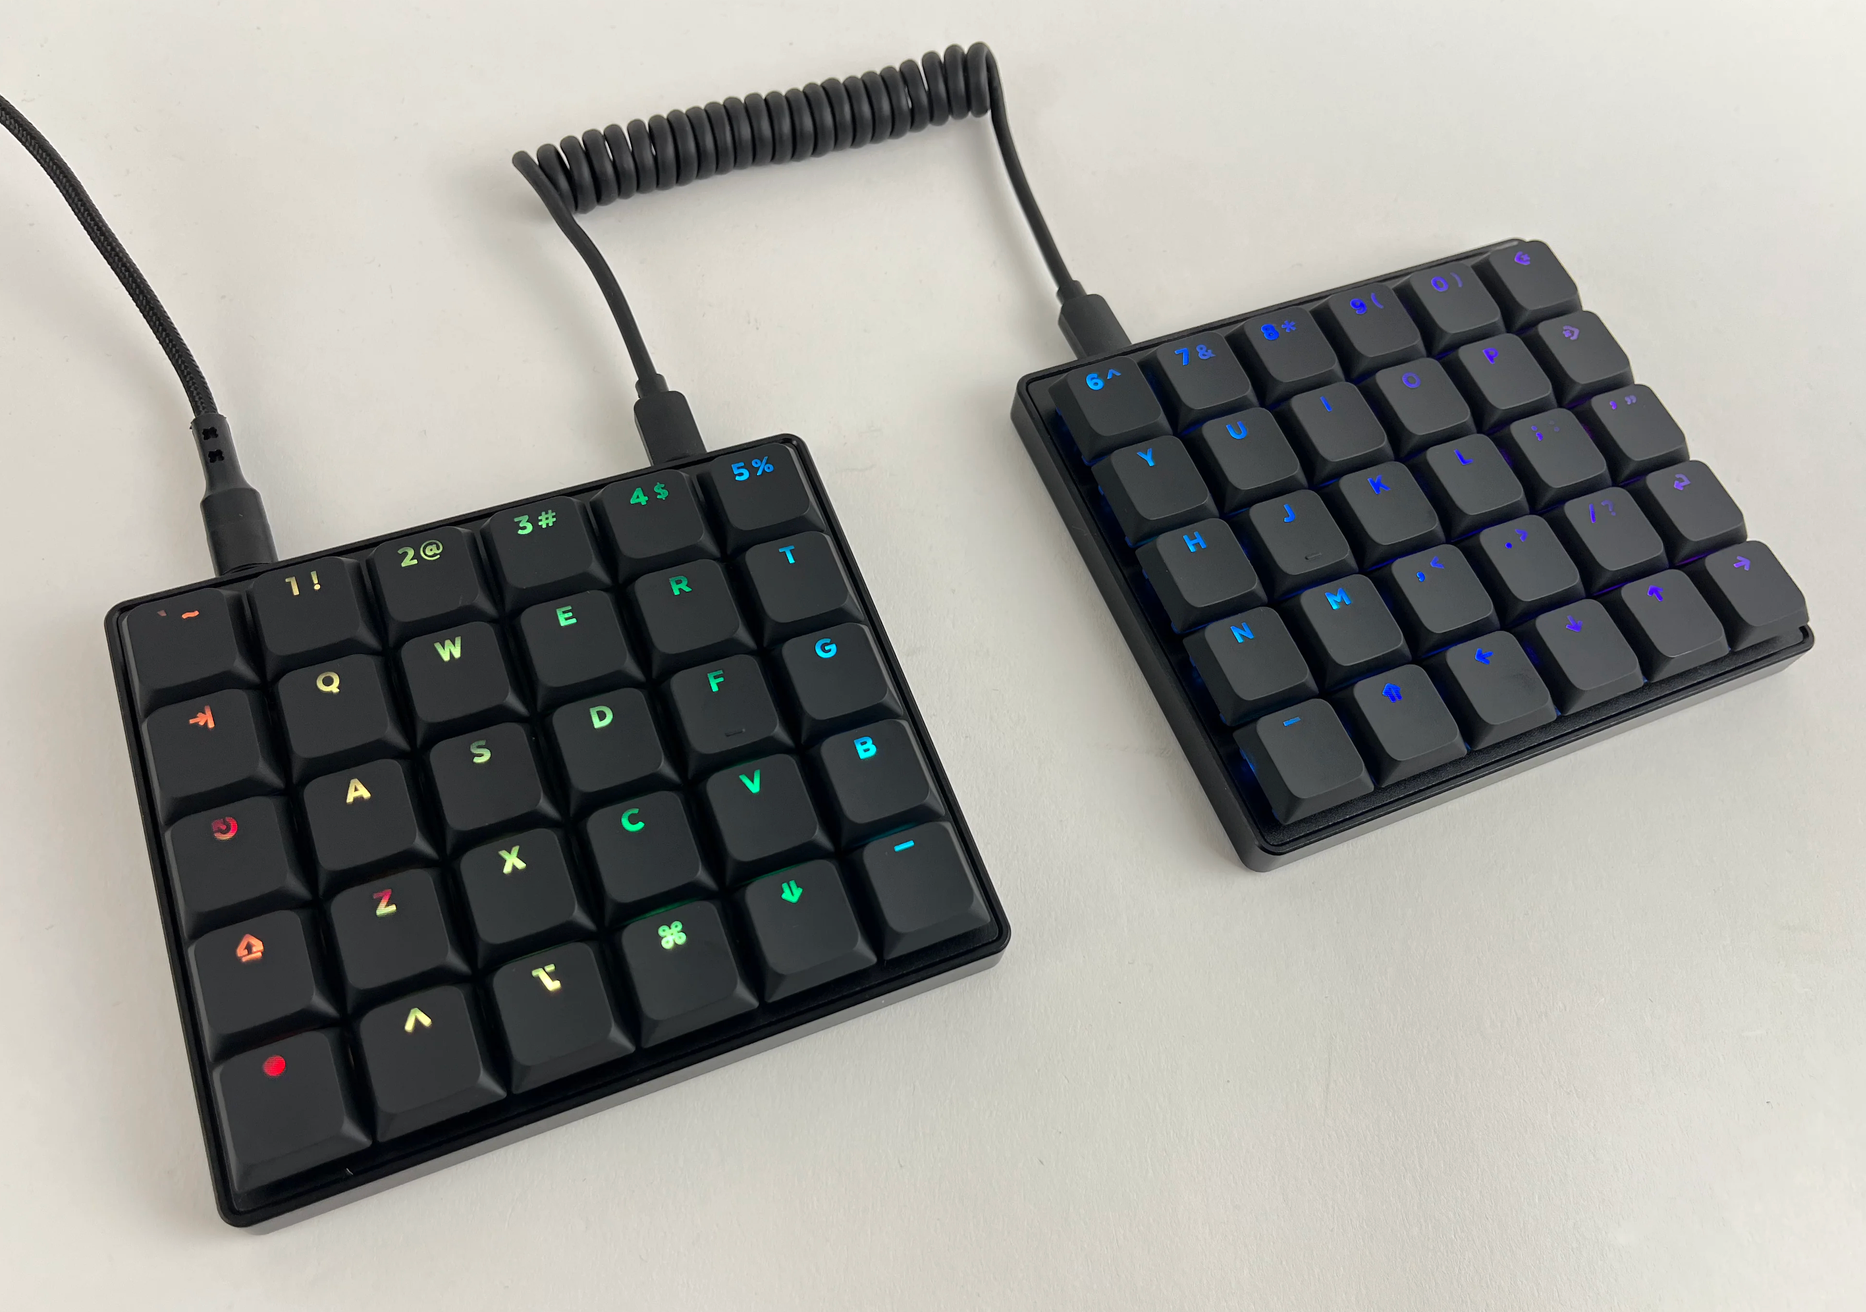
The Nyquist LM is a low-profile version of the Nyquist, while still maintaining that MX spacing that may be more comfortable if you need room to move on your keyboard.
FoldKB
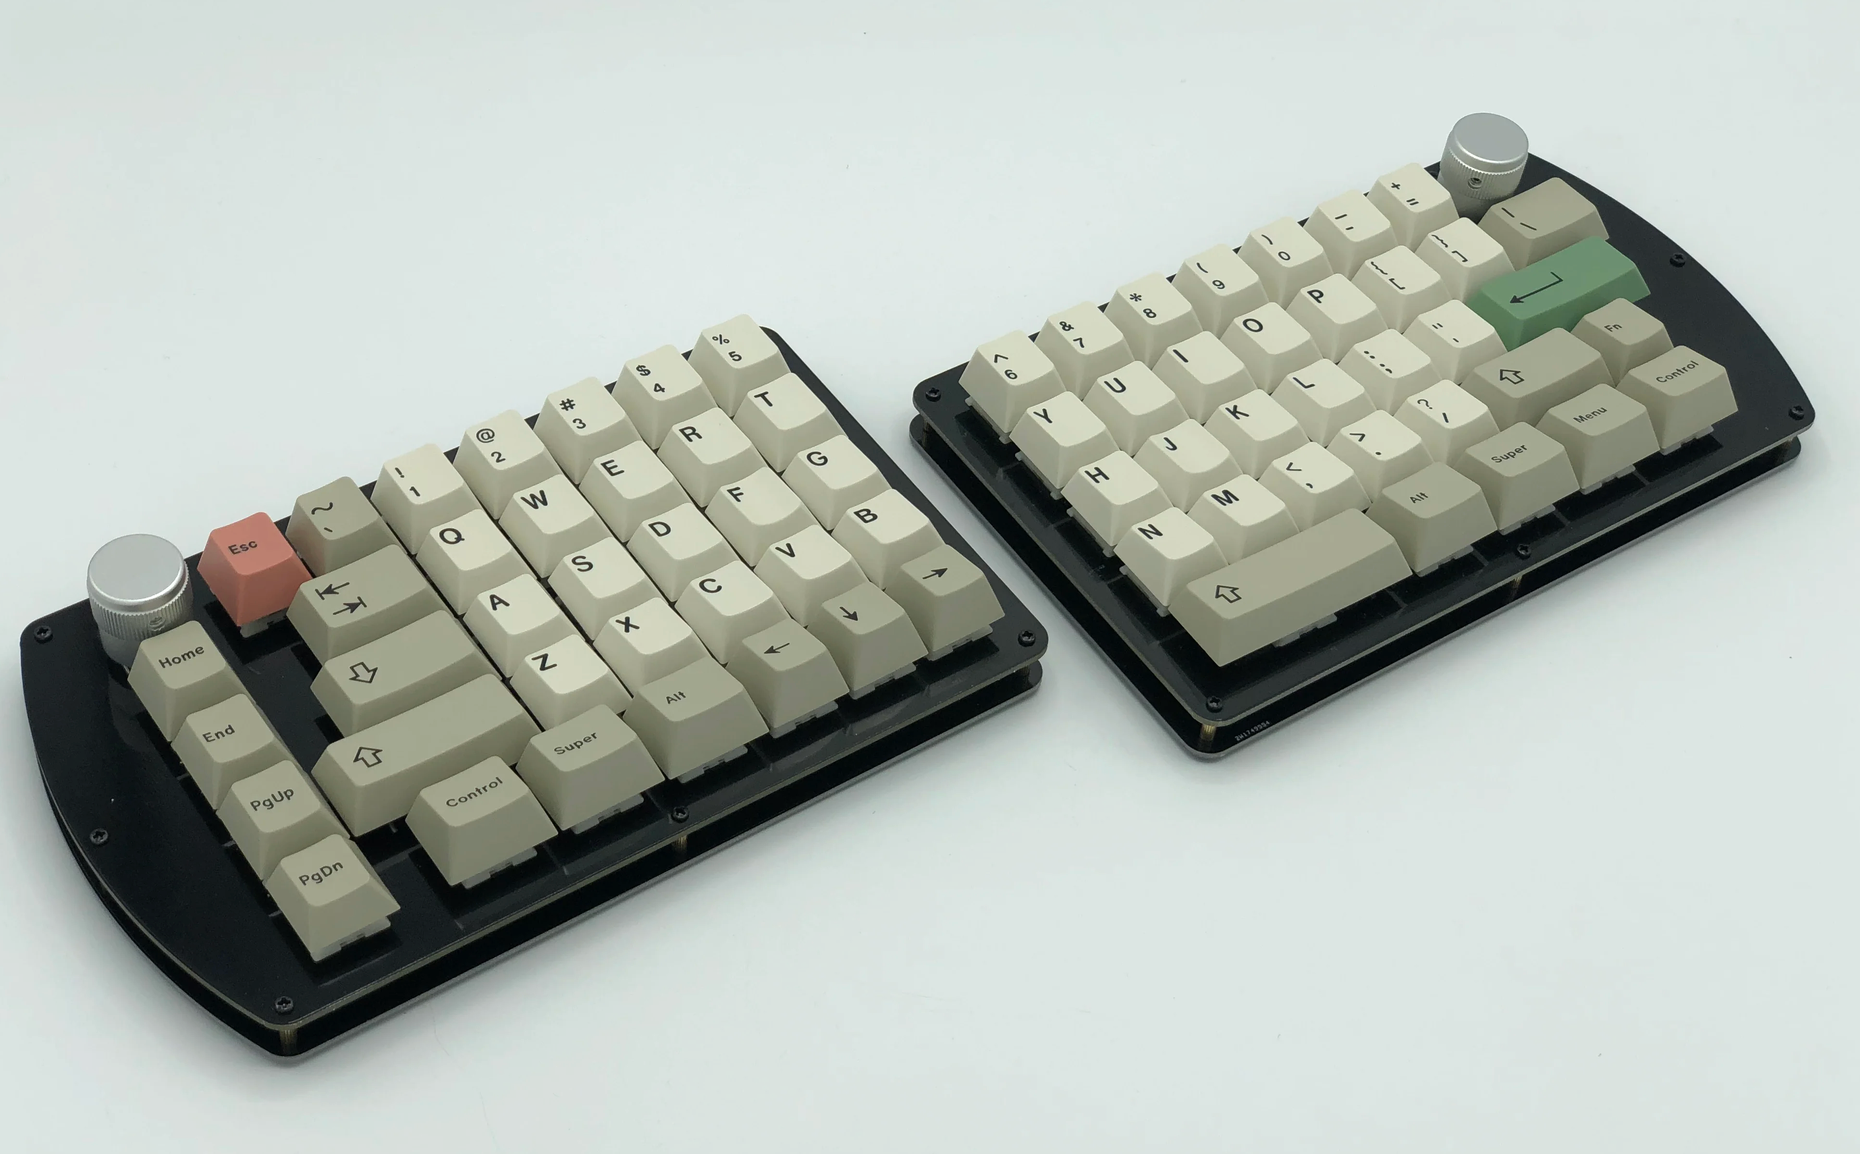
Ortholinear but with a standard keyset?! That's exactly what the FoldKB offers. No hunting down the precise keyset with the FoldKB. You can pick out something designed for a a non-ortholinear board and still enjoy the grid life.


Member discussion